By mamagourmand.com
Easy 4th of July Brownies
8 steps
Prep:30minCook:35min
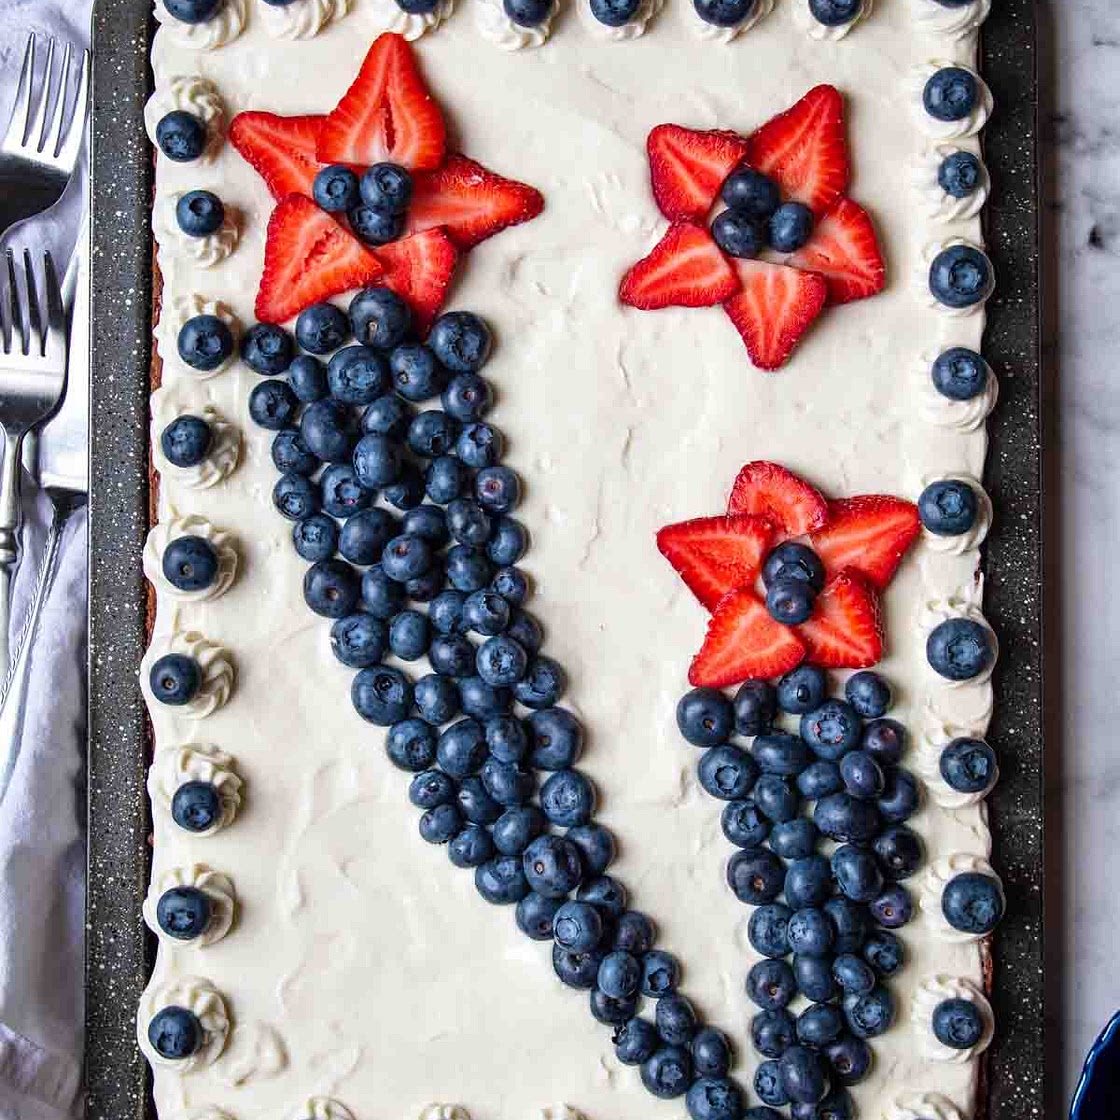
Looking for a patriotic red, white, and blue, show-stopping dessert recipe for the 4th of July? These easy Fourth of July Brownies taste amazing, look spectacular, but are completely manageable to pull off. No baking extraordinaire experience required!
Updated at: Sun, 22 Feb 2026 08:36:26 GMT
Nutrition balance score
Uh-oh! We're unable to calculate nutrition for this recipe because some ingredients aren't recognized.
Ingredients
20 servings
Instructions
Step 1
Preheat oven to 325ºF. Make the Easy Homemade Brownie recipe according to directions or alternatively prepare a store bought brownie mix that yields enough for a 9X13 pan. Pour into a greased 15 X 11 inch jelly roll pan. Bake for 33-37 minutes, or until a toothpick inserted in middle comes out clean. Cool brownies completely.
Step 2
In a small bowl beat together cream cheese, powdered sugar, and vanilla extract until smooth. Set aside.
Step 3
If using heavy cream, pour into a separate clean, large bowl. Beat on high until it holds shape and peaks form, about 3-4 minutes. Fold the whipped cream (or Cool Whip) into cream cheese mixture until no streaks remain.
Step 4
Set aside ¾ cup frosting if you wish to pipe a decorative edge. Dollop the remaining cream cheese frosting all over cooled brownies and then gently spread. TIP: Evenly dispersing dollops all over first will avoid spreading frosting around too much and pulling up brownie crumbs into frosting.
How to Decorate 4th of July Brownies:
Step 5
Cut the tops off the strawberries and then slice lengthwise. Use 5 best slices for each of strawberry "stars." Refer to recipe image for placement. TIP: Arrange the stars on brownies first before arranging blueberries. Place 1-2 blueberries in middle of strawberry "stars."
Step 6
Use the remaining blueberries to arch "tails" from strawberry "stars," ending in one corner point. For best results, start at the "star" and line the the outline of the "tails" first, and then fill in with the rest of the blueberries. TIP: Only have blueberry “tails” coming from first and last “star.” Leave the middle “star” as is.
Step 7
If decorating the edge, put remaining frosting in decorating bottle or piping bag. Pipe small swirls placed about 1 ½" apart around edge. Place a blueberry on top of each swirl. Refrigerate leftovers.
Step 8
DID YOU MAKE THIS RECIPE?? DON'T FORGET TO LEAVE FEEDBACK AND/OR CLICK A STAR RATING ON THE RECIPE CARD!
View on mamagourmand.com
↑Support creators by visiting their site 😊
Notes
0 liked
0 disliked
There are no notes yet. Be the first to share your experience!
