1/2

2/2
100%
1
By Fernando O
Tapas de empanada - Pastry discs to make Argentinian Empanadas
11 steps
Prep:20min
Fantastic pastry discs to make Argentinian empanadas. The recipe makes enough dough for 24 medium sized empanadas.
This recipe takes about 20 minutes of work, plus 30 minutes wait (for the dough to cool down and relax in the fridge).
Updated at: Fri, 04 Jul 2025 10:40:03 GMT
Nutrition balance score
Unbalanced
Glycemic Index
75
High
Glycemic Load
37
High
Nutrition per serving
Calories262.8 kcal (13%)
Total Fat3.8 g (5%)
Carbs49.1 g (19%)
Sugars0.2 g (0%)
Protein6.7 g (13%)
Sodium818.1 mg (41%)
Fiber1.7 g (6%)
% Daily Values based on a 2,000 calorie diet
Ingredients
8 servings
Instructions
Step 1

Dissolve the salt in the hot water and make a brine.
Step 2

Soften the beef dripping (or lard) for a few seconds in the microwave and make a paste with a fork. You can also melt it, but don’t let it get too hot…
Step 3

Put the flour on a working surface or silicon pastry matt. Make a hole in the middle of the flour, creating a crown. Add half the brine in the middle of the flour crown (keep the rest in case the dough needs some more liquid.
Step 4

Add the softened beef dripping (or softened pork lard), dissolve with the water, then keep mixing from the inside outwards, slowly incorporating the flour. Add more brine if needed, a little at a time. You should end up with a non-sticky soft dough.
Step 5

Once most of the flour is incorporated, pick up the dough and knead it, binding in any stranded flour left on the table.
Step 6

After kneading for 3 to 6 minutes, you should have a smooth and soft dough. Make a ball, wrap it in cling film and put it in the fridge for at least 30 minutes. This will integrate, cool down and relax the dough.
Step 7

Take out and unwrap the dough. The time in the fridge should have hydrated well the flour and made the dough more homogeneous. Flour the working surface slightly so the dough doesn't stick to it. Slightly flatten the ball with a rolling pin, making a thick disc to make it easier to work with.
Step 8
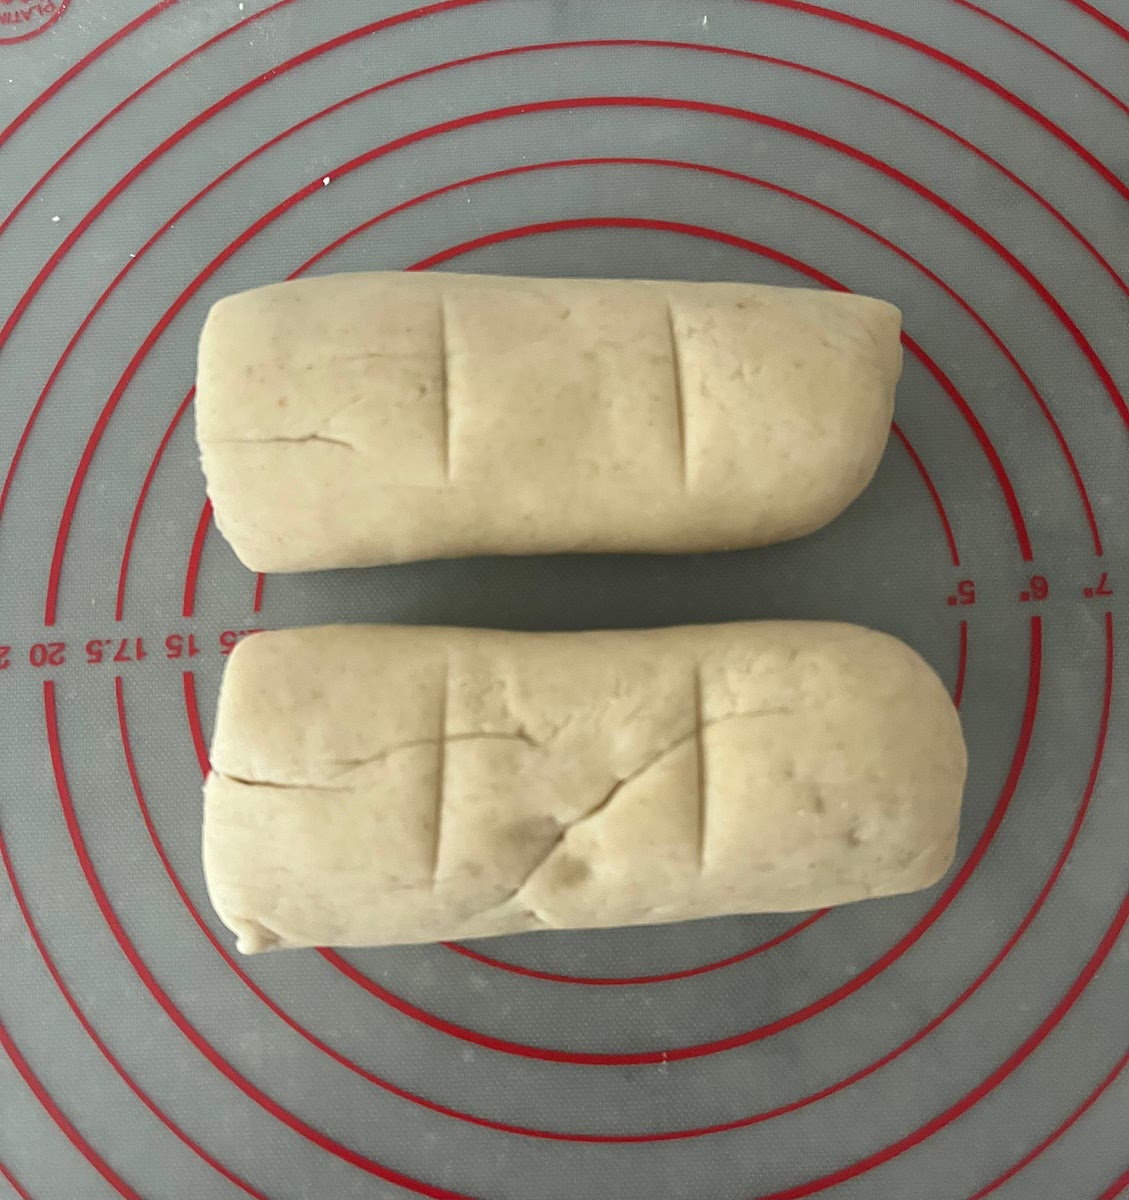
Cut the disc in half, pick one half and roll it up into a sausage shape, then cut it in half, then each half into 3 equal parts, then each in half; make balls with the chunks. Do the same with the other half of the disc. You should end up with 24 dough balls of about 30g each.
Step 9
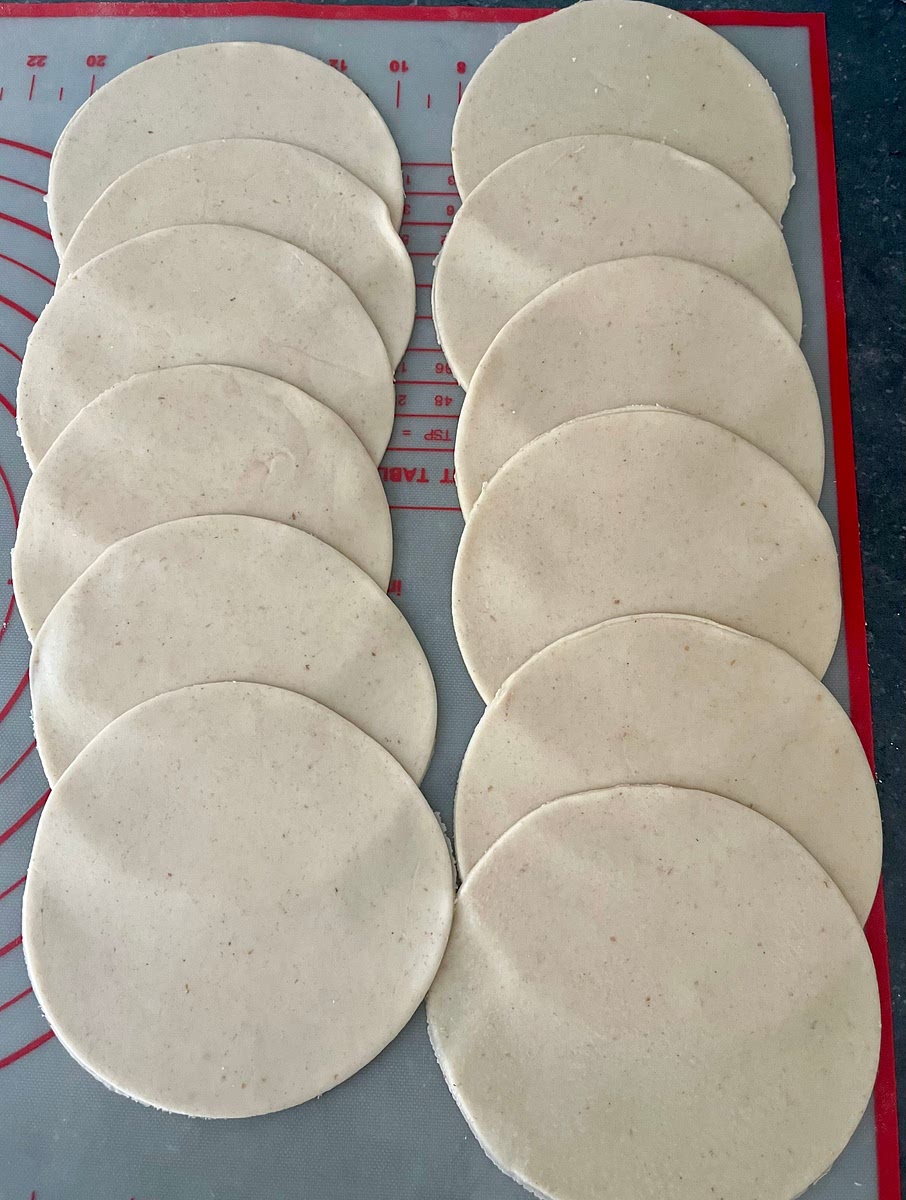
Lightly flour the working surface and, with a rolling pin roll out each ball into discs until their thickness is about 2mm. If you want them perfectly circular(they should be roughly round, but don’t need to be perfect) you can use a 12cm round cutter.
Step 10
Lightly flour the discs and let them rest covered for 5 minutes, before making the empanadas. These pastry discs are good for both baked or deep fried empanadas. If baking them, painting the empanadas with egg wash will give a crispier, shinier result with a more golden colour.
Step 11
STORAGE: you can store them in the fridge for up to a week, or in the freezer for up to 3 months, using a layer of baking paper in between them so they don't stick to each other, and wrapping the pile of discs in cling film (or inside a ziplock bag) so the pastry doesn't dry up.
Notes
1 liked
0 disliked
Delicious
Easy
Fresh
Go-to
Moist