1/4

2/4

3/4

4/4
Leave a note
By Mia Breznau
Lavender Lemon Vegan Macarons
59 steps
Prep:45minCook:2h
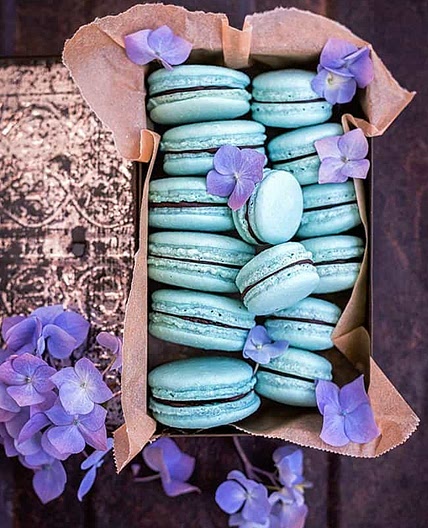
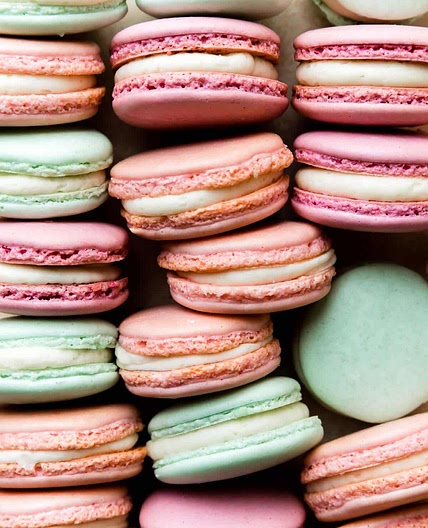
Lemon Lavender Vegan Macarons are here to celebrate spring! These vegan macarons are filled with a vegan lavender buttercream, and vegan lemon curd.
Updated at: Thu, 17 Aug 2023 12:16:35 GMT
Nutrition balance score
Unbalanced
Glycemic Index
65
Moderate
Glycemic Load
13
Moderate
Nutrition per serving
Calories118.9 kcal (6%)
Total Fat4.4 g (6%)
Carbs19.6 g (8%)
Sugars17.9 g (20%)
Protein1.2 g (2%)
Sodium1.2 mg (0%)
Fiber0.4 g (2%)
% Daily Values based on a 2,000 calorie diet
Ingredients
30 servings
200mlchickpea water
aquafaba
133 gramsalmond flour
133 gramspowdered sugar
133 gramswhite sugar
40mlwater
yellow food coloring
optional
¼ cuplemon juice
1 tablespoonzest lemons
of the juiced
⅓ cupgranulated sugar
1 ½ tablespoonscornstarch
2 tablespoonswater
cold
turmeric
for color
1 tablespooncoconut butter
vegan margarine will also work
½ teaspoondried lavender
culinary grade
2 tablespoonscoconut cream
1 ½ cupsconfectioners’ sugar
sifted
4 tablespoonsvegan margarine
softened
¼ teaspoonvanilla extract
Instructions
Vegan Macaron Shells
Step 1
Place your aquafaba in a small saucepan. Bring it to a boil over medium heat. Let it reduce and thicken, while stirring from time to time to check the consistency, over medium low heat. You are looking for a gentle simmer.
Step 2
Once the mixture has reduced til about half, you can remove from the heat.
Step 3
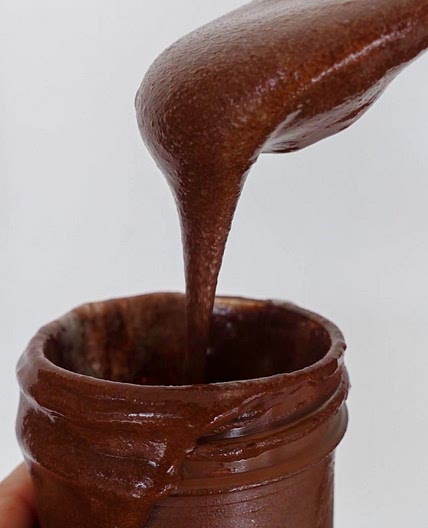
The aquafaba should have kind of a slimy consistency, such as egg whites.
Step 4
Set it aside until it cools completely to room temperature.
Step 5
Measure out 100 ml of the prepared aquafaba. If you have any leftovers, store it in the fridge for up to 3 days.
Step 6
Sift almond flour and powdered sugar together in a bowl.
Step 7
Divide the aquafaba in half. Mix 50 ml of the aquafaba with the almonds and powdered sugar. Use a spatula to mix until this becomes a thick paste. Add food coloring at this point, if using any.
Step 8
Place the other 50 ml of the aquafaba in the bowl of a stand mixer.
Step 9
Start to mix on low, raising the speed gradually to medium-high.
Step 10
Whip aquafaba until it reaches stiff peaks. They won’t get as stiff as the peaks in the egg white meringue do. But you will be able to recognize it as a stiff peak, because the whisk will leave streaks in the meringue, and you’ll be able to identify some medium to stiff peaks in your meringue. The mixture will be white and fluffy.
Step 11
While the meringue whips, you want to move quickly to make the syrup.
Step 12
Mix water and white sugar in a small saucepan.
Step 13
Place a thermometer on the side of the pan.If your thermometer doesn’t reach, you might have to hold a thermometer in place while you cook the sugar syrup.
Step 14
Bring it to a boil over medium heat, until it reaches 245F. Don’t stir the mixture at all. You may rotate the pan if the heat isn’t being evenly distributed. Do it slowly. The problem with doing this is having the risk of forming sugar crystals, from the movement. Which is why it’s recommended you have a clip on thermometer to help you check the temperature of the syrup. If you have to hold the thermometer in place, make sure to move as little as possible, so you don’t form sugar crystals in your syrup. The temperature won’t take too long to get there. Once it reaches 245F remove from the heat.
Step 15
It’s best if the syrup reaches 245F at the same time as the aquafaba reaches stiff peaks. For that to happen, I always find best to start whisking the aquafaba first, and then quickly starting to make the syrup.
Step 16
Once the stiff peaks are reaches, and the syrup has cooked til 245F, you may turn the speed in the mixer to medium-low. Start to add the syrup to the aquafaba, with the mixer on. Try not to touch the sides of the pan. Try to pour it directly into the aquafaba.
Step 17
Raise speed to high once all syrup has been poured.
Step 18
Whisk on high speed for about 10 minutes.
Step 19
Once mixture looks glossy, fluffy, and has reached stiff peaks, your meringue is ready to go.
Step 20
Pour meringue over almond flour paste. Mix with a spatula, doing a J-fold, until incorporated. A J-fold is when you fold coming down through the middle of the bowl, drawing a letter J with your spatula, and just consistenly do that motion, stopping to scrape the spatula every once in a while.
Step 21
It’s time to stop folding when the batter is glossy and has a thick and flowing consistency. There are several ways to test this, and you might have to have a couple failed batches before you get this right.
Step 22
First, I pick up some batter with my spatula and try to draw a figure 8 with the batter that is dripping off the spatula. If you can form several 8 figures without the batter breaking up, that’s one indication that it might be ready.
Step 23
Then, I grab a teaspoon of batter and spoon onto my parchment paper or silicon mat.
Step 24
If the batter stays stiff and doesn’t spread out a bit, I start folding a little bit more, about 3 folds.
Step 25
Test again.
Step 26
Once the batter spreads out a bit and starts to look glossy on the parchment paper, I transfer my mixture to the piping bag.
Step 27
You don’t want your batter to be too runny either. So be careful not to overmix. It’s always best to undermix and test several times until the proper consistency has been achieved.
Step 28
This is the most important part about making macarons in my opinion.
Step 29
Once you’ve piped as many 1 1/2” circles as you could, bang the trays against the counter a few times each. This will release air bubbles that are in the batter and prevent your macaron shells from cracking.
Step 30
Let your trays sit for a while so the shells will dry out a little bit. This vegan macaron batter takes longer to get dry than my regular French macaron, using the Swiss method. But probably around 30 min-1 hour depending on how humid the day is. You’ll know they’re ready to be baked when you gently touch the surface of a macaron and it seems dry.
Step 31
Pre-heat the oven to 210F.
Step 32
Bake one tray at a time.
Step 33
Bake for 6 minutes, rotate tray.
Step 34
Bake for 6 more minutes, check if it needs to be rotated again. You will know if it needs to be rotated again depending on how the macarons are baking. Take a look at them, if one side seems taller then the other, maybe you have to rotate the tray again.
Step 35
Bake for a total of 30 minutes. Really keep an eye out, checking to see if it’s baking evenly. Your oven might be very different than mine.
Step 36
When baked, the macarons will have a deeper color and formed feet.
Step 37
Turn the oven off after the 30 minutes, and leave macarons in there for another 20 minutes.
Step 38
Remove from the oven and bake the other tray.
Step 39
Let the macarons cool down before proceeding with the filling.
Vegan Lemon Curd
Step 40
Place lemon juice, lemon zest, and sugar in a small saucepan.
Step 41
Bring mixture to a boil over medium heat, stirring constantly until sugar is melted.
Step 42
Mix cornstarch and cold water. Set aside for a second.
Step 43
Once sugar is melted and mixture starts to boil, add cornstarch mixture to the pan.
Step 44
Bring mixture back to a boil, stirring constantly.
Step 45
Add a pinch of turmeric to make it a nice deep yellow color.
Step 46
Cook mixture for one or two minutes over medium-heat, stirring non-stop, until thickened and smooth. For a second, in the beginning, it might seem like the mixture is lumpy, just keep stirring and it will come together.
Step 47
Remove from the heat. Add coconut butter and stir until coconut butter is melted.
Step 48
Transfer mixture to a bowl. Let it cool down completely. Cover and refrigerate until ready to use.
Vegan Lavender Buttercream
Step 49
Place lavender and coconut cream in a microwave safe bowl. Microwave for a few seconds until the cream heats up. Let lavender and coconut cream infuse for a while until the cream cools down.
Step 50
Strain cream and discard lavender buds. Let cream cool all the way down before adding it to the recipe.
Step 51
Sift powdered sugar. Set aside.
Step 52
Place vegan margarine in a mixer bowl. Cream at medium-high speed for one minute.
Step 53
With the mixer turned off, add powdered sugar and cream to the bowl.
Step 54
Mix on low until combined.
Step 55
Raise speed and cream until fluffy. If buttercream is too runny, consider adding more powdered sugar to it.
Step 56
Add vanilla. Mix to combine. Place buttercream in a piping bag fitted with a small round tip, or simply cut a small hole at the end of the piping bag.
How to assemble
Step 57
Pipe a circle of buttercream around the edges of the macaron, in a way that you have a little hole in the middle. Fill the little hole with a bit of lemon curd. Don’t overfill it. Place another shell on top.
Step 58
To decorate, you can drizzle some vegan white chocolate on top and decorate with dried lavender.
Storage
Step 59
These Blueberry Macarons will be at their best up to 4-7 days in the fridge.
View on piesandtacos.com
↑Support creators by visiting their site 😊
Notes
0 liked
0 disliked
There are no notes yet. Be the first to share your experience!
