By The Toasted Pine Nut
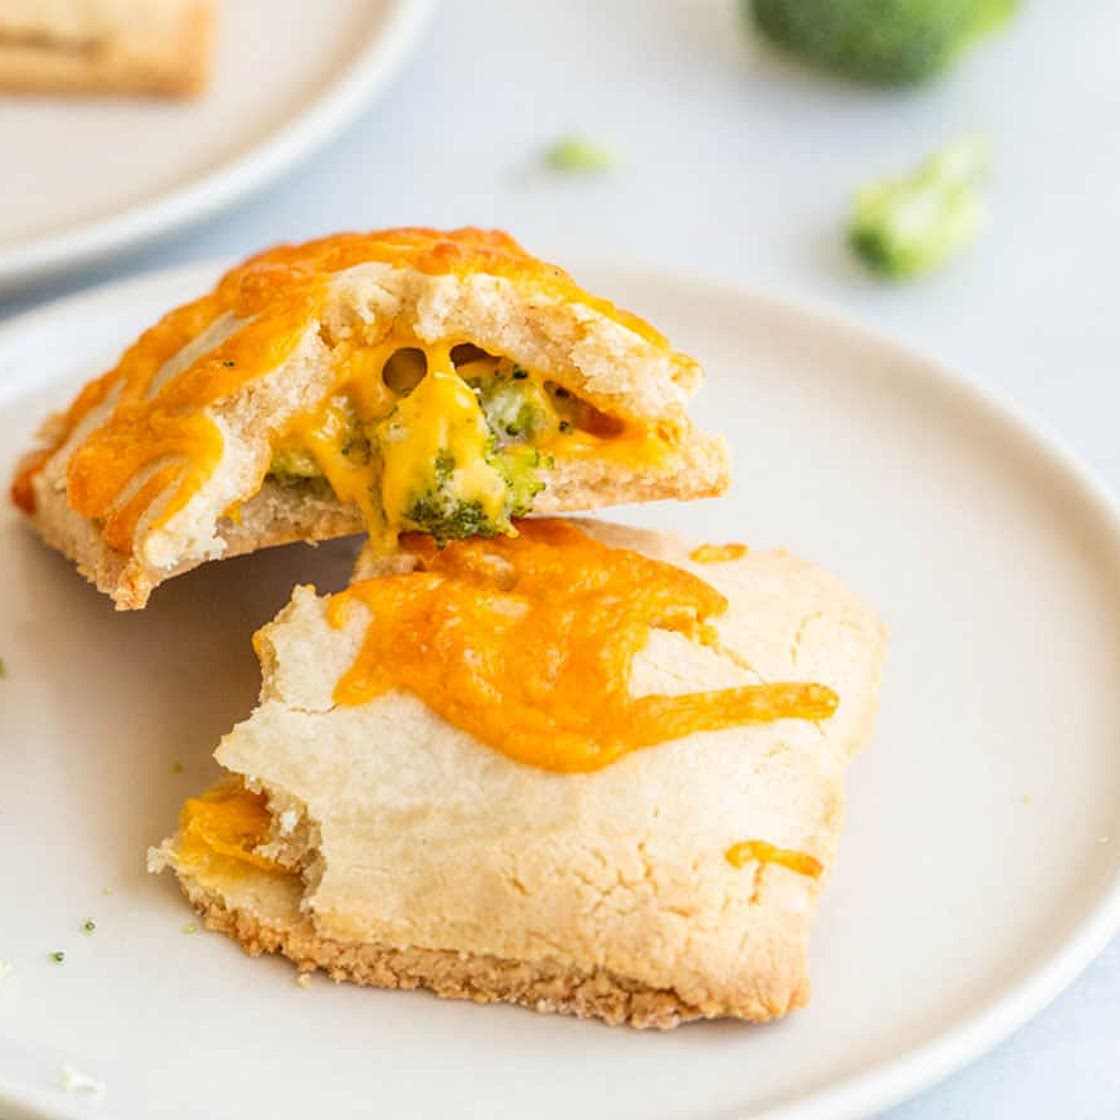
Gluten Free Broccoli + Cheese Hot Pockets
15 steps
Prep:25minCook:20min
Relive your childhood with these healthier Gluten Free Broccoli + Cheese Hot Pockets! They're loaded with a cheesy filling and perfect for your kids!
Updated at: Fri, 23 Jan 2026 08:36:14 GMT
Nutrition balance score
Unbalanced
Glycemic Index
23
Low
Glycemic Load
8
Low
Nutrition per serving
Calories708.2 kcal (35%)
Total Fat55.6 g (79%)
Carbs35.1 g (14%)
Sugars5.9 g (7%)
Protein18.6 g (37%)
Sodium1146 mg (57%)
Fiber9.2 g (33%)
% Daily Values based on a 2,000 calorie diet
Ingredients
3 servings
Instructions
Step 1
Add all of the crust ingredients into a food processor and process until the mixture pulls together.
Step 2
Turn out the crust dough and form into a disc. Wrap in plastic wrap and place in the fridge while you make the filling.
Step 3
Preheat the oven to 350 F.
Step 4
Add the butter to a small skillet and heat over medium heat.
Step 5
Add the broccoli florets and cook for 5-7 minutes, until soft.
Step 6
Add the arrowroot powder, salt and garlic powder and sauté for 2 minutes.
Step 7
Finally, add the coconut milk and cook until the milk thickens into the broccoli, about 2-3 minutes. Remove from the heat.
Step 8
Roll the dough out onto parchment into a square. Cut the edges off so you have clean lines.
Step 9
Cut the dough in half widthwise, and in thirds or fourths lengthwise, depending on how large you want the hot pockets to be.
Step 10
On half of the pastry squares, sprinkle on about a tablespoon of the cheese.
Step 11
Add about 1 tablespoon of the broccoli mixture on top of the cheese and add another tablespoon of the cheese to finish.
Step 12
Press a remaining square of dough on top of each square with filling in it. Press the edges together to seal.
Step 13
Place the hot pockets on a parchment lined baking sheet and place in the oven for 10 minutes.
Step 14
After 10 minutes, remove the hot pockets and sprinkle 1 tablespoon of cheese on top of the hot pockets and return to the oven for 10 minutes.
Step 15
Serve while hot!
View on The Toasted Pine Nut
↑Support creators by visiting their site 😊
Notes
0 liked
0 disliked
There are no notes yet. Be the first to share your experience!
