By mamagourmand.com
How to Make Gluten-Free Pie Dough (Best Results)
15 steps
Prep:15min
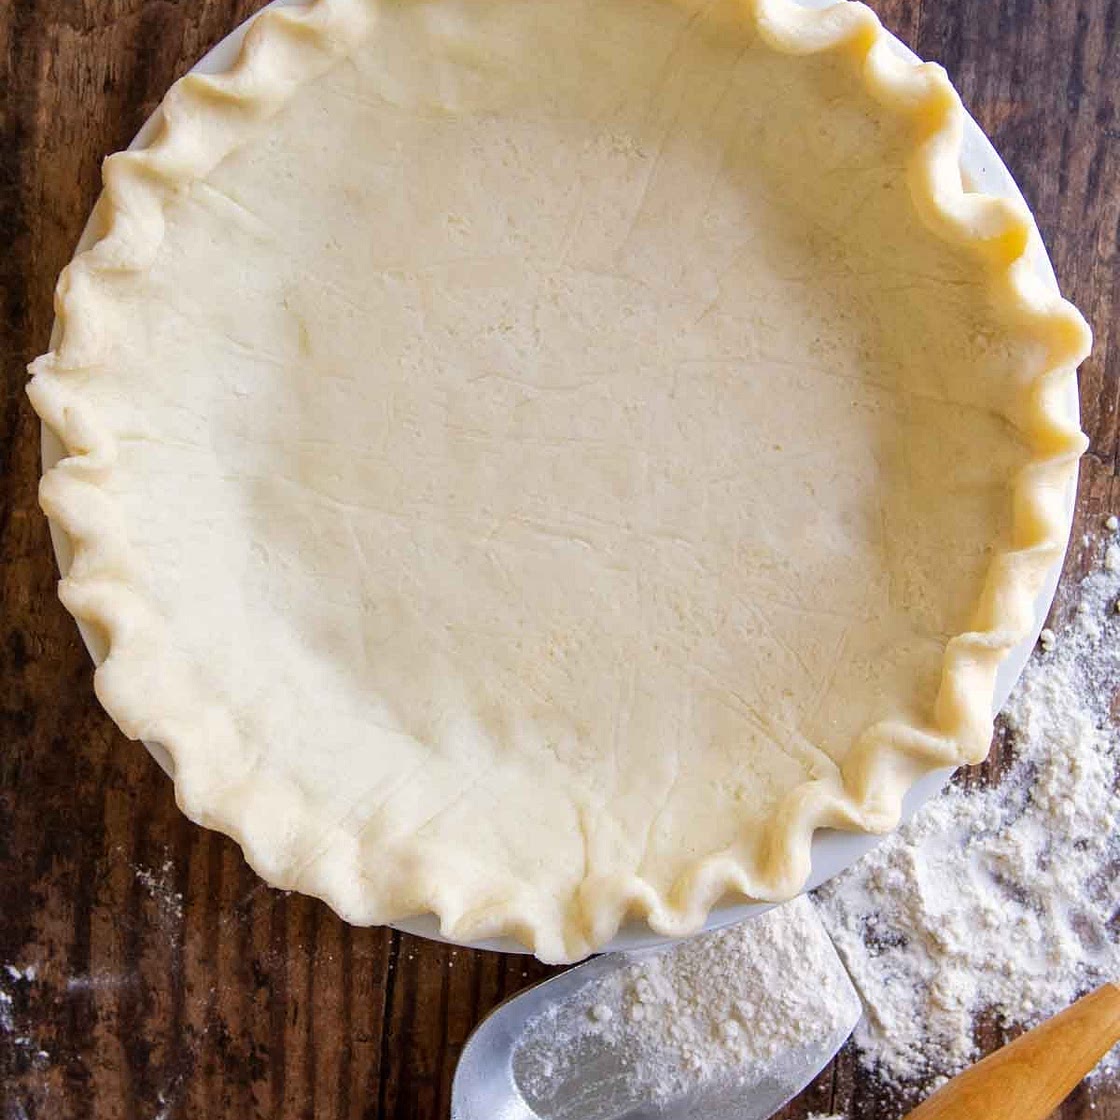
If you’re looking for a flaky, tender gluten-free pie dough (or pastry dough) that is fabulously easy to roll out, look no further. Not only is this the best tasting gluten-free pie dough, this detailed guide is also full of tips and tricks to help you make perfect GF pie crust at home. The secret? A tablespoon of sour cream! It tenderizes the gluten-free pastry dough.
Updated at: Wed, 05 Mar 2025 11:11:55 GMT
Nutrition balance score
Unbalanced
Glycemic Index
79
High
Glycemic Load
16
Moderate
Nutrition per serving
Calories195 kcal (10%)
Total Fat11.9 g (17%)
Carbs20.5 g (8%)
Sugars0.9 g (1%)
Protein1 g (2%)
Sodium214.1 mg (11%)
Fiber0.8 g (3%)
% Daily Values based on a 2,000 calorie diet
Ingredients
8 servings
Instructions
Food Processor Method:
Step 1
Place the cubed butter in the freezer for 10 minutes. Mix together the cold water, sour cream, and vinegar in a small bowl. Place the liquids bowl in the refrigerator until you are ready to use.
Step 2
Pulse together the flour, sugar, and salt together until mixed.
Step 3
Process the butter into the flour mixture until well incorporated, evenly dispersed, and without large chunks.
Step 4
Add the liquids to the food processor and pulse until the flour becomes moistened and small dough clumps appear. Tip: To check if you have enough liquid, clump and flatten a small bit of dough. If it doesn’t stick together, is crumbly, or breaks apart easily, add a small dash of ice water. Pulse a few times and recheck. If the dough is too wet or sticky, add a dash of flour. Pulse a few times and recheck.
Step 5
Turn the dough onto a large sheet of plastic wrap and flatten into a thick 1" disk. Wrap tightly and refrigerate for at least 1 hour or freeze for 30 minutes. Before rolling out, let sit on counter 5 minutes so it is easier to work with.
By Hand Method:
Step 6
Mix together the cold water, sour cream, and vinegar in a small bowl and place in the fridge until ready to use. Freeze the butter for 10 minutes until very cold.
Step 7
In a large bowl whisk together the gluten-free flour, sugar and salt.
Step 8
Use a pastry blender, fork, or fingers to cut and knead butter into the dough until it is well incorporated throughout.
Step 9
Add half the liquids and knead with fingers or a fork. Pour in the remaining liquids. Knead until the dough starts to come together and the liquids are well mixed with flour.
Step 10
Turn the dough onto a large sheet of plastic wrap and flatten into a thick 1" disk. Wrap tightly and refrigerate for at least 1 hour or freeze for 30 minutes. Before rolling out, let sit on counter 5 minutes so it is easier to work with.
How To Roll Out Crust:
Step 11
I find rolling in a silicone pie bag works best because the dough doesn’t stick, no additional flour is needed, and it’s easy to shape. If you don’t have one, use two large pieces of parchment paper. Plastic wrap may be used, but it has a tendency to stick to the dough more.
Step 12
Place the unwrapped dough disc in middle. Use a rolling pin to press and spread the dough from the middle out. Roll into a circle slightly larger than your pie dish. (See tips in recipe notes for rolling out crust)
Step 13
Remove the top paper, and invert into the pie plate. Remove the second paper. Tip: If the dough has warmed while rolling, it may be trickier to take the paper off. If this happens, leave the paper on, and stick the whole thing in the fridge for 5 minutes. Once the crust is chilled again it's much easier to pull off the paper. If the dough is too cold and the crust breaks, let it sit on the counter for a minute first before trying again.
Step 14
Trim off excess dough around the edges. If some edges need more dough to fold under, press on some of the clipped off pie dough. Tuck the overhang dough under to meet edge of pie dish. Using both forefingers, flute edges by pressing one down and one up next to each other.
Step 15
Wrap loosely with plastic wrap and place in freezer 15 minutes, or up to an hour, until chilled. Fill and bake according to recipe directions, or see recipe notes for a partially or fully baked crust.
View on mamagourmand.com
↑Support creators by visiting their site 😊
Notes
0 liked
0 disliked
There are no notes yet. Be the first to share your experience!
