1/5

2/5

3/5

4/5

5/5
100%
1
By Tess Löwenhardt
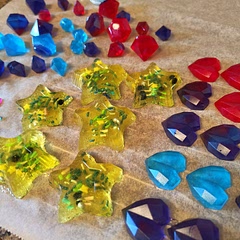
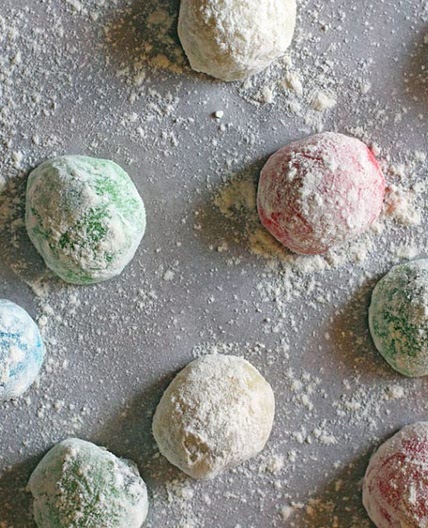
Kohakuto - Japanese Edible Crystals - Wagashi
6 steps
Prep:10minCook:30min
A wonderful traditional Japanese candy that's easy to make at home (you'll need time on your side, though!!). These make amazing gifts or special treats. Good cake decorations and they're amazing for making ASMR videos. 🤣
You can make them any color and flavor you prefer and can get your hands on. You can even make them with pasteurized juices!*
Use food coloring with a tiny fork, any flavored sugar, flavorings or whatever you like. Only if it can spoil in a week, it can spoil your candy.
Note: if you have more or less agar (7gr is standard in my country) you can adjust the serving size accordingly!
I hope you'll love making these!
The best thing about them: they're vegan and keep for at least a month if stored dry and cool.
*(The acidity of the liquid used will impact the gelling ability of the agar. A more acidic liquid will require more agar powder to set. Agar breaks down and doesn’t set if exposed to the enzymes of certain raw tropical fruits such as: kiwifruit, papayas, pineapple, peaches, mangoes, guavas, and figs. These fruits contain an enzyme (bromelin) that can prevent agar from setting. If you are using these fruits, heat them before adding agar to break down the enzyme and allow the recipe to set successfully.)
Updated at: Tue, 01 Apr 2025 10:10:40 GMT
Nutrition balance score
Unbalanced
Glycemic Index
67
Moderate
Glycemic Load
21
High
Nutrition per serving
Calories121.5 kcal (6%)
Total Fat0 g (0%)
Carbs31.2 g (12%)
Sugars30.5 g (34%)
Protein0 g (0%)
Sodium3.6 mg (0%)
Fiber0.7 g (2%)
% Daily Values based on a 2,000 calorie diet
Ingredients
9 servings
Instructions
Step 1

You can use 250 to 300 grams of sugar as you prefer, (for 9 grams of agar!) but you need a high enough sugar content to let them crystallize. Mix the agar agar in a pot into the water very well for a few minutes.* Put the pot on your stove and bring to a boil. Stir and boil on low heat for about two minutes until the viscosity starts to change. (Don't boil it too hard or too long.) *If you're using an acidic juice with bromelin boil the juice first. See recipe info.
Step 2

When the liquid is a bit thicker, syrupy, turn off the heat and dissolve the sugar whilst stirring.
Step 3

Oil or line your dish/container! Or use a flexible silicone one (you can use ones with shapes too if you don't want to cut the crystals.). When the sugar is dissolved, transfer the liquid into a heat proof container. Immediately add any colorants if you want. Start with a tiny bit as you can always add but not take out.
Step 4

Put the container in the fridge to set for 1 to 2 hours (or up to 10 if needed but cover it).
Step 5

When you're ready to carve cut along side the candy to loosen it from the container. Put your cutting board on top of the container, flip it and get the candy out. Cut the candy to your desired shapes. Please note: bigger shapes will take longer to dry/crystallize. With the cuttings you can make some tester pieces and small crystal/glass clumps.
Step 6

Wait! Put the candy on parchment paper and place it at a location where there's a tiny bit of air flow (not a closed container) and where you can check on it. After 2 or 3 days when they're a bit crystallized, turn them over so the bottom also dries. It's said you can keep them for a month if stored dry and room temp but I've eaten them after two months and found no loss of nor funky taste. It's mainly sugar... You can also add a bit of citric acid if you have it.
Notes
1 liked
0 disliked
Delicious
Easy
Go-to
Kid-friendly
Sweet
