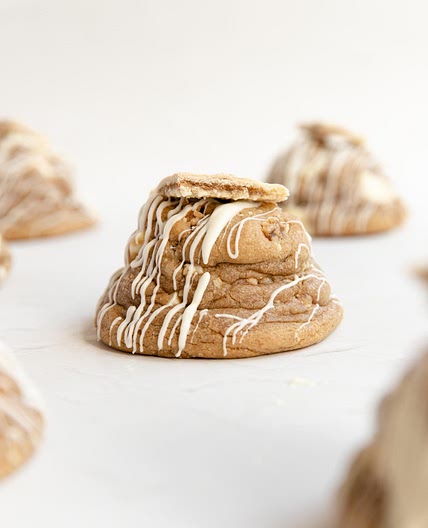
Raspberry Cookies
Leave a note
By Hailey Whiting
Raspberry Cookies
18 steps
Prep:1h 30minCook:15min
Updated at: Fri, 20 Dec 2024 20:48:44 GMT
Nutrition balance score
Unbalanced
Glycemic Index
70
High
Glycemic Load
37
High
Nutrition per serving
Calories279.9 kcal (14%)
Total Fat9.8 g (14%)
Carbs52.4 g (20%)
Sugars31.6 g (35%)
Protein1.1 g (2%)
Sodium161.6 mg (8%)
Fiber1.9 g (7%)
% Daily Values based on a 2,000 calorie diet
Ingredients
12 servings
For the Raspberry Syrup
For the Cookies
2 cupsall purpose gluten free flour
1 ½ tablespoonscornstarch
1 ½ teaspoonsbaking powder
½ teaspoonsalt
½ cupunsalted butter
or vegan baking stick, room temperature
1 ¼ cupsgranulated sugar
2 heaping tablespoonscornstarch
3 tablespoonswater
3 tablespoonsmilk
3 tablespoonsraspberry syrup
3 dropsred food coloring
I use McCormick, You may need less if you’re using a gel or paste
½ cupfrozen raspberries
chopped into tiny pieces
2 tablespoonsgranulated sugar
Instructions
For the Raspberry Syrup
Step 1
In a saucepan set over medium heat, cook the ¼ cup granulated sugar and 1 cup of raspberries, stirring constantly, until they are broken down and syrupy. About 10 min. It will still appear a little chunky and that’s fine.
Step 2
Set a mesh colander over a bowl. Pour the raspberry liquid through the strainer and set aside to let cool. There should be about 2-3 tablespoons of raspberry syrup once it's strained.
For the Cookies
Step 3
Measure out ½ cup frozen raspberries. Rough chop the raspberries into small pieces. Be careful not to over chop; you don't want a puddle of raspberry pulp.
Step 4
Place the chopped raspberries into a freezer safe bowl and pop back into the freezer until you're ready to add them into the dough.
Step 5
In a large bowl, whisk together the gluten free flour, baking powder, cornstarch and salt. Set aside.
Step 6
In a small bowl, using a spoon, mix together the remaining 2 heaping tablespoons of cornstarch with 3 tablespoons of water until thin and watery. It will be thick and tacky at first.
Step 7
In a large bowl of an electric mixer fitted with the paddle attachment, beat the butter or vegan baking stick and 1 ¼ cups of the sugar until it is soft and creamy. About 2-3 minutes.
Step 8
Slowly beat the cornstarch water mixture, milk, the cooled strained raspberry liquid (about 2-3 tablespoons) into the creamed butter and sugar. It will look pink and chunky.
Step 9
Slowly beat in the gluten free flour mixture a little at a time until just combined.
Step 10
If desired, add in 3-4 drops of red food coloring and mix into the dough so it is blended throughout.
Step 11
Gently using a spatula, fold in the frozen chopped raspberries. The dough will become a lovely marbled pink color. Be careful not to mix too much or the dough will become slimy.
Step 12
Keep the dough in the bowl, cover the top with plastic wrap and freeze for at least 1 hour. You must not skip this step or the cookies will spread everywhere and it must be frozen, not in the fridge.
Step 13
After the dough has been in the freezer for at least 1 hour, preheat the oven to 325 degrees Fahrenheit. Line a baking sheet with parchment paper. Set aside.
Step 14
Use an ice cream scoop or a large cookie scoop to make large cookies. It makes 12 scoops.
Step 15
Roll each dough ball in the extra 2 tablespoons of granulated sugar to coat completely.
Step 16
Place dough balls about 3-4 inches apart on the parchment lined baking sheet. Bake the cookies at 325 degrees Fahrenheit for 15 minutes.
Step 17
Store extra dough balls in the freezer while the rest are baking if they don't all fit. I only bake 6 at a time.
Step 18
Immediately reshape the cookies when they come out of the oven by using a spatula to push them into a circle shape and let cool on the baking sheet for 5 min before transferring to a cooling rack. If you don't do this, the cookies will break apart into a giant mess.
View on pin.it
↑Support creators by visiting their site 😊
Notes
0 liked
0 disliked
There are no notes yet. Be the first to share your experience!