1/2

2/2
100%
1
By Peter Danco
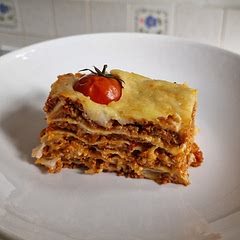
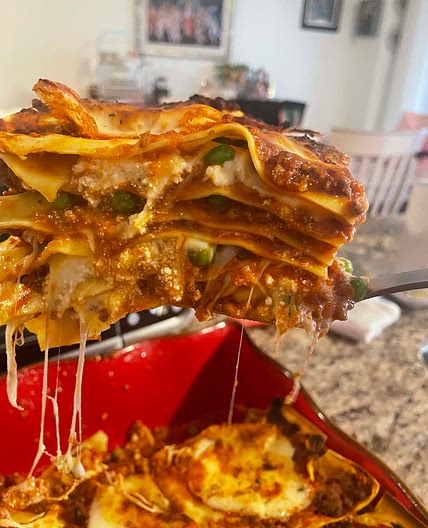
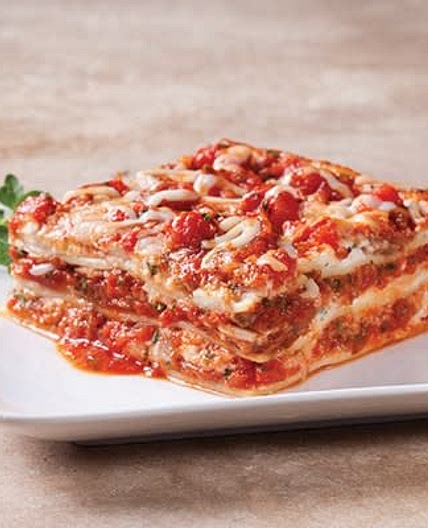
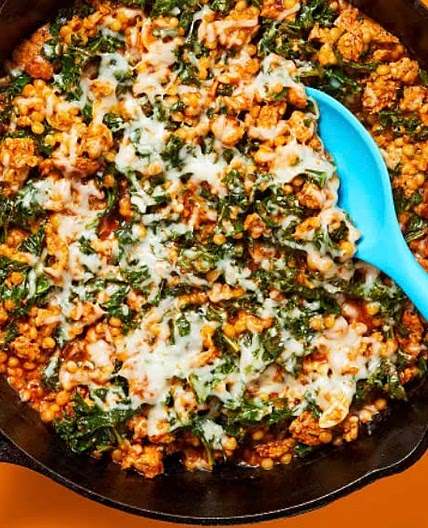
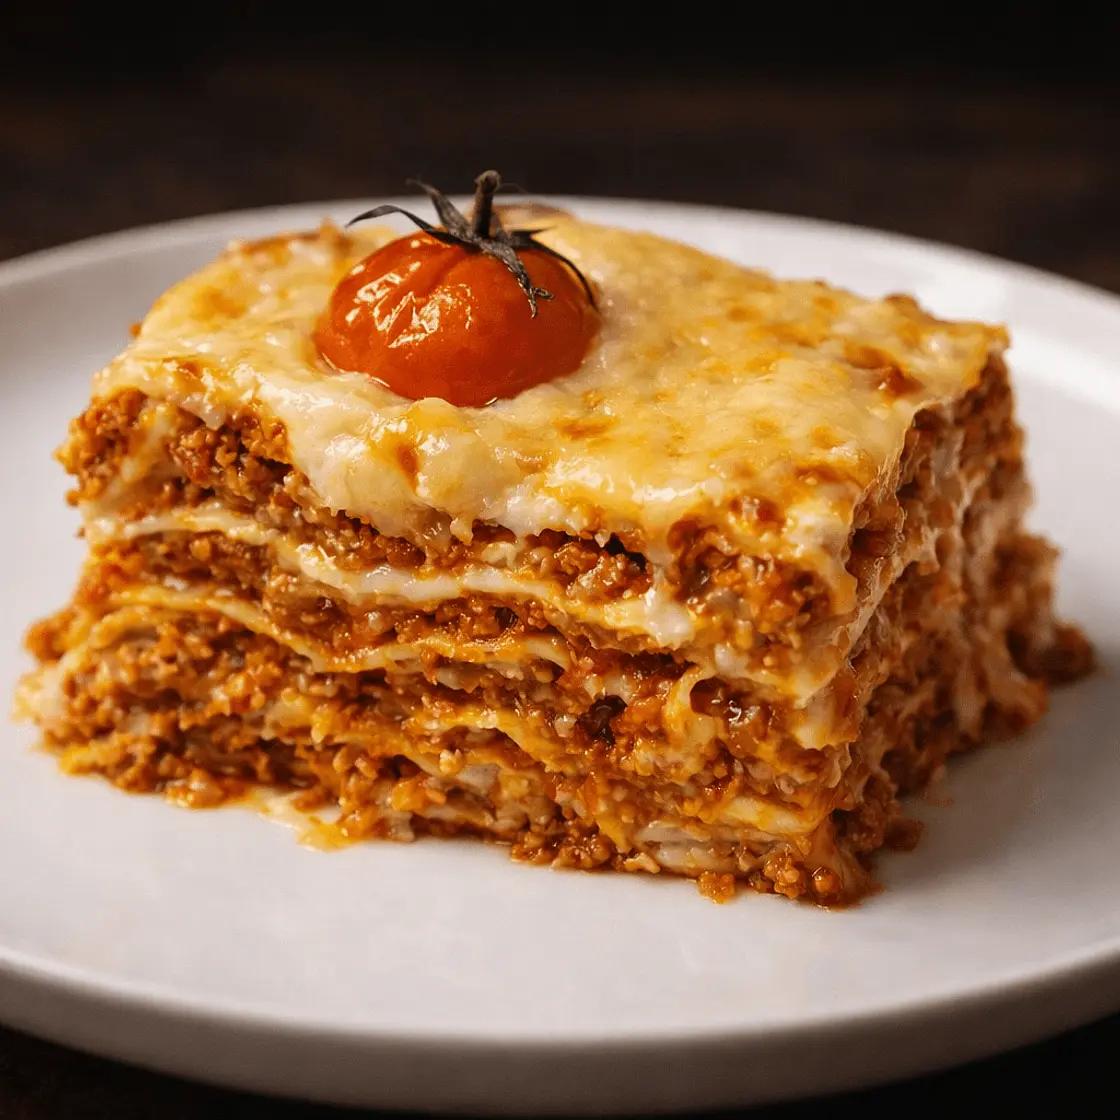
Ordinary Lasagne (gloryfied pasta bake)
17 steps
Prep:8hCook:45min
A regular easy lasagne recipe that I do regularly for my son who can't get enough of it.
Updated at: Sun, 22 Feb 2026 13:27:28 GMT
Nutrition balance score
Unbalanced
Glycemic Index
52
Low
Glycemic Load
21
High
Nutrition per serving
Calories1152.7 kcal (58%)
Total Fat62.5 g (89%)
Carbs77.5 g (30%)
Sugars11 g (12%)
Protein62.7 g (125%)
Sodium936.7 mg (47%)
Fiber5.3 g (19%)
% Daily Values based on a 2,000 calorie diet
Ingredients
12 servings
For Bolognese:
600gOnion
400gCelery
500gcarrot
Pork lard
1kgMinced pork
1kgminced beef
500mlmilk
250mlwhite wine
0.5nutmeg
1lTinned peeled tomatoes
1bay leaf
salt
pepper
For Bechamel:
For constructing:
Garnish:
Instructions
Notes:
Step 1
Notes: I'm usually making a massive quantity to last at least 2 days for the whole family so if you have a smaller tray or want to make less you will need to scale down the amounts of each ingredient. For reference I'm using the classic stainless steel tray from IKEA called KONCIS.
Bolognese:
Step 2
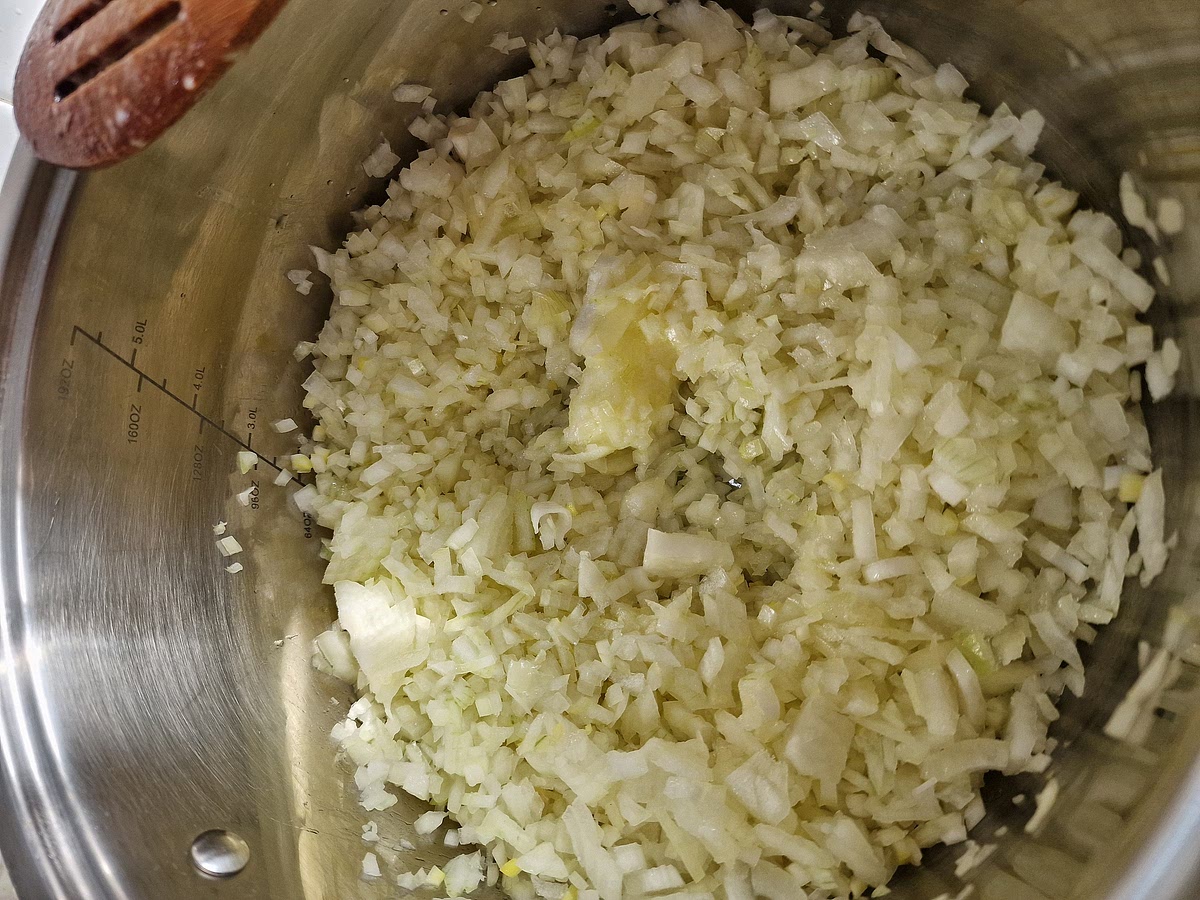
Start your bolognese sauce by dicing your onion, then put it in the pot and start frying it on low heat, you can add some butter as well as a fat of your choice - I chose pork lard as that's what I had available when making this recipe. I like to add a pinch of salt into the onion to help it break down faster. The amounts are informational, the thicker you want it the more onion you need.
Step 3
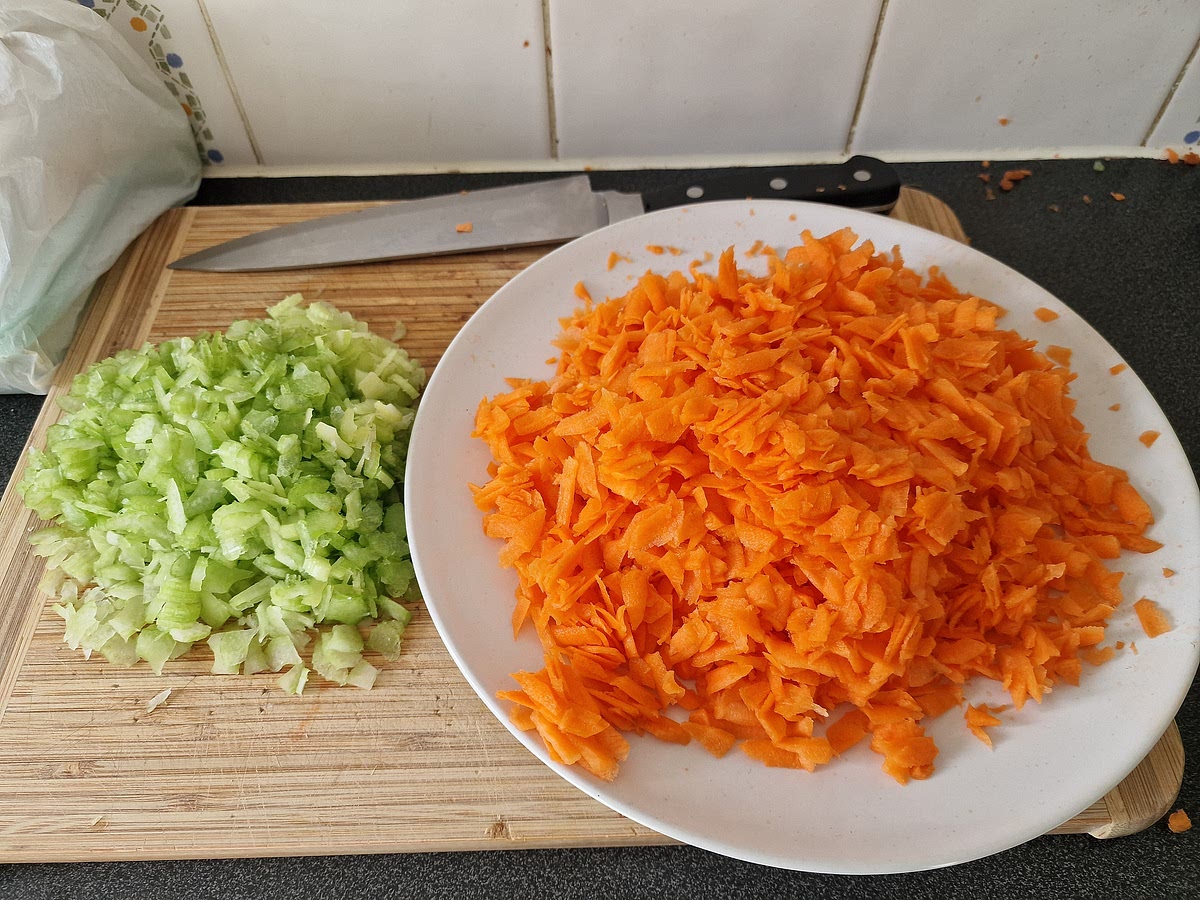
While your onion is frying, you have plenty of time to dice the celery and carrot.
Step 4
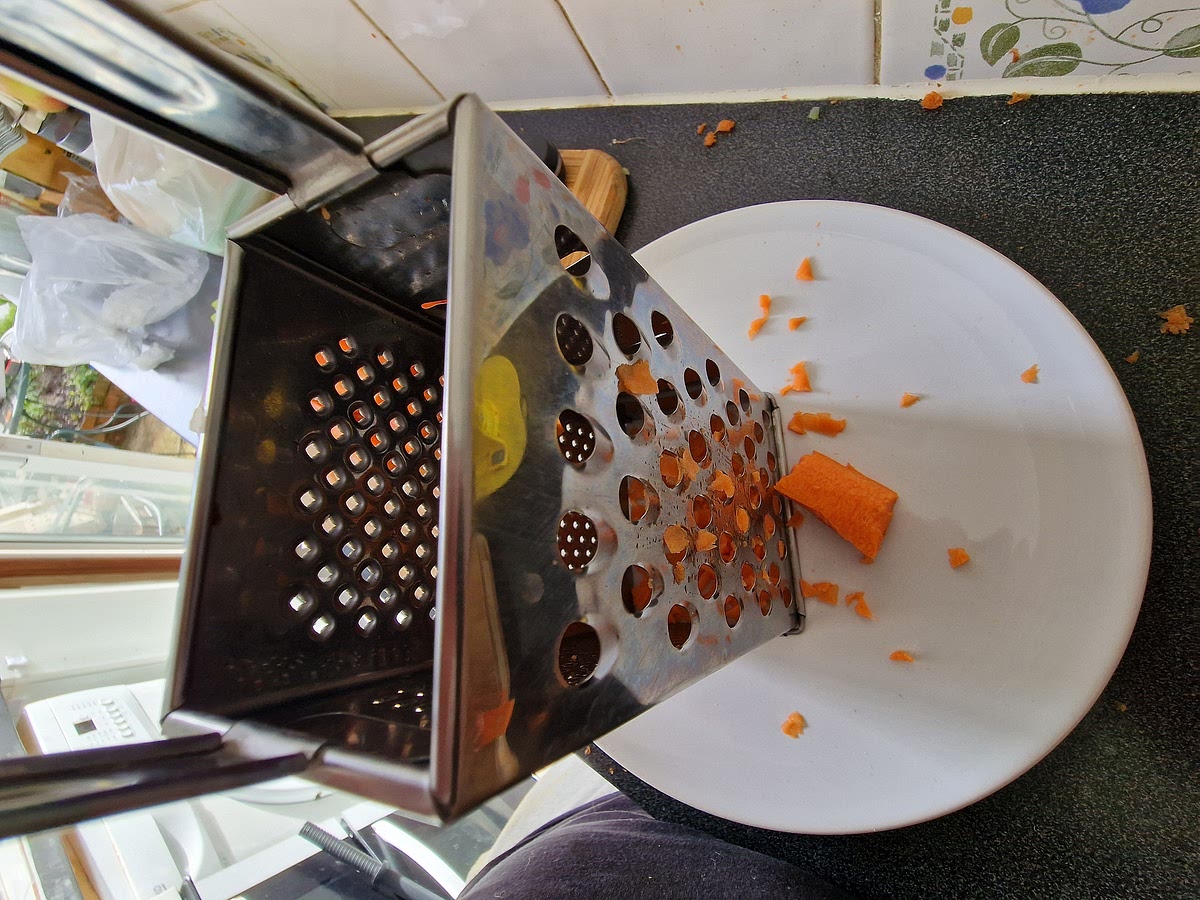
Carrots in this quantity are a pain to dice into small pieces so I usually use cheese grater as it gets the job done much faster and the carrots are diced to whatever size you want. I like it quite fine so after peeling the carrot I slice it into quarters and then I grate it.
Step 5
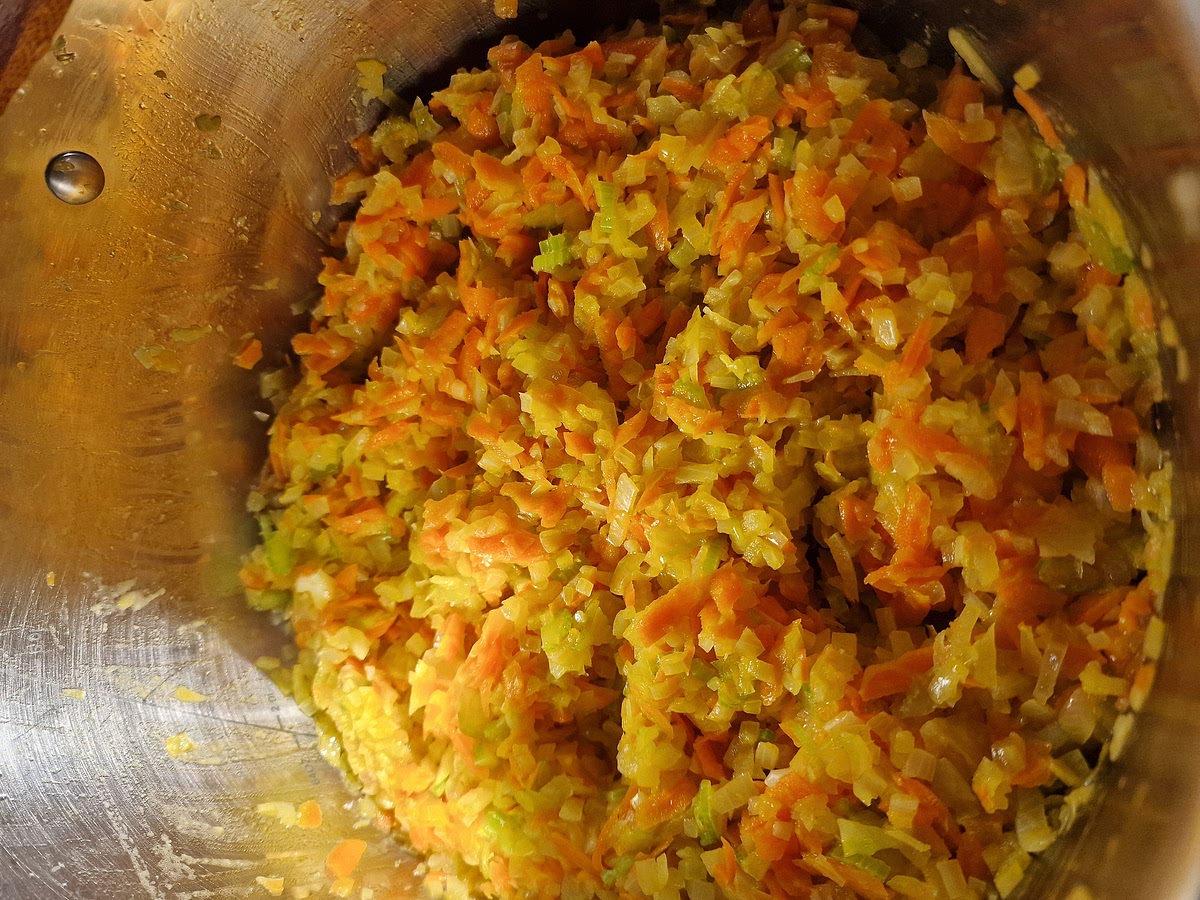
Once your onion is translucent and soft, you can add the celery and carrot and let it fry for a couple more minutes until they soften too.
Step 6
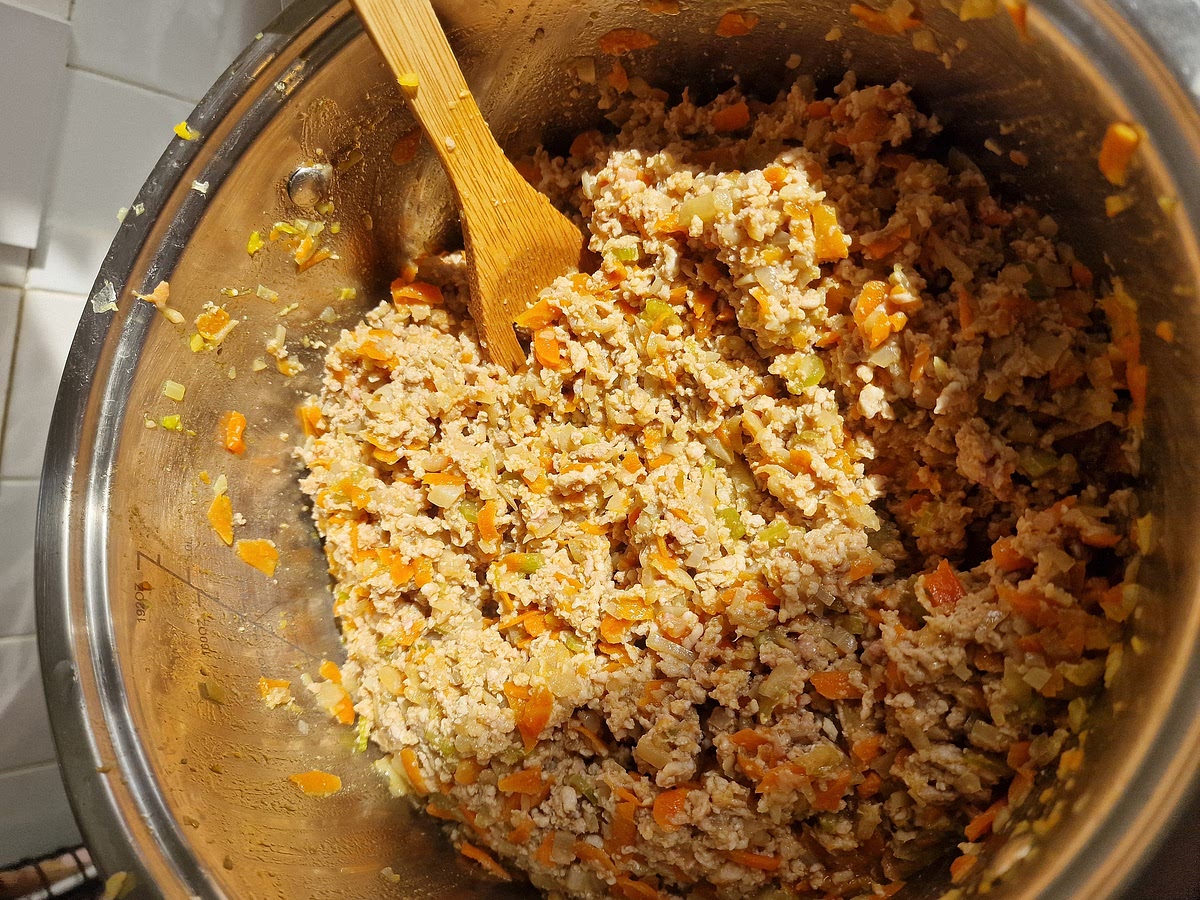
When your base is finished, you can add the meat. Make sure to break it all down properly and fry it on medium to high heat until the meat is browned and doesn't look raw anymore. At this point you need to properly salt and season the meat. I used about a table spoon of salt for this quantity and a large pinch of black pepper.
Step 7
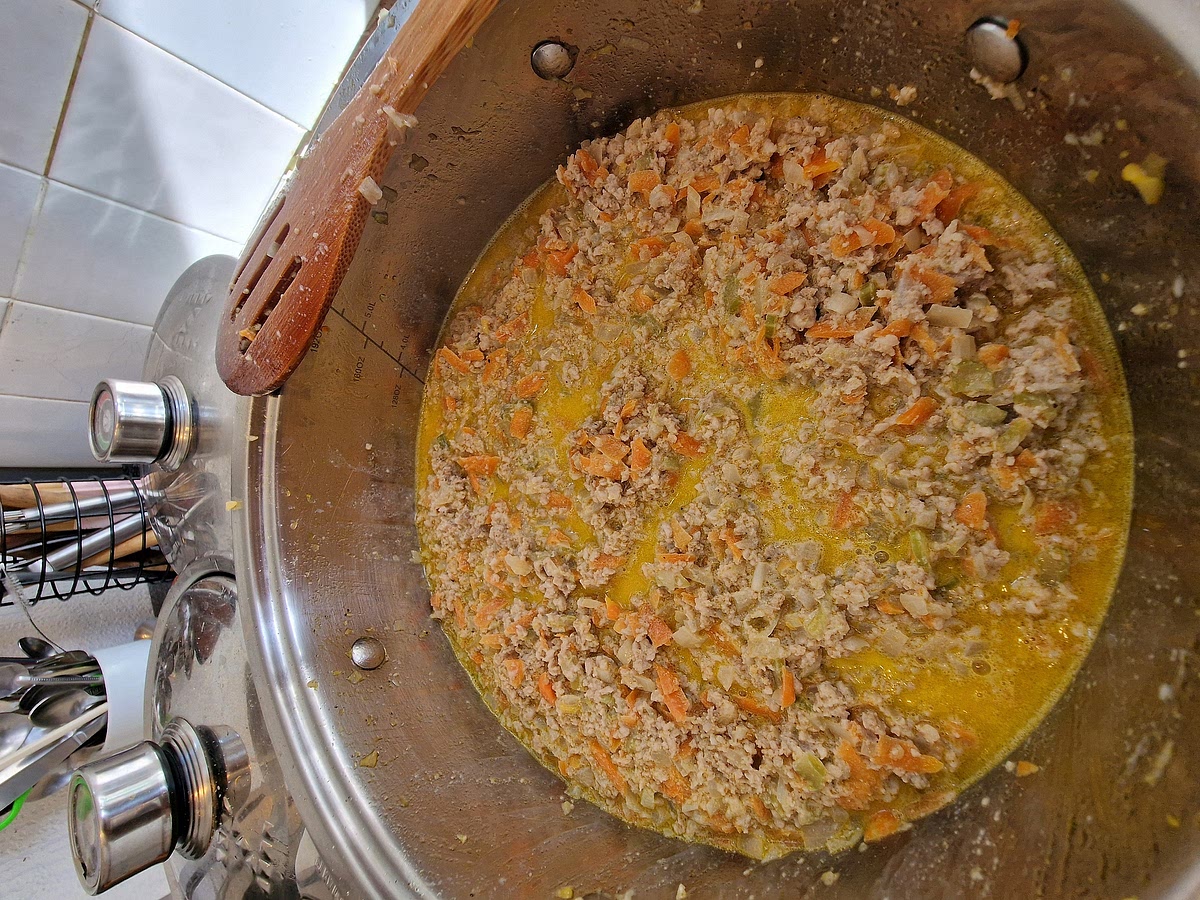
Once the meat is brown, add the milk to help it soften nicely. I add about 500ml of milk (1 pint) but it depends on the amount of meat you're using. Rule is to have the meat just barely covered in milk. Let it cook and stirr it regularly until the milk completely evaporates.
Step 8
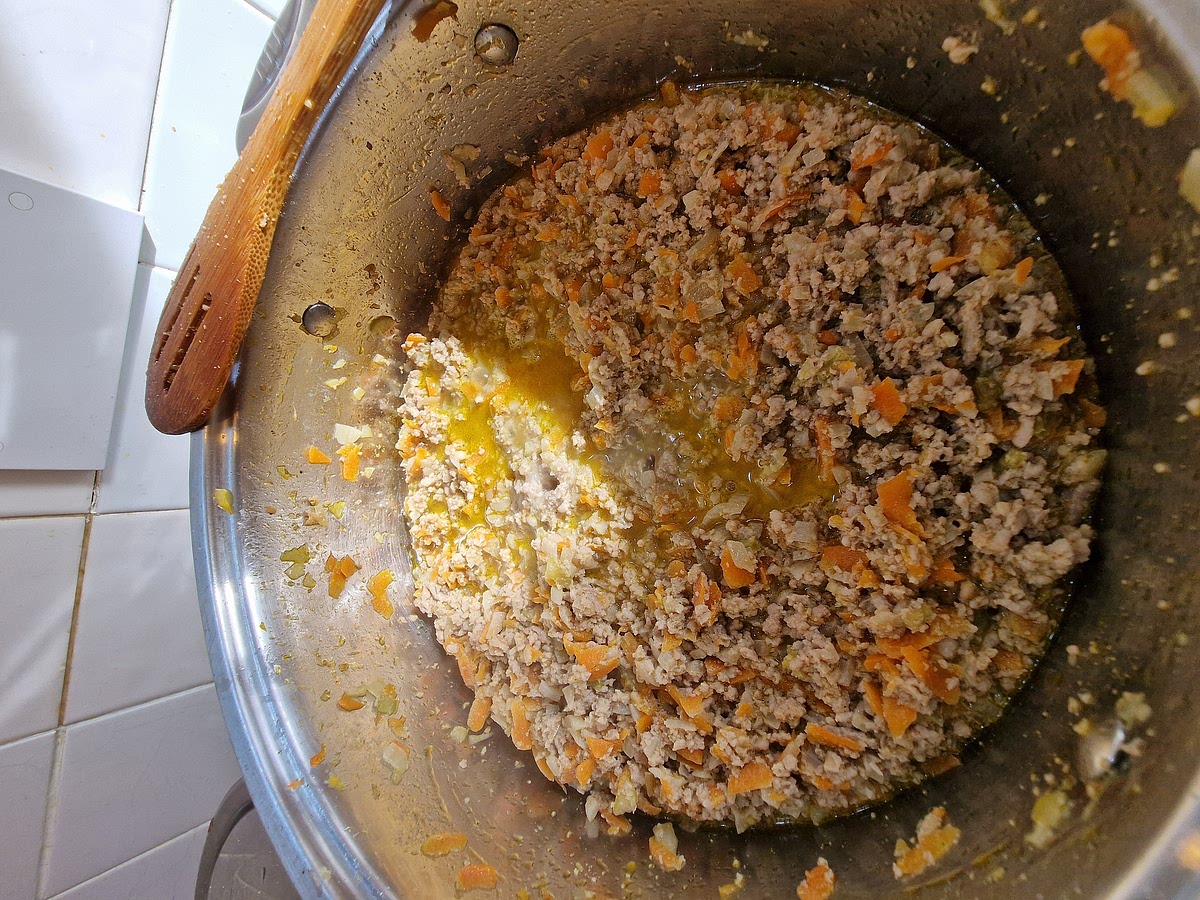
Once the milk is evaporated, you can grate half a nutmeg into it. Give it a stirr and then you can add the wine. I used one full glass, this really depends on you and how strong your wine is. I used a French dry white wine. It's okay to use red wine if that's what you have, it will give the sauce more depth but use less of it as it can overpower the flavour of meat if you overdo it. Let the wine evaporate completely just like with the milk.
Step 9
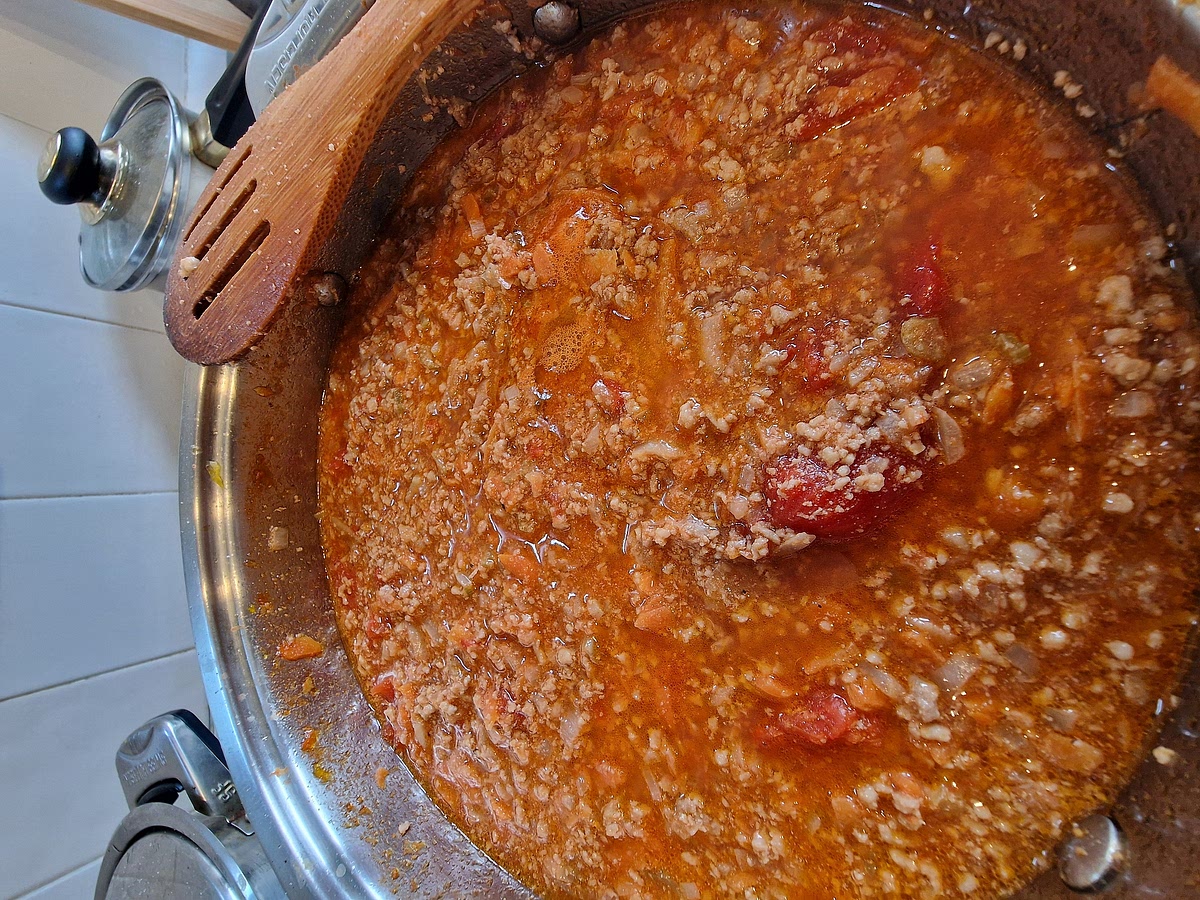
Finally when your wine is evaporated you can add your tinned plum tomatoes. I prefer the whole peeled tomatoes instead of chopped. If it's available in your region I recommend using the San Marzano tomatoes from Italy which are really good and will dictate the flavour of your bolognese. Stir everything properly and let the tomato juice coat all other ingredients. Bring it to boil and lower the heat. Add one bay leaf (optional step, I just like bay leaf in my bopognese) and let the sauce simmer on the lowest of simmers. You should only see an ocassional bubble pop up on the surface. Simmer uncovered for a minimum of 4 horus, I usually do 5-6 hours. In the end you should have a thicker sauce with fat separated on top. During the simmer process it might dry and it is recommended to add a bit of water when that happens but I usually use quite a lot of tomatoes so I haven't had this issue yet. You don't want your sauce to be too watery in the end.
Bechamel sauce:
Step 10
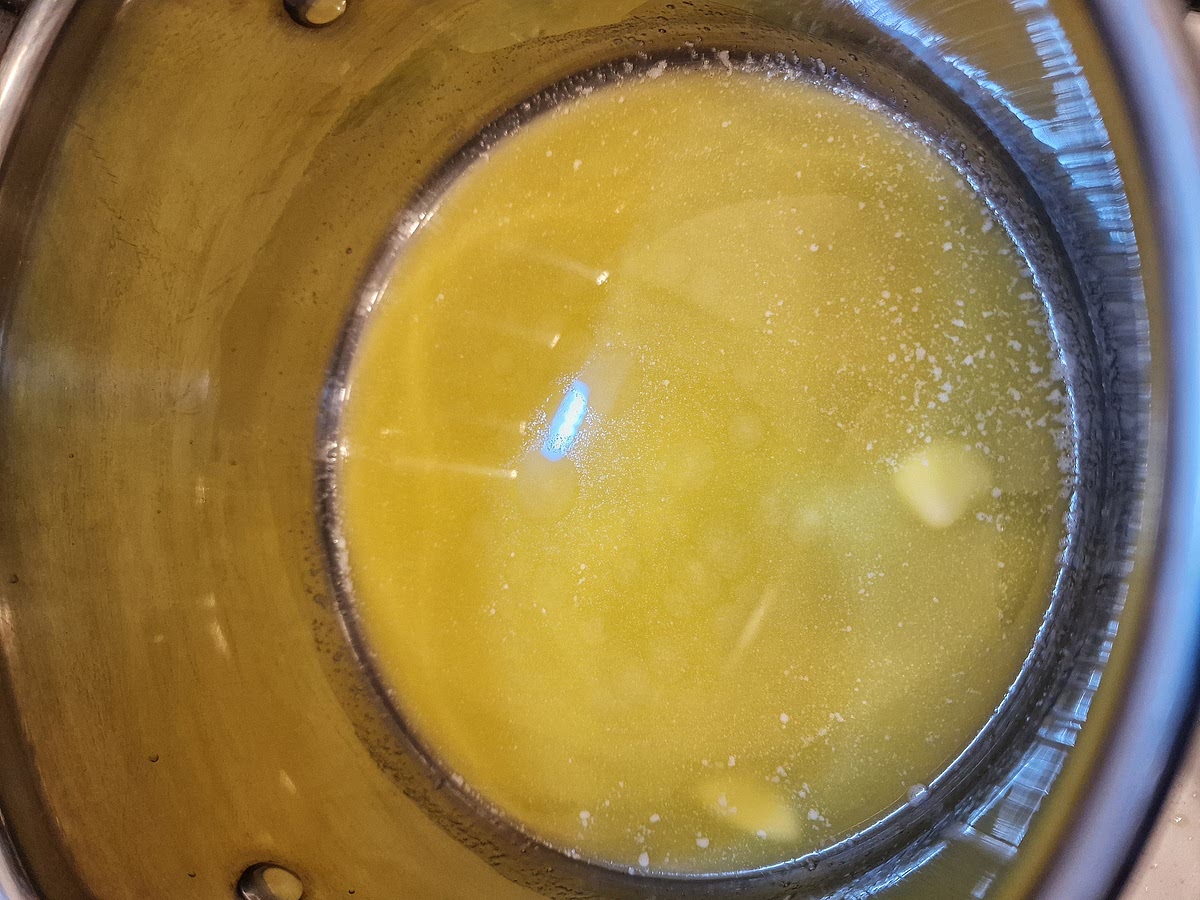
Prepare your bechamel sauce. First on low heat melt a minimum of 100g of butter. Don't let it burn.
Step 11
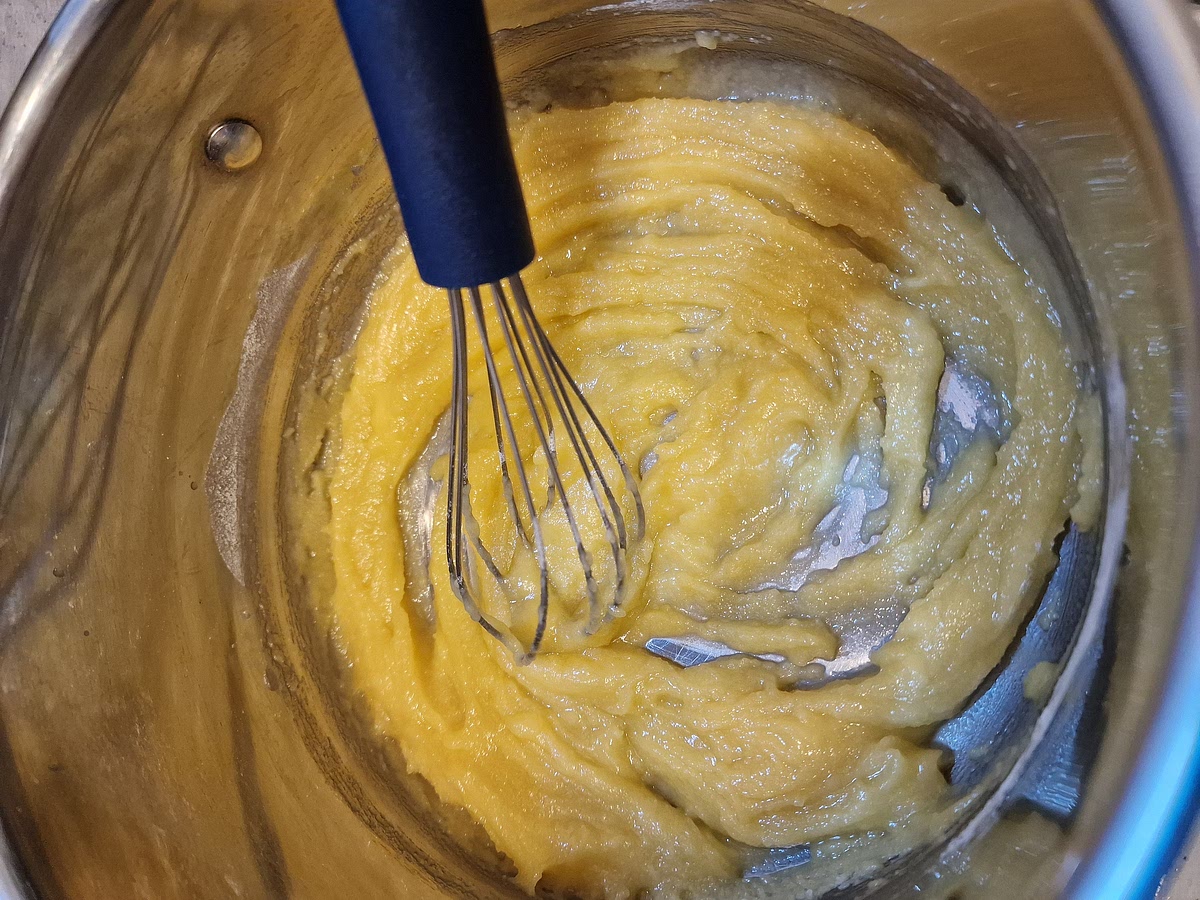
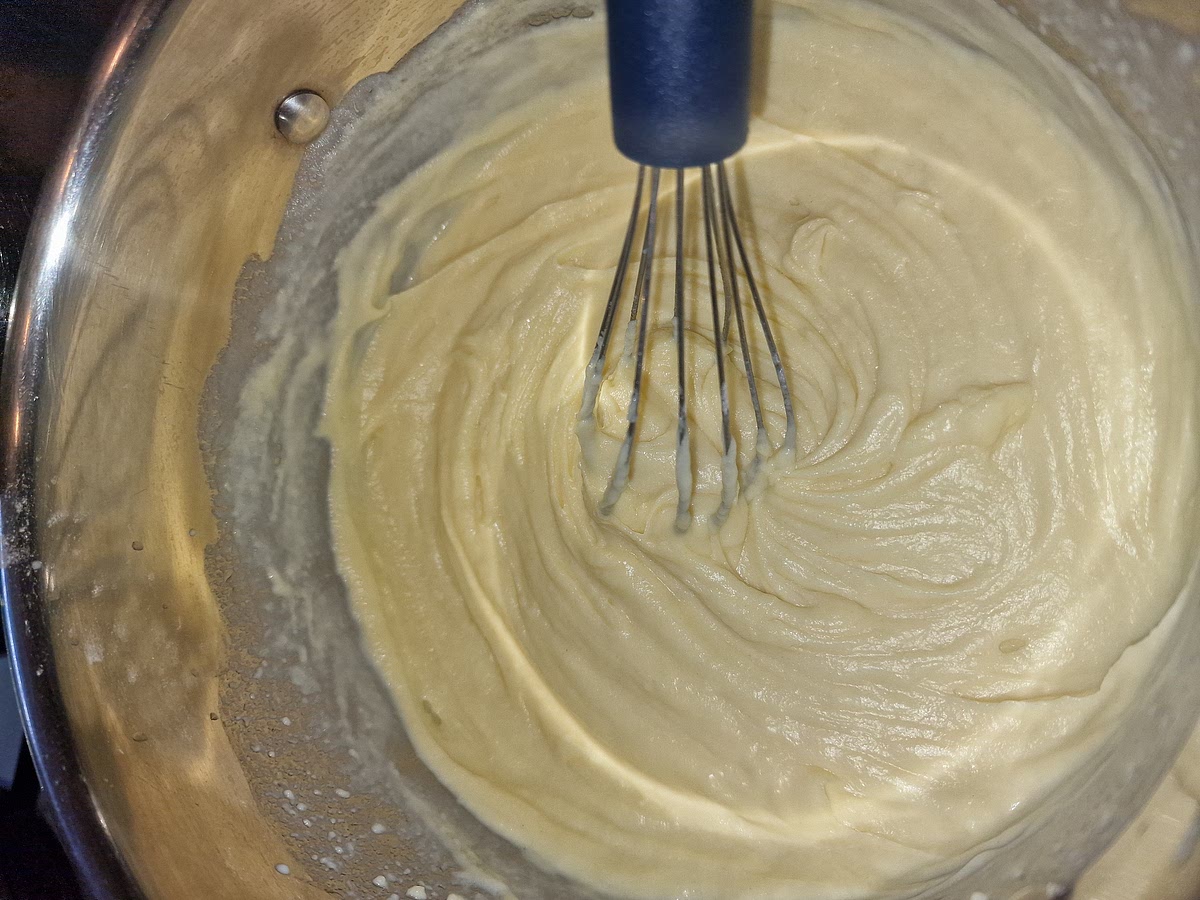
Add flour into the melted butter and stir until you get this thick paste. I use 00 flour but you can use any fine all purpose flour. The better the quality of your flour the better your bechamel will be, that goes without saying.
Step 12
After your butter and flour thickens completely, start adding milk bit by bit while stirring continually. Still on low heat. Eventually you'll get a fairly thick sauce. From now on just keep stirring and adding milk bit by bit until you have your desored amount and thickness.
Step 13
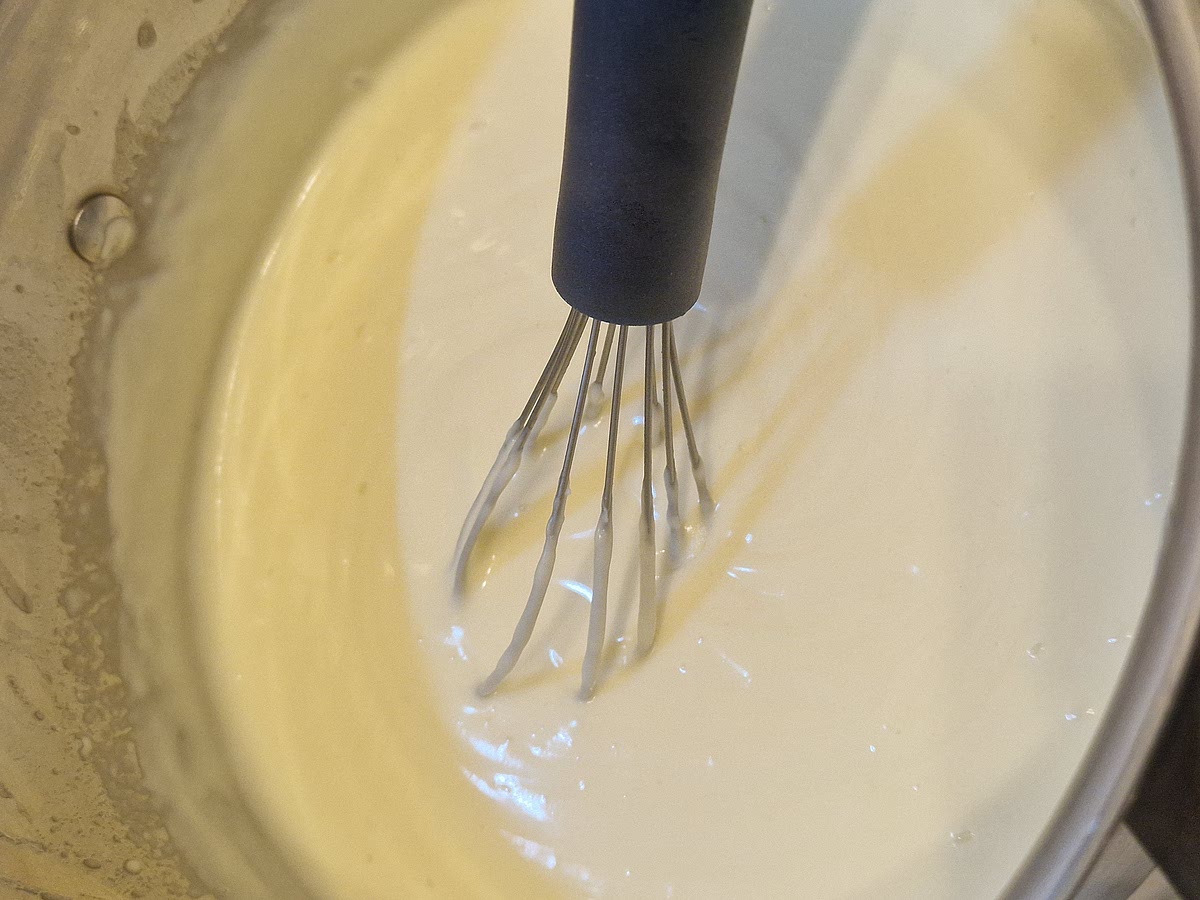
Season your bechamel sauce with grated nutmeg and salt In the end it should look something like this. In the end I like to add a handful of grated parmesan into my bechamel for a bit of extra flavour. Remember, if you add parmesan and the sauce becomes too thick, you can just stir in more milk to bring it back to your desired thickness.
Construction:
Step 14
It's time to construct your lasagne. It is still a pasta dish so we don't want the meat layers to be too thick otherwise it won't hold shape and there won't be enough pasta. Grate your parmesan in advance.
Step 15
Constructing order: it is very important that you start with a thin layer of bolognese first so that your lasagne doesn't stick to the tray. My order is this:
- thin layer of meat
- layer of lasagne sheets (they can overlap a bit)
- thin layer of meat
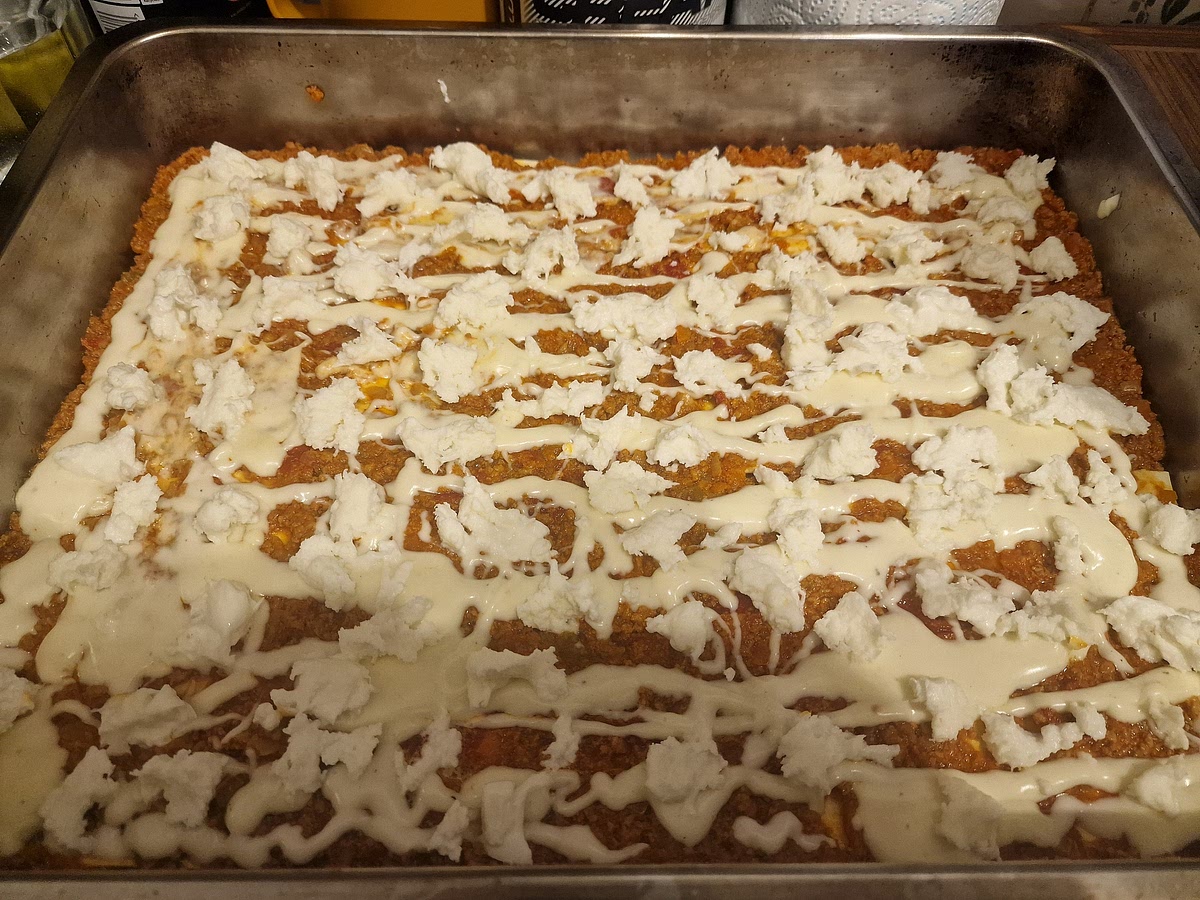
- thin layer of bechamel sauce
- evenly spread fresh mozzarella (I tear off small chunks with my hands and place them around)
- thin layer of grated parmesan (literally just dust it with the grated cheese)
- layer of lasagne sheets
- thin layer of meat... And repeat until you get to the top or run out of ingredients. The important part is to not use too much meat in the layering. Make really just a thin layer, you should still see a bit of sheet underneath the meat in a few spots and that's fine so don't worry.
Step 16
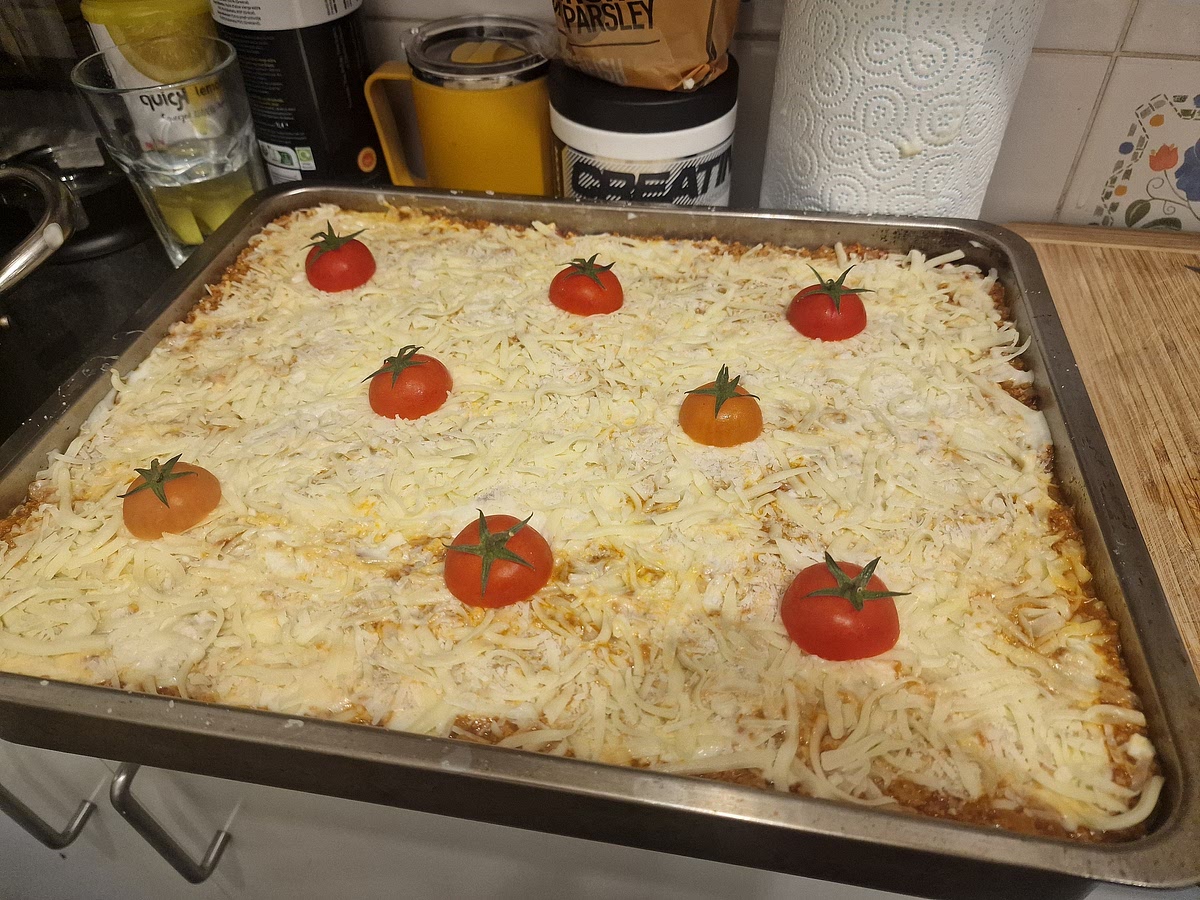
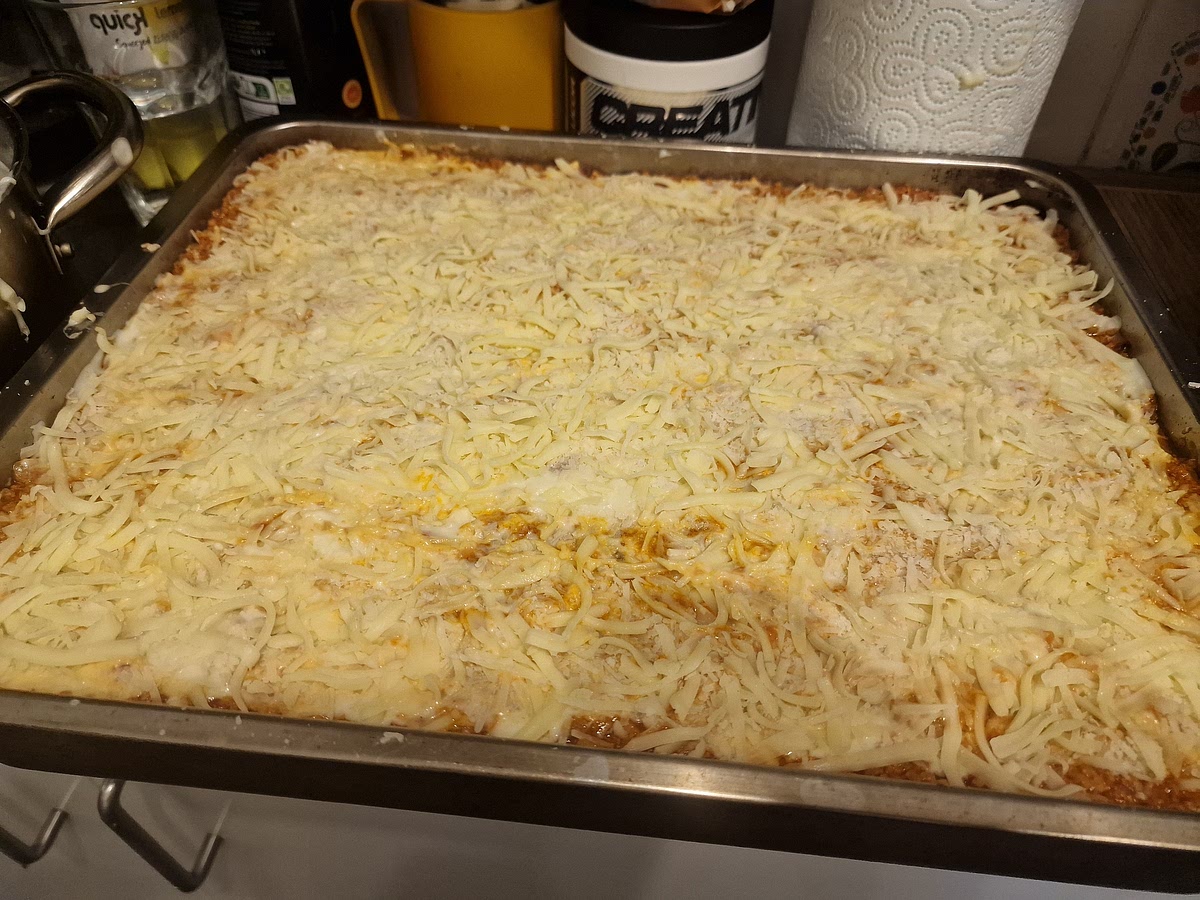
Finishing the construction: After you are done with the last layer of meat you should cover it with the rest of the bechamel sauce, grated parmesan and fresh mozzarella like before. I like to also add a layer of regular grated mozzarella to make it just a bit more cheesy. Then slice cherry tomatoes in half and place the top parts with attached vines on top of your lasagne. This is decorative and adds a bit of extra tomato flavour for a single bite when you're eating.
Step 17
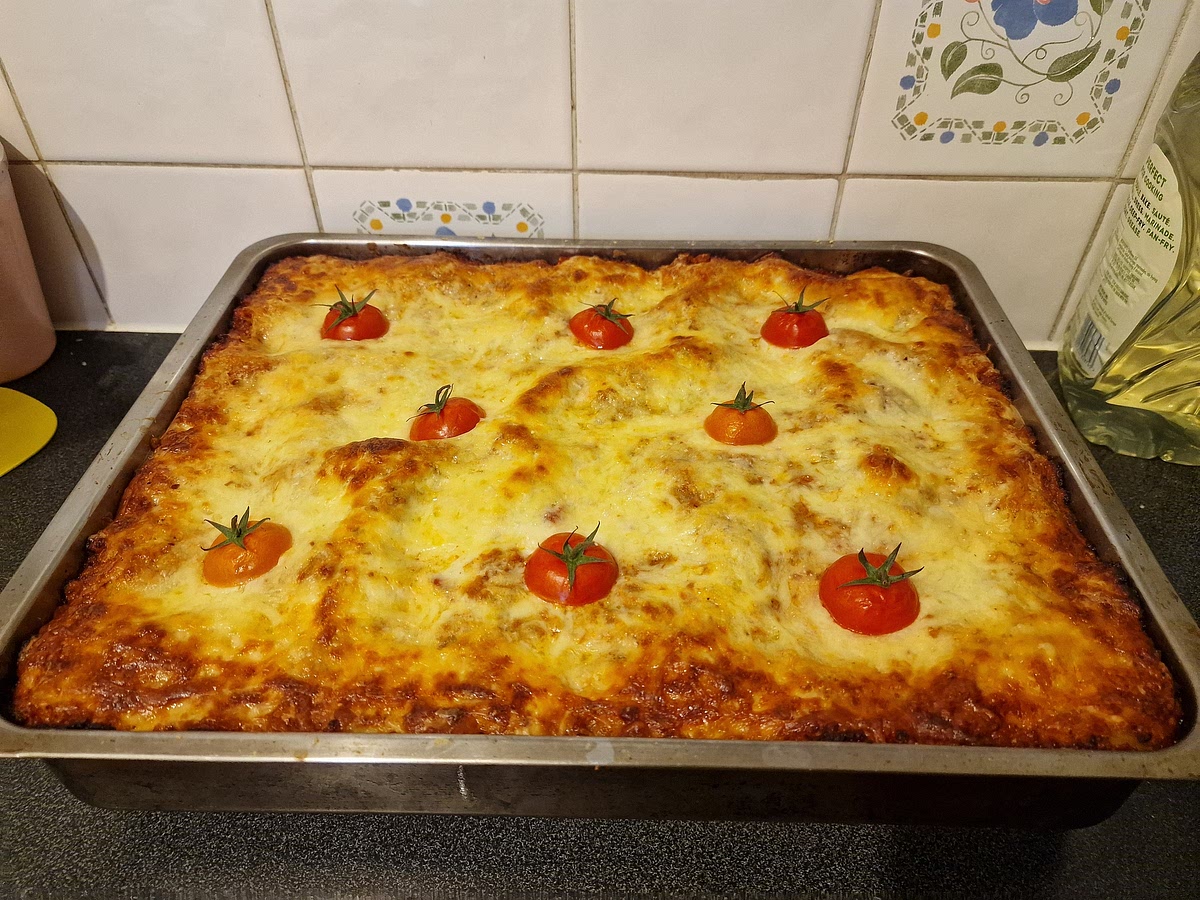
And lastly, pre heated oven (mine is gas so I'm not too sure) to between 180-200°C and let it bake for around 45 min. You do need to keep an eye on it and take it out once your top layer of cheese starts getting brown. Don't burn your cheese! Mine nearly burned when I was making this recipe :D Careful!
Notes
1 liked
0 disliked
Delicious
Fresh
Go-to
Makes leftovers
Moist