By Mary Grace Quigley
Backwards Brötchen (bread rolls)
14 steps
Cook:50min
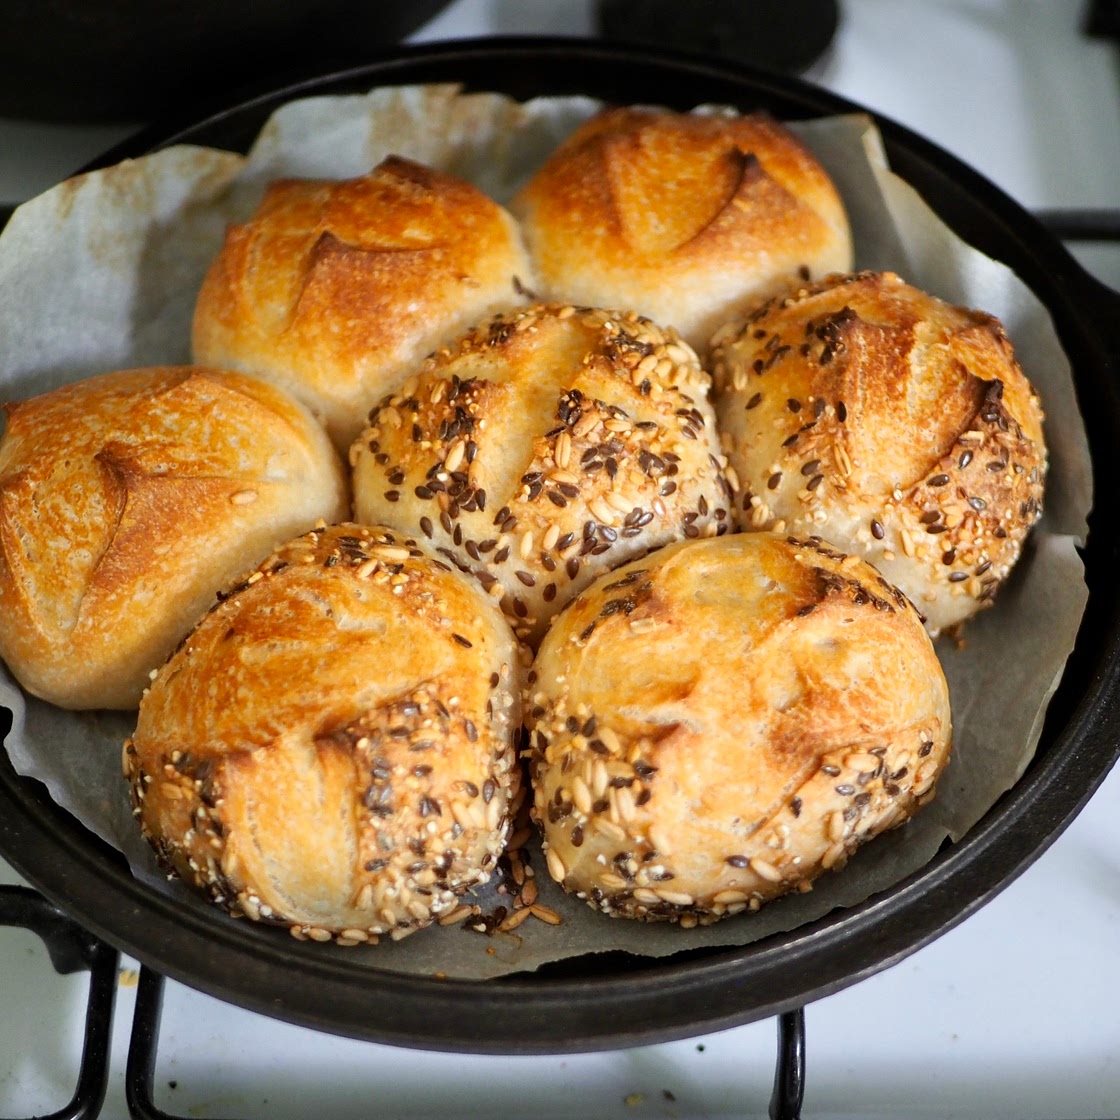
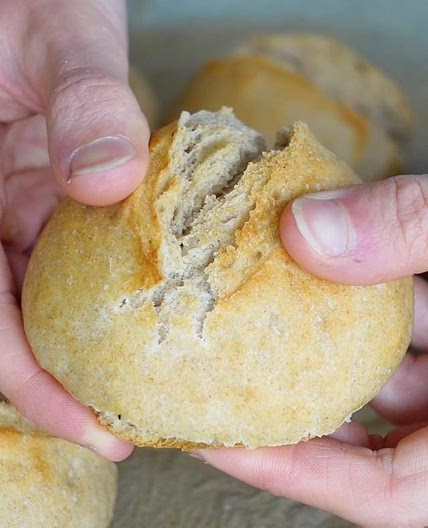
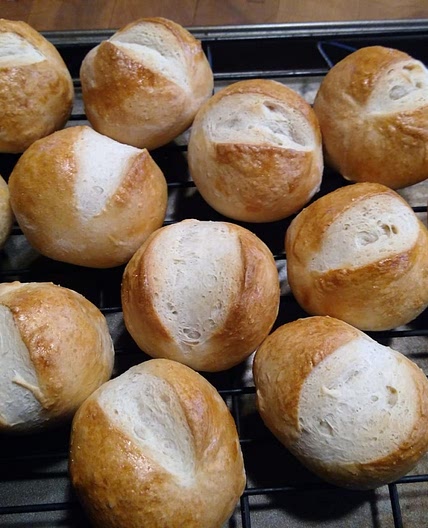
If you have been following my bread journey on social media for a while you will know about my love of bread rolls, possibly, mainly because of my love of the German word for bread roll: Brötchen which is composed of ‘Brot’ = bread and ‘chen’ = little, so a little bread. And these really are little breads. They look astoundingly similar to their larger cousins, normal 750g loaves, but they’re just so small and cute.
And you may wonder why are they ‘backwards’. The Backwards Bread Method is something I use when I want to make bread but I don’t have enough time to ‘look after’ the dough by giving it hourly folds e.g. because I need to sleep, or work. You mix your dough, give it one fold, and then abandon it on the counter. Then you just shape it and bake it about 10 hours later.
It sounds too good to be true, I know, but I promise, it’s not!
Updated at: Thu, 17 Aug 2023 06:32:58 GMT
Nutrition balance score
Good
Glycemic Index
72
High
Glycemic Load
34
High
Nutrition per serving
Calories265.8 kcal (13%)
Total Fat4 g (6%)
Carbs47.4 g (18%)
Sugars0.3 g (0%)
Protein8.2 g (16%)
Sodium444.1 mg (22%)
Fiber3 g (11%)
% Daily Values based on a 2,000 calorie diet
Instructions
Day 1: Mixing the dough
Step 1
Mix together sourdough starter, salt, olive oil and water in a mixing bowl using a dough whisk or a wooden spoon.
Step 2
Add the bakers flour and continue to mix. As the mixture starts to come together, you can switch to mixing with wet hands. Keep going until a shaggy dough forms and no dry flour is visible. Leave covered with a wet tea towel for about 30 minutes.
Step 3
After about 30 minutes, give the dough a fold of your choice. My choice is usually a few coil folds. Fold the dough until it becomes smoother and more cohesive, then return it to the bowl and leave covered with a wet tea towel for approx. 9.5 more hours (now you can go to bed and the dough will do its work while you sleep). See notes on temperature below for help with timing.
Day 2: Shaping and baking
Step 4
The next morning, after about 9.5 hours, tip the dough out of the bowl onto a lightly wet workbench. Using a bench knife, divide the dough into 7 approx. 110g pieces.
Step 5
Shape each piece into a ball, just like you would with a larger loaf by pulling the edges in towards the centre and going around and around until the dough becomes tight. Then flip it over so that the smooth side is on top and use your hands to smooth it further.
Step 6

At this stage if you want to, you can dip the dough ball into some seeds e.g. sesame, linseed or sunflower, or you can leave it totally plain. For seeds, simply spread a few tbsp of seeds (I used Wallaby multigrain mix for these) onto a plate and roll the top side of your dough ball in the seeds so that they stick.
Step 7
Dust the dough balls with flour, including on the bottom.
Step 8

Take your (still cold) Dutch oven and cut a round piece of baking paper to the size of the Dutch oven so that it will fit inside and go slightly up the edges. Place it inside your Dutch oven and put your balls of dough in there too so you can work out a nice way to arrange them. It depends a little on the size and shape of your pot, ideally you want to arrange them in the centre of the pot so they’re not touching the edges of the pot too much. It’s okay if they touch each other: they will be lovely pull apart rolls. Once you’re happy with the arrangement, lift the paper together with the dough balls up, out of the Dutch oven and place onto a plate, cover and put into the fridge.
Step 9
Now put your Dutch oven into your oven and preheat it to 230C for 45 minutes.
Step 10
When your oven is fully preheated, remove the Dutch oven from the oven. Take the dough balls out of the fridge, still nicely arranged on the parchment paper, score a cross into each one, and then drop them, still on the paper into the Dutch oven.
Step 11
Use a little water bottle to give a few sprays of water to the dough and then put the lid on and return the Dutch oven to the oven.
Step 12
Turn the oven down to 220C and bake for 20 minutes.
Step 13
After 20 minutes, remove the lid from the Dutch oven and continue baking for another approx. 20-30 minutes. This time will vary depending on your oven. Keep checking on them every 5 minutes after 20 minutes and take them out when they are golden brown, to your liking.
Step 14
Allow them to cool and then enjoy as a nice lunchtime snack, or a beautiful accompaniment to a festive meal.
View on Mary Grace Bread Newsletter
↑Support creators by visiting their site 😊
Notes
0 liked
0 disliked
There are no notes yet. Be the first to share your experience!
