1/2
2/2
100%
0
By Lazy Diabetic Vegetarian
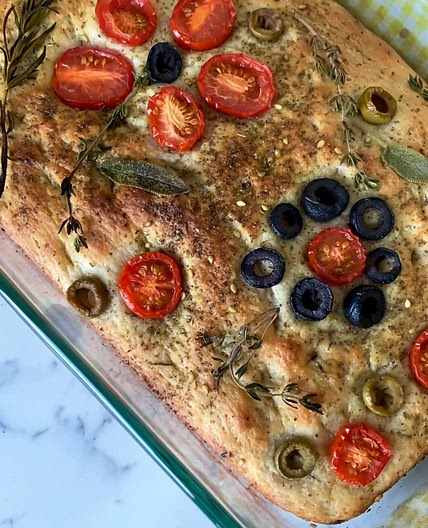
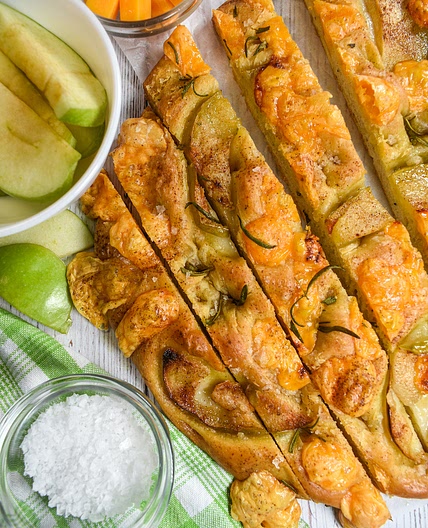
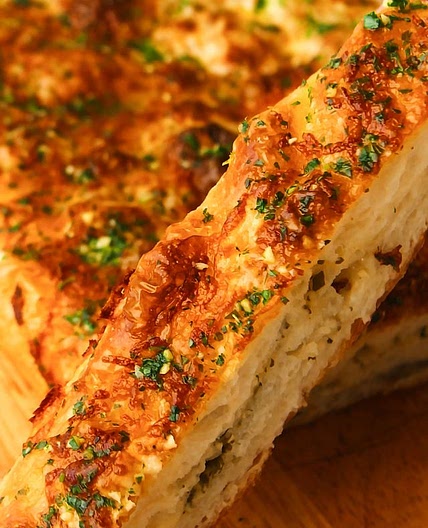
GF Focaccia
7 steps
Prep:1h 50minCook:30min
Updated at: Tue, 07 Jul 2026 12:10:22 GMT
Nutrition balance score
Unbalanced
Glycemic Index
75
High
Glycemic Load
19
High
Nutrition per serving
Calories164.3 kcal (8%)
Total Fat6 g (9%)
Carbs25.4 g (10%)
Sugars0.3 g (0%)
Protein1.2 g (2%)
Sodium209.8 mg (10%)
Fiber2.1 g (7%)
% Daily Values based on a 2,000 calorie diet
Ingredients
12 servings
Dry Mix
350gGluten Free Flour
3 tsppsyllium husk powder
1 tspdried basil
optional
½ tspgarlic powder
optional
1 tspsea salt
Yeast Mix
For Pan and Topping
Instructions
Step 1
Activate the Yeast - Pour the warm water into a jug and stir in the sugar until dissolved.Sprinkle the Tandaco yeast over the top, stir briefly, and let it sit for 5–7 minutes.It is ready when a thick, frothy, bubbly layer forms on top.
Step 2
Mix the Batter - In a large bowl, thoroughly whisk together the gluten-free flour, psylliam husk, dried basil, garlic powder, and salt.Pour the frothy yeast mixture and 2.5 tablespoons of olive oil into the flour. Stir vigorously with a butter knife or spatula for 2–3 minutes. Note: The mixture will look like a thick, wet cake batter or cookie dough rather than a traditional bread dough ball. This is completely normal for gluten-free baking!
Step 3
Pan and Rise - Drizzle 2 tablespoons of olive oil into the bottom of your 27.5 x 17.5 cm metal brownie pan. Use your fingers to coat the bottom and all the way up the sides.Scrape the wet dough directly into the oiled pan.Wet your fingers with water or a bit of oil, and gently smooth the dough into a flat, even layer right to the edges.Cover loosely with a damp tea towel and leave it in a warm spot for 60 minutes until it looks puffy.
Step 4
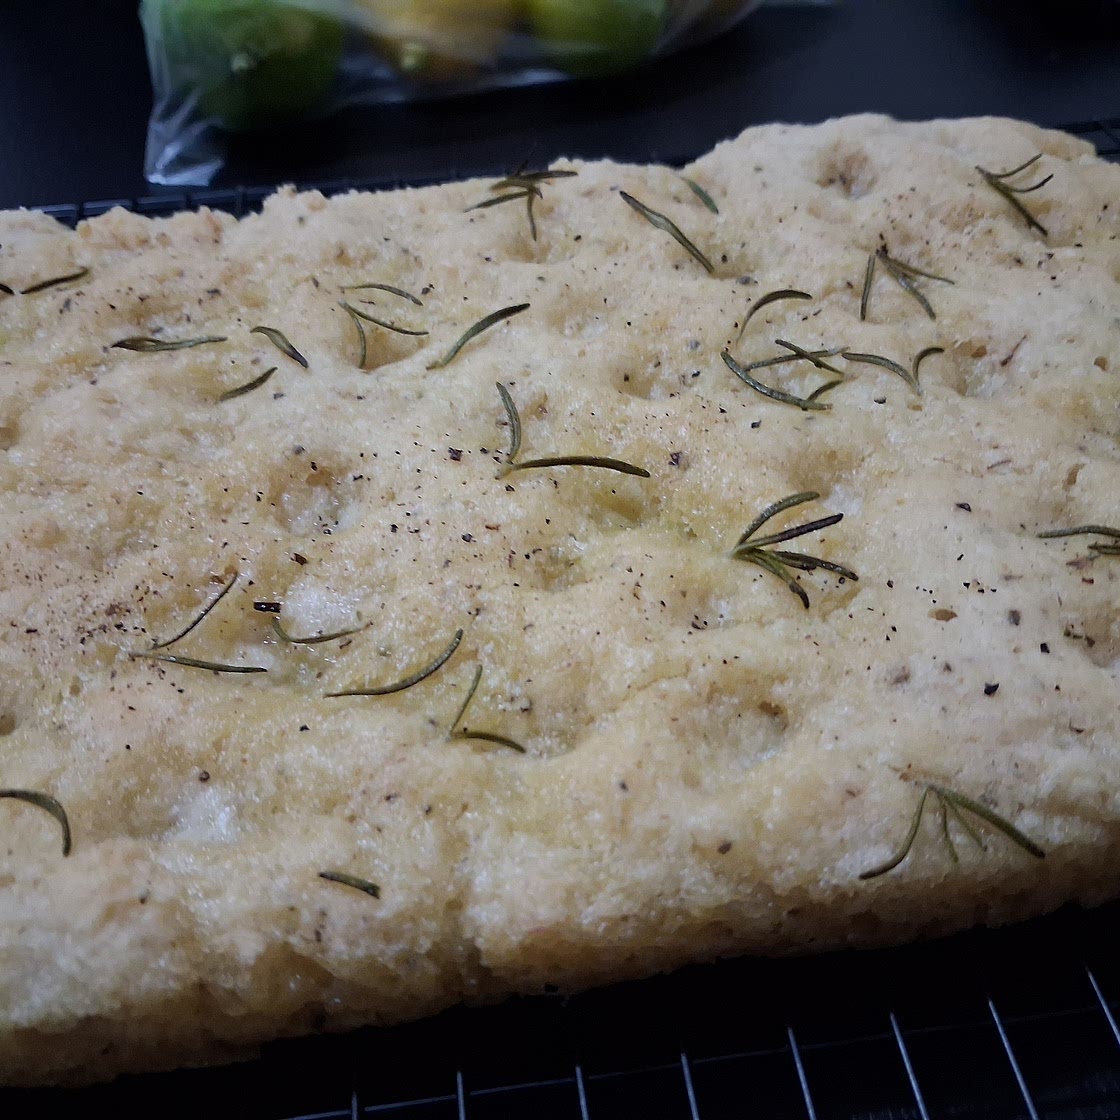
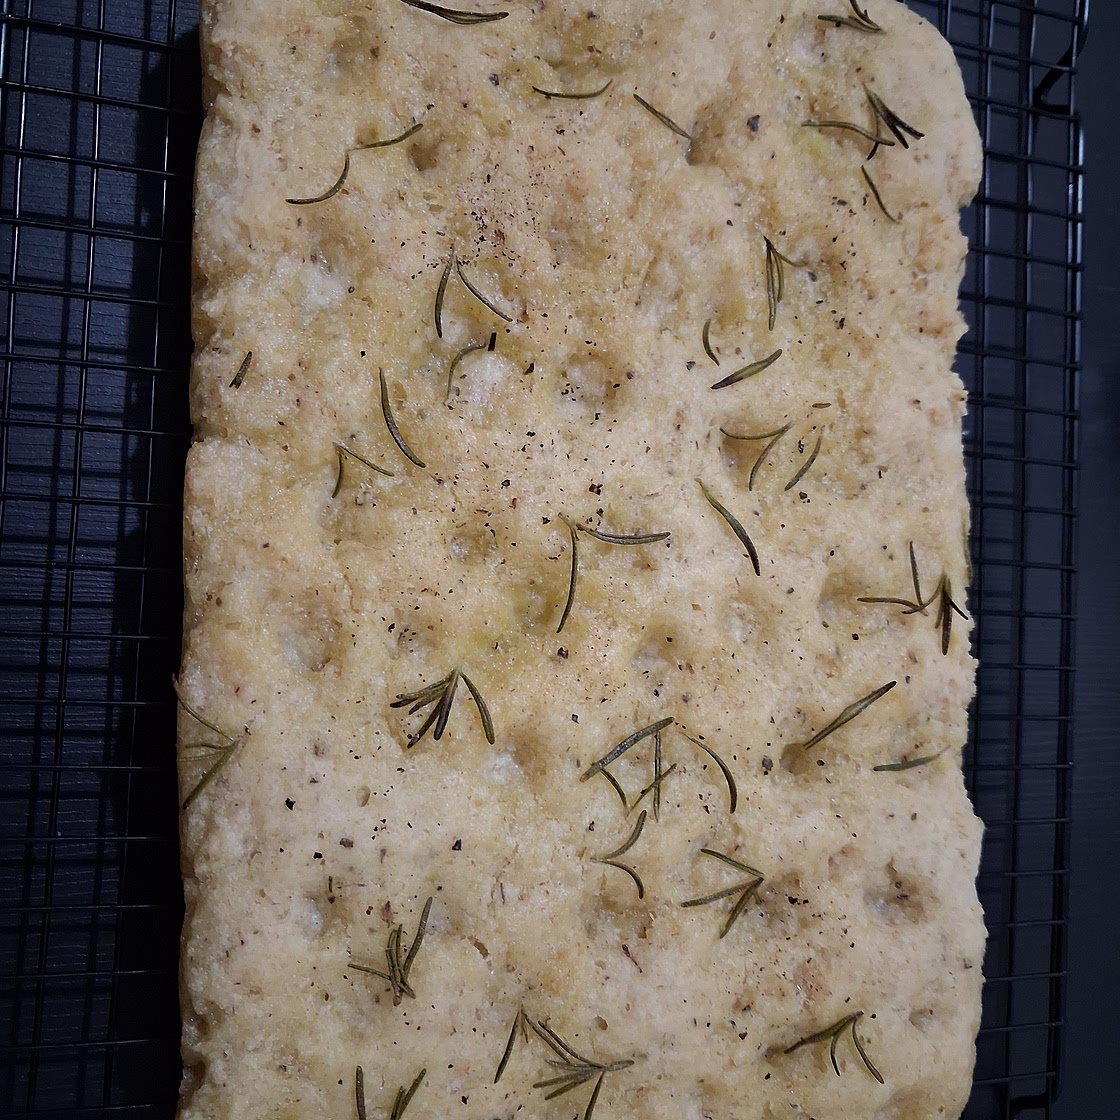
Dimple and Bake - Preheat your oven to 210°C (Fan-forced) or 220°C (convection) .Drizzle another 1–2 tablespoons of olive oil over the top of the risen dough. Oil your fingers and press straight down into the dough to create deep dimples. Sprinkle lightly with crushed sea salt and very finely chopped rosemary (you can leave the rosemary off one half for picky eaters). Bake for 20 minutes on the middle rack then move to the top. Check at 22/27 minutes—it is done when the top crust is crunchy (you can tap with the back of a spoon to check). When I used the aldi flour it didn't get very brown so its best to check like this. Remove from the tin immediately and cool on a wire rack so the bottom stays crispy.
Reheating
Step 5
To warm the focaccia before your gathering so it tastes freshly baked with a crispy crust and soft middle, use your oven. Avoid the microwave, as it will make gluten-free bread rubbery and soggy.
Step 6
The Best Oven Method (Best for a Crispy Crust)Preheat your oven to 180°C (Fan-forced).Spritz or brush the top of the focaccia very lightly with a tiny bit of water or a drizzle of olive oil (this stops it from drying out).Place the bread directly on the oven rack, or on a baking tray, for 5 to 8 minutes until it is warmed through and the crust crisps up again.
Step 7
The Foil Method (Best if you want it Extra Soft)If the children prefer the bread to be completely soft rather than crunchy, wrap the entire focaccia loosely in aluminium foil before putting it in the oven at 180°C for 10 to 12 minutes.
Notes
1 liked
0 disliked
Crispy
Delicious
Fresh
There are no notes yet. Be the first to share your experience!