1/2

2/2
100%
2
By Mama Linda
Easy Napa Cabbage Kimchi
13 steps
Prep:1h 30minCook:30min
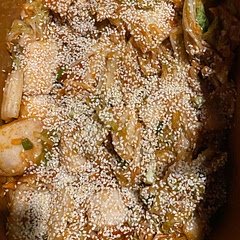
Kimchi Series Part 3. Easy Napa Cabbage Kimchi! This is a classic and you’ve got to save this one. Nothing beats homemade kimchi and this recipe is easy to follow and fool-proof! Kimchi is trending for good reasons: it’s delicious, easy to pair with your favorite foods, healthy (full of nutrients) and healing ( full of living prebiotics and probiotics). Enjoy!
Updated at: Thu, 17 Aug 2023 06:35:23 GMT
Nutrition balance score
Unbalanced
Glycemic Index
40
Low
Glycemic Load
4
Low
Nutrition per serving
Calories45 kcal (2%)
Total Fat0.3 g (0%)
Carbs9 g (3%)
Sugars3.6 g (4%)
Protein2.8 g (6%)
Sodium3505.3 mg (175%)
Fiber2 g (7%)
% Daily Values based on a 2,000 calorie diet
Ingredients
24 servings
Rice Slurry
Seasoning
¾ cupGarlic
1 cuponion
1 TbspGinger
½ cupFish sauce
or soy sauce
¼ cupSalted shrimps
1 ½ cupshot pepper flakes
Korean, less if you prefer mild
Veggies
Instructions
Step 1
Cut napa cabbage in quarters, discard core, then cut into bite-size.
Step 2
Give it a light wash and drain.
Step 3
Add salt and mix. Let sit for 90 minutes, turning every 30.
Step 4
Cabbage will release water. Rinse and drain with cold water 3 times.
Step 5
In a sauce pan, combine water and glutinous rice flour.
Step 6
Bring to a boil. Simmer for 5 minutes, stirring frequently.
Step 7
Add sugar. Remove from heat. Stir to dissolve, about 1 minute. Let cool completely.
Step 8
In blender jar, add garlic, onion, ginger, fish sauce and salted shrimps. Blend till smooth.
Step 9
Combine cabbage, seasoning, rice slurry, Korean hot pepper flakes, radish, green onions and garlic chives. Mix well.
Step 10
Pack kimchi tightly in a food safe container, press down to remove as much air as possible. Leave a little space on top. Close the lid.
Step 11
It’s ready to eat right away. Or you can let sit and ferment in room temperature for 1 -2 days (depending on the temperature and how sour you prefer) then store in the fridge.
Step 12
Cabbage will release liquid and if left in room temperature, you will see bubbles in the first few days. It’s the sign of successful fermentation. You may or may not need to burp the jar (open the lid quickly and close again) to release excess gas. Press down kimchi to make sure every piece is immersed in liquid before storing in the fridge.
Notes
Step 13
Before making kimchi, clean all surface, and tools. I recommend using dish soap and hot water then dry thoroughly.
View on mamalindacooks
↑Support creators by visiting their site 😊
Notes
5 liked
0 disliked
Crispy
Delicious
Easy
Fresh
Go-to
