By jonbrowne2
The Best Butter Chicken — Just Kitchin
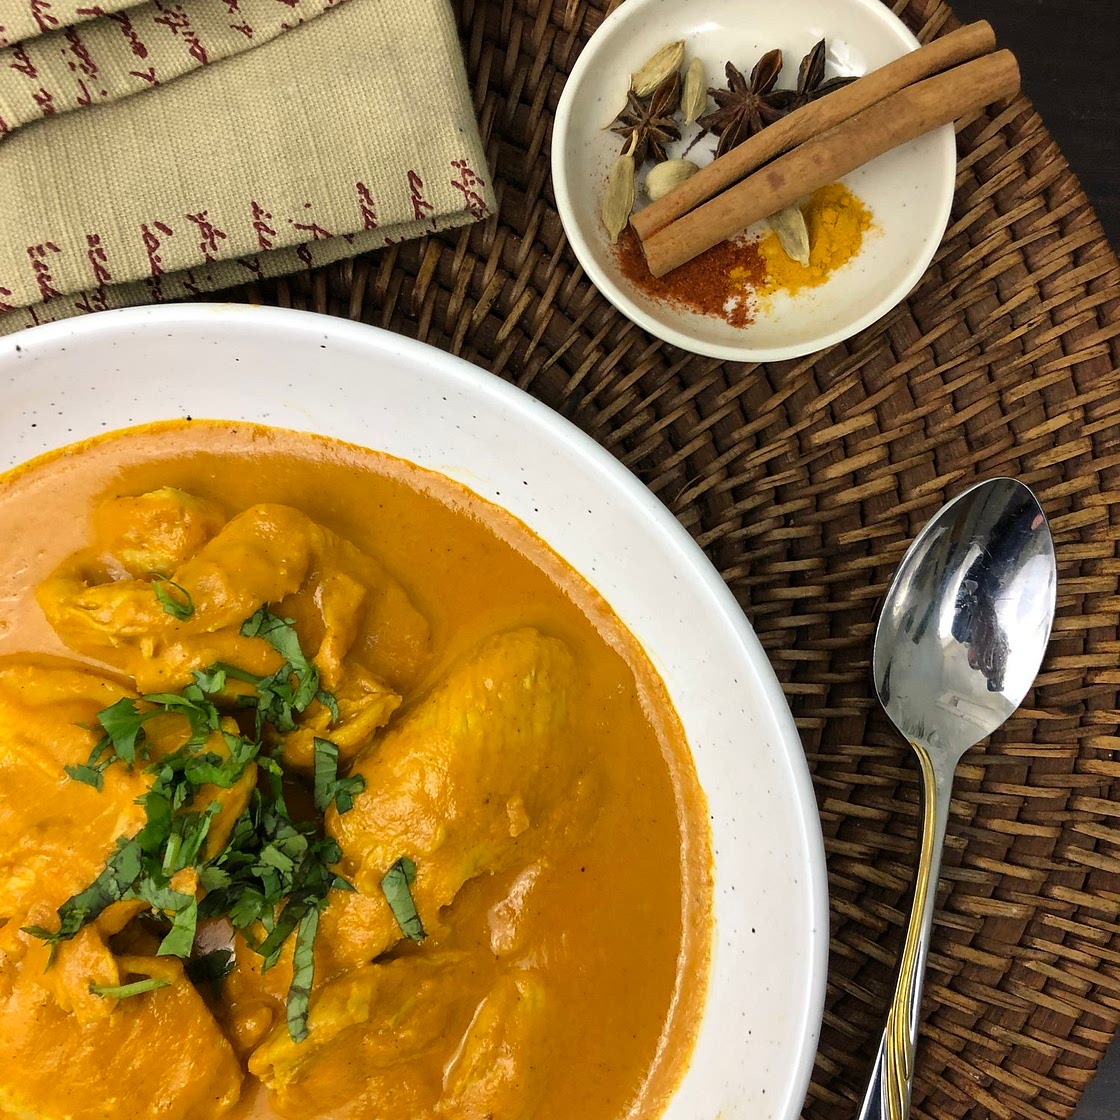
The. Best. Butter. Chicken. Is this subjective? Probably. Is this the best butter chicken I’ve ever had? Most certainly. Will it be the best butter chicken you’ve ever had? Perhaps. Follow this guide, use your instincts and taste buds, put on some music, have fun and impress yourself and your frien
Updated at: Thu, 17 Aug 2023 07:36:39 GMT
Nutrition balance score
Great
Glycemic Index
24
Low
Glycemic Load
16
Moderate
Nutrition per serving
Calories759.8 kcal (38%)
Total Fat45.3 g (65%)
Carbs67.6 g (26%)
Sugars9.6 g (11%)
Protein38.3 g (77%)
Sodium694.8 mg (35%)
Fiber28.6 g (102%)
% Daily Values based on a 2,000 calorie diet
Ingredients
4 servings
butter
chicken tastes
3 partscoriander
2 partscumin
1 partred chili powder
0.5 partturmeric
3 partcinnamon
3 partfennel
or anise
2 partscardamom
2 partsblack pepper corn
1 partclove
1 partnutmeg
or mace
3 clovesGarlic
large
Salt
to your taste
2 poundsChicken
I’m usually a thigh guy, but I like chicken breast for this recipe
0.25 stickButter
to, but realistically, the dish tastes the best after adding upwards of 3/4 stick
¼ cupCream
start with a and potentially add more from there, You want a nice orange hue
0.3 x 28 ozcan of tomatoes
It’s tempting to add the whole thing, but there is definitely such a thing as too much tomato in a dish like this
1 tspTomato paste
too much tomato is a thing
1Onion
medium
3 clovesGarlic
large
Ginger root
I find ginger can easily get too intense, so I add about a teaspoon of grated ginger peel it with a spoon
1 pinchFenugreek Leaves
Sugar
but, Spoiler
Salt
to your taste
1 TspSugar
Instructions
Step 1
1) Heat up some fat. I used vegetable oil. If you want to be super authentic, use ghee. Hell, use bacon fat even.
Step 2
2) Fry your tomato paste.I love this step. I use it for pretty much all tomato-based sauces. It’s such a quick an easy way to add some serious depth of flavor to your sauce. Cook it until it reaches a deep mahogany color. his the maillard reaction working its magic. As the raw tomato paste darkens in color, flavor molecules rapidly change conformation and introduce complex, savory flavors that will shine oh-so brightly in the final product.
Step 3
3) Salt your chicken. You could probably wait until later for this, but I like to give the chicken and salt sometime to get to know each other. Salt literally dissolves and penetrates throughout the entire cut of meat, improving flavor and moisture retention. You might be familiar with a “brine”; this is the same concept sans the water.
Step 4
4) Fry your aromatics. Onion goes in first. I personally like to cook them pretty aggressively. Once the onions start turning dark in color, add your garlic and ginger. The reason we wait on these guys is because they are pretty high in sugar and burn fairly easily.
Step 5
5) Bloom your spices. Add your spices and allow them to cook for a few seconds. The flavor compounds of ground spices are super soluble in oil, especially when the oil gets hot. As the spices sizzle, the oil will change color and an exotic scent will fill your kitchen. This is called “blooming” your spices, and it is one of my favorite cooking vocabulary words - it just sounds so elegant.
Step 6
6) Tomatoes. Adding the cold/wet can of tomatoes will stop the cooking process in the pot, preventing the spices from burning. Cook the tomatoes down a bit. Evaporating the liquid off will allow the tomatoes to mingle with your other ingredients, while also concentrating the flavor and adding body to the sauce.
Step 7
7) Butter and Cream. Add a lot of both. You will be surprised about how much is actually needed to make it taste how it would at your local Indian restaurant. Up to this point, all of the ingredients have been acidic (tomatoes) and bitter/pungent/spicy (your spice blend). Cream and butter will tip the scales the other direction, providing a subtle sweetness along with a luscious, smooth mouthfeel that gives the dish its name.
Step 8
8) Blend. I love this step so much. It turns your tasty-yet-chunky sauce into a velvety smooth gravy of joy and comfort. This is also the step where I do most of my tasting and adjusting - I literally put my spoon in the blender, taste it, add what I think it needs, and blend it again - rinse and repeat. I added a lot of extra salt and butter here, and I’m assuming you’ll probably need to as well. Also, this is where I perform one of my secret techniques for certain stews and sauce - I’m going to call it “tempering” our sauce. It all started with me still being disappointed with the sauce even after adding all the extra butter and salt (I have very high standards). After a few minutes standing over my blender pondering about what was missing, I concluded that it tasted too… cooked… too “one note”. I guess it needed more acid, but I knew a splash of lemon juice wouldn’t totally fix my issue. At this point in the process, all of our vegetables in the pot have been cooked to death. While this does bring out complex and desired flavors, it also leaves behind some of the original flavors that the fresh produce brought to the table. To help bring balance to the force, I added small amount of uncooked tomato and even smaller amount of raw onion (not even a teaspoon) to the blender and gave it a few pulses. Tasting it literally made me smile. It’s such a simple little trick, but the affect was absolutely noticeable. The fresh tomato added some acid and helped round out the savory notes in a way that related back to the base we laid with the tomato paste, while the onion brought a touch of some much needed bitterness and complimented the more “musty” spices such as coriander, cumin, and turmeric.
Step 9
9) Fenugreek/Kasoori Methi. This stuff is cool. It looks like any other dried herb, but it brings on a totally wack-yet-subtle, almost maple-y aroma when added to it’s perfect accompaniment: cream based curries. Even after a pinch or two, it adds a very noticeable X-factor to the dish, making it much more similar to the authentic curries you get out of a great Indian restaurant. As I previously mentioned, fenugreek has notes of maple, and this is why I personally chose to lightly sweeten this dish with maple syrup rather than sugar. You don’t want to notice it; you want just enough to add a subtle sweetness that both balances your seasoning and also accentuates the flavor of the fenugreek.
Step 10
10) Chicken joins the party. Here we just want to turn the heat down, and gently poach the chicken. The lower and slower the better. You could sear/grill the chicken before-hand, but I think the delicate texture of poached chicken breast matches perfectly with the smooth, unassuming sauce. Once the chicken is cooked, taste and adjust for seasoning one last time.
Step 11
11) Eat. Maybe garnish with cilantro, maybe eat with rice, definitely eat with naan. Do what makes you happy. Enjoy.
View on justkitchin.com
↑Support creators by visiting their site 😊
Notes
0 liked
0 disliked
There are no notes yet. Be the first to share your experience!
