By Hailey
Buckingham Palace’s Royal English Scones
17 steps
Prep:1h 10minCook:12min
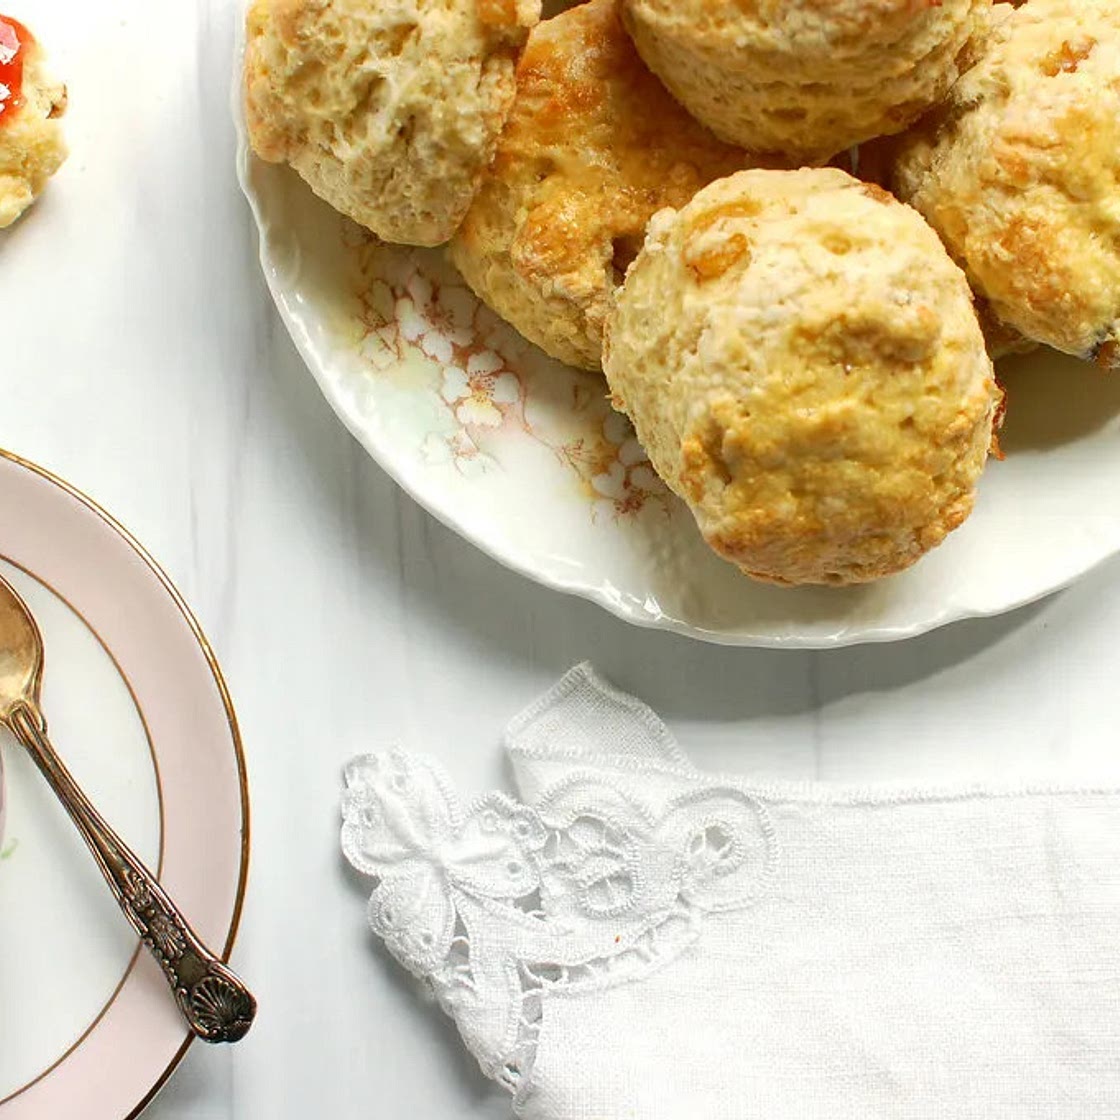
The only thing better than a good cup of tea is a good cup of tea paired with a perfect scone. And if you are going to bake scones, why not bake the very best? In case you are not invited to royal tea at the palace this week, you now have this very official, very royal, best English scones recipe. Also a great coronation food.
Updated at: Thu, 31 Aug 2023 19:53:45 GMT
Nutrition balance score
Unbalanced
Glycemic Index
71
High
Glycemic Load
33
High
Nutrition per serving
Calories261.8 kcal (13%)
Total Fat8.3 g (12%)
Carbs40.4 g (16%)
Sugars8 g (9%)
Protein6.2 g (12%)
Sodium299.7 mg (15%)
Fiber1.1 g (4%)
% Daily Values based on a 2,000 calorie diet
Ingredients
12 servings
Instructions
Step 1
If using, soak the raisins in hot water for 30 minutes. Drain before adding to the recipe.
Step 2
PRO TIP: Why soak the raisins? Two reasons. One, it softens them, which tastes better in the finished recipe than a hard, tough little raisin. Secondly, it helps keep the scone dough moist. Raisins naturally want to rehydrate. By letting them soften I water, the hard raisins pull moisture from water, not the scone dough.
Step 3
Mix the dry ingredients (flour, baking powder, pinch of salt), butter and sugar together in a large bowl until crumbly. Work the butter into the dough a bit, as you would pie dough.
Step 4
In a separate small mixing bowl, whisk two eggs and the buttermilk together. Stir the liquid into the crumb mixture. Add the raisins, if using, and mix until evenly distributed. Continue to gently knead the dough by hand just until smooth.
Step 5
PRO TIP: Do not overmix or knead the scones, as this could make the scones a bit tough and bready instead of tender.
Step 6
Remove the dough from the bowl onto a clean countertop lightly dusted with flour. Lightly dust the top of the scones with flour. Flatten the dough to a 1” thickness and cover. Leave to rest for 30 to 45 minutes in the refrigerator. Resting the dough allows the gluten to relax. This helps achieve a tender, flaky scone.
Step 7
PRO TIP: You could simply use the palm of your hand to flatten the dough. But I suggest a rolling pin for a more even result. Roll from the center out, and rotate the dough as you go to prevent sticking.
Step 8
Remove the dough from the refrigerator and cut to the desired shape using a round biscuit cutter.(Note: I used standard 2-inch and 2 1/4-inch round cutters. The original recipe did not specify, but this is standard. If you use a 2-inch cutter, I suggest making the height a little shorter.)
Step 9
Preheat the oven to 400°F (205°C). Cover and rest the scones for another 20 minutes in the fridge. Whisk the third egg and gently egg wash the top of the scones with a pastry brush.
Step 10
PRO TIP: If you do not have a pastry brush, just use your fingers.
Step 11
Bake on baking sheets for around 12 to 15 minutes, give or take depending on your cutter size, or until light golden brown. Leave at least 1 1/2" of space between each scone. Cool on a wire rack before serving warm or at room temperature with jam and clotted cream.
Step 12
PRO TIP: These will bake best if you bake them one sheet at a time, or at least rotate the baking sheets top to bottom, front to back halfway. If you have a convection setting on your oven, adjust the temperature to 375°F (190°C) and bake for about 10 to 12 minutes.
Step 13
Notes
Step 14
This best English scone recipe was adapted very carefully from the official Buckingham Palace recipe for tea scones.
Step 15
That said, if you would like to simplify things a bit, my effort-saving trick here is to roll the scones out and cut them with the biscuit cutter at the same time, instead of two separate chillings. Place the scones on prepared baking sheets, cover, then let them rest in the fridge for a full hour to hour and a half. Then just egg wash them and pop them in the oven.
Step 16
These English scones can be rolled, cut, and frozen in advance in an airtight container, such as a freezer bag. Just freeze the scones on a baking sheet first before putting the scones in the airtight container into the freezer, so they keep their shape and don't smush.
Step 17
You can bake frozen scones exactly as you would chilled scones, directly from frozen. They may just take an additional minute to bake.
Notes
1 liked
0 disliked
There are no notes yet. Be the first to share your experience!
