1/4

2/4

3/4

4/4
77%
0
By Lacey (Lace Bakes)
Sourdough Starter: Recipe and Guide
35 steps
Prep:170h
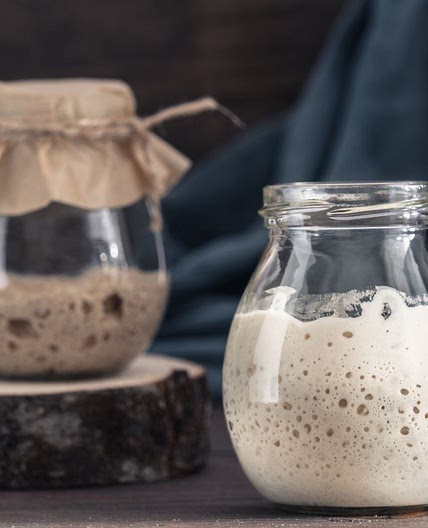
Building a sourdough starter isn't difficult at all, it just takes time, patience and consistency. I hope this recipe and guide will help to hold your hand through the process!
There are a lot of different recipes for building a sourdough starter out there that will explain every scientific aspect of whats happening inside your starter jar each day. This recipe and guide is not that. This guide will outline a simple method to build yourself a sourdough starter that is usually ready to use by day 7-10. Every time I've used this method, I was baking with my starter by day 7. But be warned, it can take up to two weeks as there are a lot of factors involved: environmental temperatures, the flour you use, the exact wild yeast that floats around in your particular home...all of these will factor in to how long it takes to get your starter nice and strong.
Updated at: Thu, 17 Aug 2023 10:32:10 GMT
Nutrition balance score
Uh-oh! We're unable to calculate nutrition for this recipe because some ingredients aren't recognized.
Ingredients
1 servings
Equipment
Instructions
Day One -Initial Mix
Step 1
In one of your jars, mix together 60g white bread flour and 60ml of slightly warm water. Mix with your little spatula until no dry patches of flour remain - give it a really good stir to mix lots of air in.
Step 2
Scrape down the sides of the jar so they're as clean as possible. Place lid on top of jar, but do not screw on tightly - you want a bit of air to be able to get in. Leaving the lid slightly ajar is fine.
Step 3
Place the jar in a warm spot in your home - doesn't matter if it's not in your kitchen. Mine goes near our radiator in our dining room.
Day Two - Stir To Incorporate More Air
Step 4
About 24 hours later, grab your jar from its warm spot. Remove the loose fitting lid. With your little spatula, give the starter a really good mix. Really try to incorporate as much air as you can into the flour.
Step 5
Scrape down the sides of the jar so they're as clean as possible and replace the loose fitting lid and put it back into it's warm spot in your home.
Day Three (AM)- Discard and Feed
Step 6
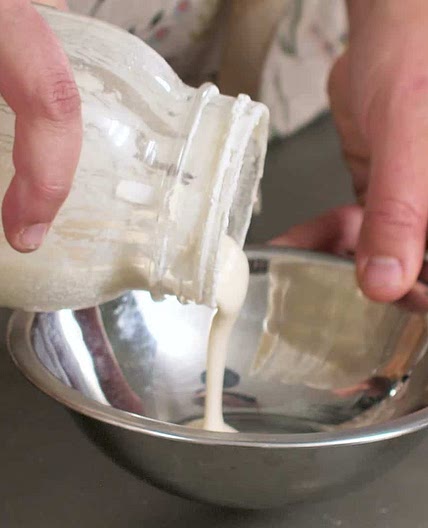
Remove the lid off of the starter and give it a really good stir. If a liquid layer has appeared, just stir this into the starter until the liquid is evenly incorporated.
Step 7
Now, decant 60g of the starter into a clean jar. Add 60g white bread flour and 60ml slightly warm water into the jar with the starter, and mix well with your little spatula until no dry patches of flour remain. Scrape down the sides of the jar, so it's as clean as possible, replace the lid loosely and then place your large rubber band around the jar - you want he line of the rubber band to line up with the top surface of the sourdough starter. The rubber band will help you to gauge how much the starter is growing from now onwards.
Step 8
Place back into the warm spot in your home, and leave it undisturbed for 12 hours.
Day Three (PM) - Discard and Feed
Step 9
For this feed, you are going to start using your 'discard pot', which can be any lidded container you have on hand that will store a decent amount of sourdough discard. You will always pour off the excess sourdough from the starter jar before you feed it, and this discard can be stored in your discard pot in the fridge for future use in recipes that call for sourdough discard (pancakes, crackers, cookies, cake, flatbreads etc). You can use a lidded bowl, lidded container or even a large lidded jar.
Step 10
Grab your starter jar, take the lid off, give it a really good stir. Now, using a digital scale, weigh 120g of the starter into the discard pot. You will be left with 60g of starter in the jar.
Step 11
Add 60g white bread flour and 60ml slightly warm water into the jar with the remaining 60g of starter. Mix well until no dry patches remain.
Step 12
Scrape down the sides of the jar, make sure your rubber band lines up with the top of the sourdough and replace the lid loosely.
Day Four onwards until your starter is ready to bake with (AM + PM)
Step 13
From day four onwards until your starter is ready (anywhere from Day 7- 14), continue twice daily discard/feeds as detailed in the 'Day Three (PM)' step above. Space your feeds roughly 12 hours apart from one another.
Step 14
Discard 120g grams of starter into discard pot, feed with 60g white bread flour and 60ml slightly warm water. Always remember to scrape down the sides of your jar, make sure the rubber band is lined up with the sourdough starter, and leave lid fairly loose.
Step 15
You don't need to switch into a clean jar for each and every feed, but do switch to a clean jar at least once every other day or so as they can get quite gunky and the flour can start to dry and become crusty in the lid area. To do this, place your clean jar on the scale, weigh out 60g starter and then feed in the new jar as usual. Discard the remaining starter in your old jar to the discard pot. This will take the place of one of your normal feeds.
DAY-BY-DAY OBSERVATIONS
Step 16
The following describes what you might expect to notice on each day of the starter building process. If yours doesn't match up exactly, do not worry...just keep following the process as outlined above.
Day Two Observations
Step 17
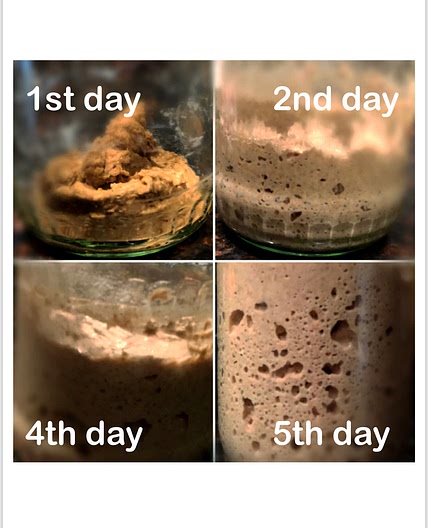
There will probably be a few little bubbles starting to appear already, and the flour mixture will be runnier than it was when you mixed it the day before.
Day Three Observations
Step 18
In the morning, there will probably be lots of bubbles present at the surface of the starter. It may smell sort of funky or cheesy or unpleasant. You may notice that it has formed a layer of alcohol or a hooch - the mixture might look like it has split a bit. All of this is fine and part of the process! Your starter may start to grow above the rubber band line after feeds.
Day Four Observations
Step 19
Starter will probably have grown overnight since the evening feed. There will probably be lots of bubbles now, and maybe still a line of alcohol (hooch) running through it. Tiny little spit-like bubbles at the surface means it is HUNGRY. Starter may still smell funky, cheesy, unpleasant still. This is all normal!
Day Five Observations
Step 20
Starter may start to double in size between feeds. You'll probably notice lots of bubbles at the surface by now, some may be trapped inside the starter which can be observed by looking at the side of the jar. Starter may be starting to look a bit thicker, and if you had noticed a hooch split line, it may have disappeared by now. Or it might still be there. Or you may have never had one at all. Every starter is different...
Day Six Observations
Step 21
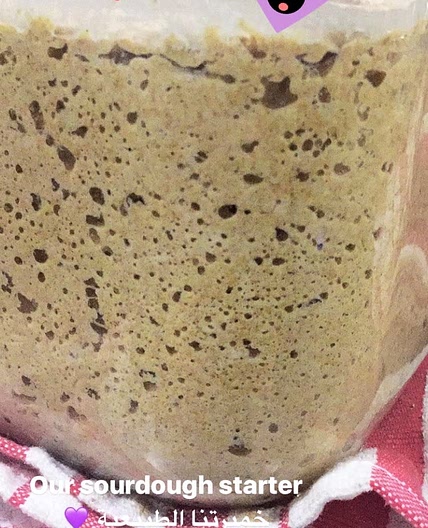
You may notice huge changes in your starter between day five and six. The starter is probably starting to become stronger, thicker, more stable. It can likely hold its peak for much longer without showing signs of hunger. It might be starting to peak at its highest point well before the 12 hour feed mark. You can probably see bubbles at the side of jar, and larger bubbles just under the surface on the top - it’s probably starting to be fluffy and stretchy, less liquid than it was before. These are all signs of strength. If your starter hasn't reached this point yet, do not give up. Keep following the twice feed schedule. It may be that your environmental temperature is different, your flour has different microbes in it, or you may have a a little less wild yeast floating around in the air around your home. Your starter may just take a little longer to gain momentum.
Day Seven Observations
Step 22
You could very well have a starter that is ready to bake with by day seven. Characteristics of a strong starter include:
-It's doubling (or more) 8 hours or less after a feed - It’s thick, fluffy, stretchy when you put a spoon into it and pull the spoon out
- It has tons of bubbles around the side of the jar, has big bubbles on top of and under the surface at the top of the starter
- It doesn’t show signs of hunger between 12 hourly feeds (hunger would be lots of little tiny spit-like bubbles at the top surface)
-It passes the float test too (when you gently plop a spoonful of it into a bowl of water, the starter floats). This is usually an indicator that the starter is strong enough to bake with. If your starter hasn't reached this point yet, just keep going with the twice daily feeds. Make sure you're leaving it in a warm enough spot.
How do I know when my starter is ready?
Step 23
Characteristics of a strong starter include:
-It's doubling (or more) 8 hours or less after a feed - It’s thick, fluffy, stretchy when you put a spoon into it and pull the spoon out
- It has tons of bubbles around the side of the jar, has big bubbles on top of and under the surface at the top of the starter
- It doesn’t show signs of hunger between 12 hourly feeds (hunger would be lots of little tiny spit-like bubbles at the top surface)
-It passes the float test too (when you gently plop a spoonful of it into a bowl of water, the starter floats). This is usually an indicator that the starter is strong enough to bake with.
It's Day Seven and my starter isn't ready. Have I done something wrong?
Step 24
If your starter is not ready by day seven, do not give up. Keep up the same discard (discard 120g) and feeding process (feed 60g white bread flour/60ml slightly warm water) we’ve been doing since day three. Twice a day. Building a strong sourdough starter from scratch will take different amounts time in different environments. It can take up to two weeks.
Step 25
The wild yeast in the air will vary in every home (mine probably has extra floating around since I work with sourdough regularly!). The temperature of every home varies, the flour you use will be different and contain different microbes too. This building process can realistically take up to two weeks! Just change to a new jar every couple of days and keep doing what you’re doing - make sure the starter is in a warmish (not hot!) place in your home. It’s happier and more active in warmth. Sometimes adding in a little wholemeal/wholewheat flour during a feed can help get things going a bit quicker.
My starter is ready...so now what?
Step 26
It depends on when you want to bake. If you want to make dough with it, immediately...go for it. Just make sure you always save about 25g of starter in the jar. You need this amount to continue feeding/keeping your starter. If you don't want to bake with it immediately, then discard 155g and feed the remaining 25g with 50g white bread flour and 50ml room temperature water. Once it's all mixed, you can store it in the fridge if you don't plan to bake with it immediately.
Step 27
Always feed your starter more than it’s own size (what I’ve said above is a 1:2:2 ratio). You really only need a tablespoon of sourdough in your jar before you feed it. One of the most common issues with an unhappy starter is not discarding enough before feeding. Feeding a large amount of starter a tiny snack when it’s ravenous…well, it simply won’t be satisfied and happy. Feed a smaller amount of starter an enormous meal twice its size and it will have fuel to sustain it for a good while and it will be in better shape to produce good bread.
Step 28
When you're ready to bake with it, remove it from the fridge the day before you need to bake with it, discard all but 25g or so, then feed it with 50g white bread flour and 50ml slightly warm water. Let that come to peak and then discard and feed it once more before using (if I’m making the dough first thing the next morning I’ll do the second feed right before bedtime). If I’m making the dough the next afternoon, I’ll do the second feed first thing that next morning (allowing it about 6 hours to get to peak). A strong starter can usually hold its peak for a good few hours before dipping down again.
How often do I need to feed it?
Step 29
If you are keeping it at room temperature, then you will want to discard and feed at least once a day.
Step 30
In the summer time heat, the sourdough becomes more active and gets through its feeds more quickly. This will mean you’ll likely need to increase to two discards/feeds per day over the summer if you want to keep your starter at room temperature.
Step 31
If you will only be baking with it occasionally, then keep it in the fridge after a feed. Ideally, it’s good to discard/feed it once every 7-10 days to keep it happy. But it can actually go much longer than that…it just might take multiple discard/feeds to bring it back to life once you’re ready to use it again. It becomes very sluggish in the cold!
Step 32
If you’re going on holiday, just give it an extra large feed (2x the size of a normal feed - so a 1:4:4 ratio) and put it into fridge. It should be fine for a good few weeks!
What if I want a large amount of starter to make multiple sourdough items in one go?
Step 33
There is no need to keep a massive jar of sourdough starter, you only ever need about a good few spoonfuls of it to then spawn off massive quantities. You can mix a big blob of sourdough starter with bread flour and water in a separate mixing bowl, cover it and leave it out at room temperature overnight. The next morning you’ll have a big vat of starter to use in your bakes. This is called a levain and it’s how bakeries make such large quantities of sourdough without keeping a sourdough starter jar that’s the size of a house!
Step 34
How to know how much to mix for your levain? Say you need 400g of sourdough starter for multiple recipes - the night before you plan to mix all your dough, mix together about 100g of sourdough starter with 200g bread flour and 200ml of slightly warm water. It should be ready to use by morning. If you only need 200g of levain, I’d mix about 50g of starter with 100g bread flour and 100ml slightly warm water. You increase or decrease your sourdough starter amount depending on how much you need. Always make sure you’re left with a little extra levain or starter from your main jar to keep your starter going...
Step 35
Building a levain can take a little practice getting the timings and ratios right for your exact environment. Just pay attention to if it’s ready to use by morning time, and if not then next time use a higher ratio of starter (the more starter in the levain, the faster it will peak). You’ll want to make adjustments in the coldest and hottest months - in the summer I wouldn’t use slightly warm water, I’d use room temperature or cold water because the temperature of the environment will keep the sourdough happy and active already. Using a little less starter in the levain over the warmer months will also help to slow it down so it doesn’t peak too soon.
View on Watch the day by day process
↑Support creators by visiting their site 😊
Notes
14 liked
4 disliked
There are no notes yet. Be the first to share your experience!


