By Aeriskitchen
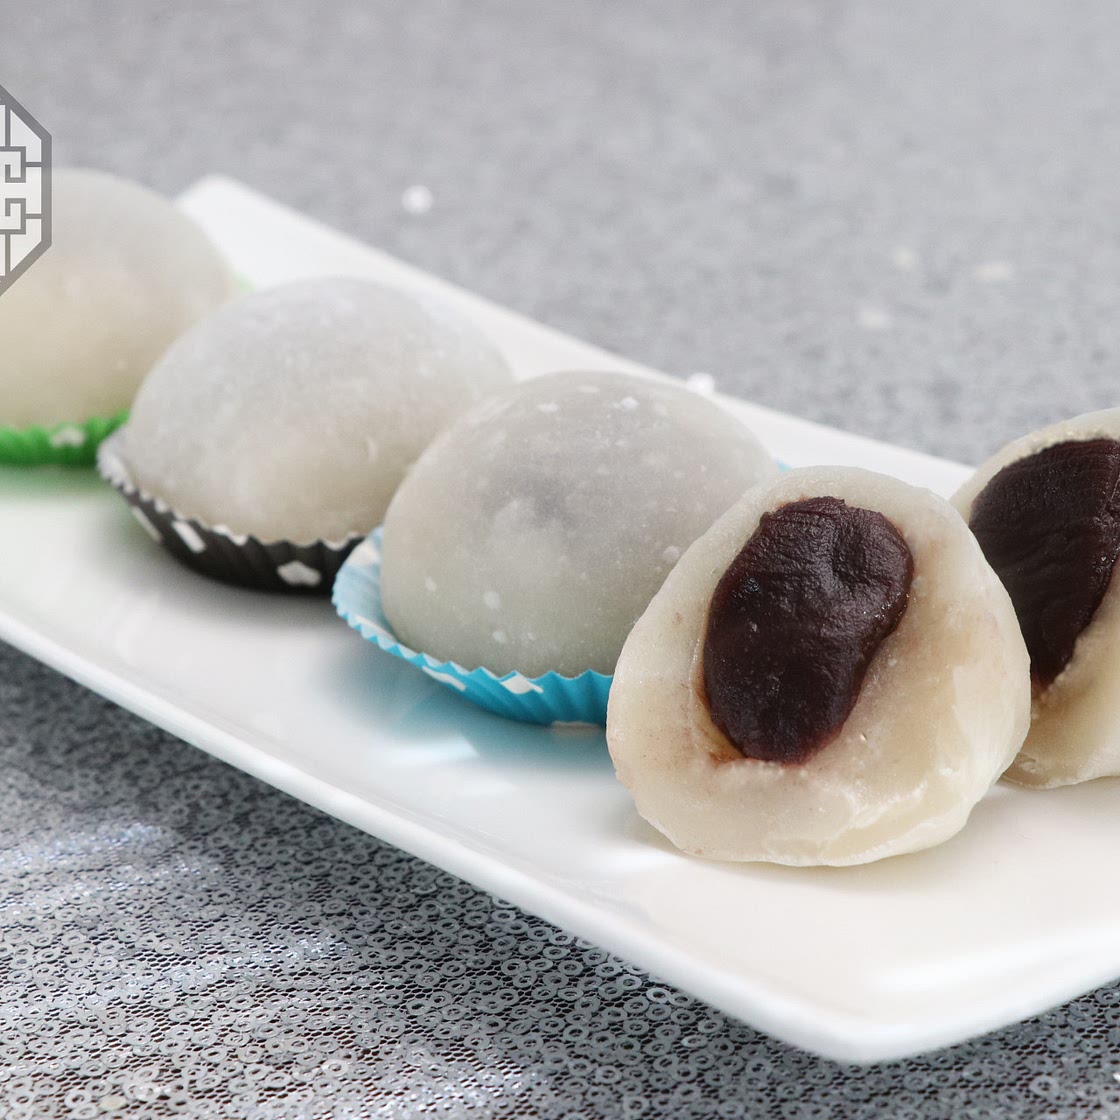
Sweet Rice and Red Bean Tteok (찹쌀떡, ChapSsalTteok) | Aeri's Kitchen
23 steps
Prep:30minCook:30min
This is a sweet rice and red bean rice cake called ChapSsalTteok in Korean. It has an amazingly nice and chewy texture with a perfect balance of sweetness & saltiness for the rice cake part. I will share several tips to make a non-failure ChapSsalTteok in the video instruction, so please watch the video to the end.
Updated at: Thu, 17 Aug 2023 03:15:39 GMT
Nutrition balance score
Unbalanced
Glycemic Index
58
Moderate
Glycemic Load
26
High
Nutrition per serving
Calories195.1 kcal (10%)
Total Fat0.1 g (0%)
Carbs45.4 g (17%)
Sugars25.6 g (28%)
Protein2.9 g (6%)
Sodium130.1 mg (7%)
Fiber1.4 g (5%)
% Daily Values based on a 2,000 calorie diet
Ingredients
24 servings
Main Ingredients:
Instructions
Step 1
First we need about 2 cups of sweet red bean paste. You want a find paste without any bean chunks.
Step 2
Take out 1 generous Tbsp of sweet red bean paste.
Step 3
Then, gently roll it with both hands to make a small ball. Do the same thing for the rest of the red bean paste to make 24 pieces.
Step 4
Tip: The sweet red bean paste can stick to your hands, so, every now and then, wash and dry your hands before rolling the red bean paste.
Step 5
Cover the red bean balls with some plastic wrap, and put them in the freezer overnight. This is a great tip to make the final shape of the rice cakes good.
Step 6
The next day, make batter for the rice cakes. Put 1 box (3⅔ cups) of sweet rice flour, 2 cups of sugar, and 1 tsp of salt in a large mixing bowl. Mix it all together.
Step 7
Pour 2¾ cups of water on the rice flour mixture and then mix it gently. The consistency will be runny like this. It is okay to have some lumps that are not completely mixed.
Step 8
Cover the mixing bowl with some plastic wrap and cook it in the microwave for 4 minutes.
Step 9
After 4 minutes, you will see the batter is still runny. Mix it once.
Step 10
Then, cover it with the plastic wrap again. This time, cook it for 3 minutes in the microwave.
Step 11
After 3 minutes, take it out. The batter still has lots of liquid with a few big chunks like this. Stir it once or twice and then cover it with plastic wrap. Put it back into the microwave and cook it for 4 minutes again.
Step 12
After 4 minutes, you can see the batter is more dough-like, but it still has some uncooked parts. Stir it several times, especially around the surface of the mixing bowl.
Step 13
Use the same process one more time, this time cook it for 3 more minutes. Finally, you will have a well cooked, shiny, and slightly transparent rice cake.
Step 14
Knead the cooked rice cake with a big wooden spoon or other strong cookware for several minutes to get a nice chewy and elastic texture.
Step 15
When the rice cake dough is still hot, sprinkle some cornstarch on a cutting board. Cornstarch is another tip to work with sticky rice cake.
Step 16
Remove all the dough from the mixing bowl and put it onto the cutting board.
Step 17
Divide the dough into 4. (Put some cornstarch on the knife before using it.)
Step 18
And then divide the each of the 4 pieces into 6 smaller chunks. This way you will get 24 pieces of similar size.
Step 19
Take out the frozen sweet red bean paste balls from the freezer. They are firm so that they will keep their shape when you wrap them with the warm rice cake dough.
Step 20
Take one piece of the rice cake and put some cornstarch on the surface if it’s too sticky to work with. Flatten the rice cake.
Step 21
Place one red bean paste ball in the center.
Step 22
Wrap the ball with the rice dough and seal it tightly like this.
Step 23
Roll it out smooth. Use the same process for the rest of them.
View on aeriskitchen.com
↑Support creators by visiting their site 😊
Notes
0 liked
0 disliked
There are no notes yet. Be the first to share your experience!
