By Alesia
Vegetable Onigiri (Japanese Rice Balls)
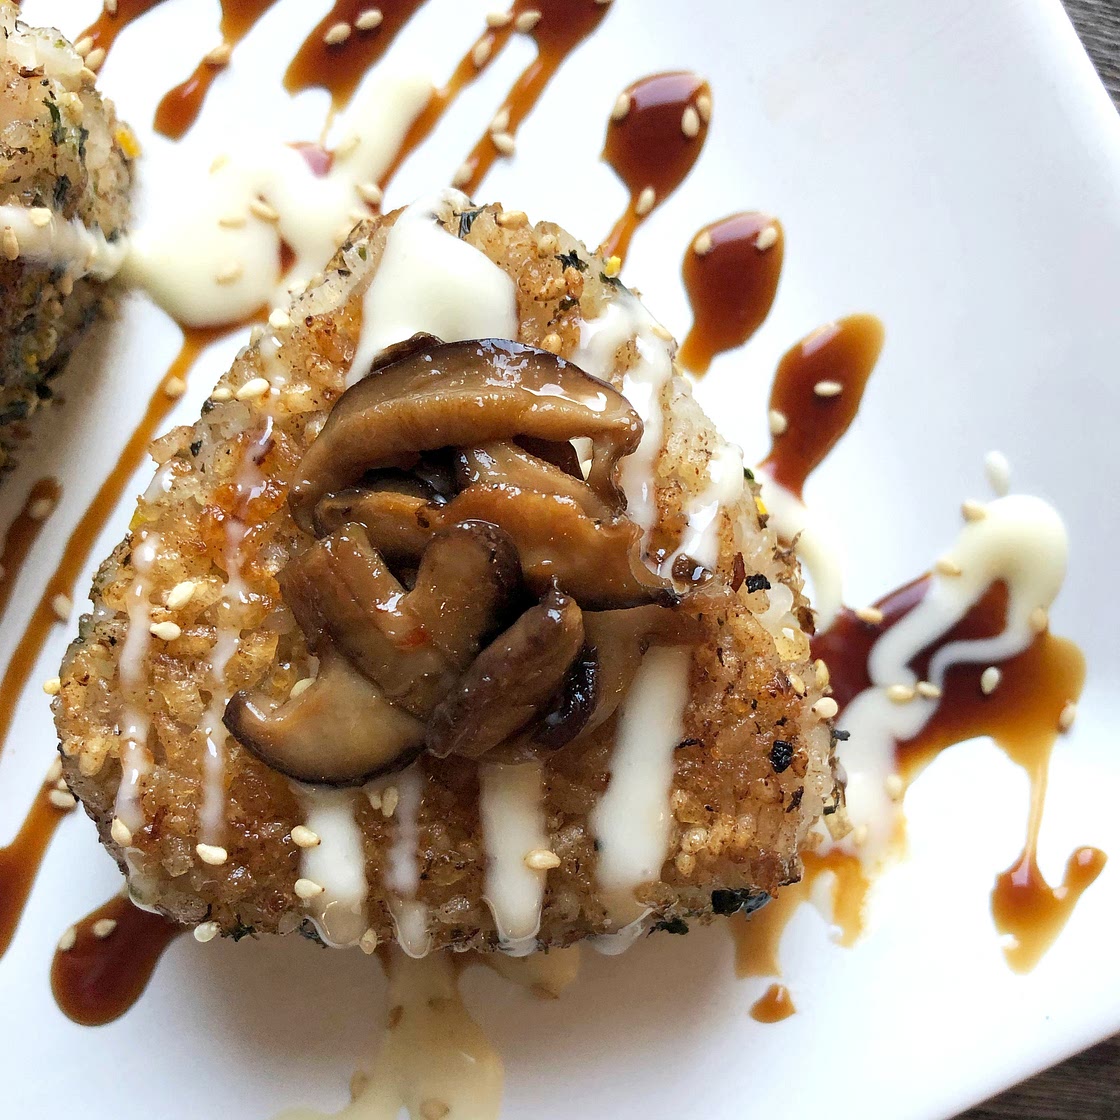
Onigiri became my one of my greatest obsessions when I was pregnant—rice balls stuffed with some kind of filling, pan fried until crispy, and wrapped in seaweed. But it’s hard to find many vegetarian options. My version is far from traditional, but absolutely delicious. This recipe includes two of m
Updated at: Thu, 17 Aug 2023 05:13:44 GMT
Nutrition balance score
Unbalanced
Glycemic Index
59
Moderate
Glycemic Load
30
High
Nutrition per serving
Calories473.8 kcal (24%)
Total Fat28.5 g (41%)
Carbs51.4 g (20%)
Sugars22.2 g (25%)
Protein5.2 g (10%)
Sodium1508.8 mg (75%)
Fiber2.6 g (9%)
% Daily Values based on a 2,000 calorie diet
Ingredients
8 servings
For the filling:
330gshitake mushrooms
raw
1 Tbspsesame oil
3cloves garlic
finely minced
1 Tbspbrown sugar
2 tsprice wine vinegar
2 tspmirin
1 Tbsplow sodium soy sauce
½ tspsriracha
For the kimchi version filling:
Eel sauce
Sweet mirin mayo
Gochujang chili sauce
Instructions
To reduce the amount of Phe
Step 1
Replace some of the sushi rice with low protein rice. I recommend at least a 50/50 mix if your phe tolerance allows. This helps ensure the rice can still bind together. With 50% low protein rice, each rice ball would be approximately 90mg phe / rice ball, give or take.
Shiitake mushrooms version
Step 2
Cook your rice and let it cool so you will be able to handle it with your hands.
Step 3
Note: you must use sushi rice or a combination of sushi rice and low protein rice to get these balls to bind and stay together.
Step 4
Clean and thinly slice your shitake mushrooms.
Step 5
Heat peanut oil in a medium skillet, on medium heat. When the pan is hot, add your mushrooms and cook them until they have softened and begun to brown.
Step 6
Note: at first the pan will seem quite dry. Continue to stir the mushrooms, and they begin to cook, they’ll release their own moisture to prevent them from sticking to the bottom of the pan.
Step 7
Once the mushrooms have softened, don’t stir too frequently. This will allow them to brown on the bottom of the pan.
Step 8
When thoroughly cooked, remove them from the pan and set aside in a bowl.
Step 9
Return your pan to the stove and turn the heat down to medium-low. Add the sesame oil.
Step 10
Add your minced garlic and cook until it begins to soften (just a couple of minutes).
Step 11
Then, add your brown sugar, rice wine vinegar, mirin, soy sauce and chili paste and stir until all ingredients are well mixed and look like a syrupy liquid in the bottom of your pan.
Step 12
Continue to simmer your sauce until it reduces slightly and the sugar begins to caramelize. (about 5 minutes)
Step 13
Add your mushrooms back to the pan and stir until they are well (and evenly coated). Set aside to cool.
Create/stuff your rice balls
Step 14
Measure 95g of sushi rice and then, divide that amount in half. (You can eyeball this. Roughly one half will work just fine)
Step 15
To get ready to assemble, quickly rinse the inside of your rice mold and your fingertips with water. This will help prevent the rice from sticking.
Step 16
Put half of your rice in the bottom of your rice mold. Push it down with your fingers to compact it, so the rice sticks together. Push the center down more than the outer edges, so there is a ‘crater’ of sorts to hold your filling.
Step 17
(The sides of your rice ball will look higher than the middle)
Step 18
Then, add 2 - 2.5 Tbsp (20g) of shitake mushrooms to the rice ball, filling (and overflowing) the crater you just formed with your fingers. You want to keep the mushrooms in the middle of the rice ball so you can’t see any of the filling from the side.
Step 19
Then, top your filling with the rest of the rice and push down with your fingers, to begin compacting both halves of your rice ball together.
Step 20
To further compact and finish your rice ball, put the the other half of your mold in place (on top) and squeeze the top and bottom together, to ensure your rice ball doesn’t fall apart.
Step 21
In the bottom of your mold, there is a divot. Gently push it with your finger until your rice ball comes out of the mold. Set it aside and repeat these steps to create the others.
Step 22
Spread your furikake seasoning in a thin layer, on a small plate. Gently roll the outer edges of each rice ball until they are lightly covered with the seaweed mixture.
Step 23
Then, melt your butter in a large skillet over medium-high heat. When the pan is evenly coated, put your rice balls in and leave cooking until the rice begins to brown and turn crispy. Then, flip them and do the same to the other side. (You will likely have to cook them in two batches)
Step 24
To finish, top with scallions, leftover mushroom filling, eel sauce and sweet mirin mayo (sauce recipes below).
Kimchi version
Step 25
Roughly chop your kimchi so it’s in small pieces and squeeze it to remove any excess moisture.
Step 26
Follow Steps 1 - 9 under “How to create each rice ball” (above), replacing kimchi where mushrooms are noted.
Step 27
To finish, top with scallions, leftover kimchi, gochujang sauce and sweet mirin mayo. (sauce instructions below)
Eel sauce
Step 28
Heat all ingredients in a pan over medium heat, until sauce reduces to about ¾ C. Stir frequently.
Sweet mirin mayo
Step 29
Whisk all ingredients together. If you want your sauce slightly thinner, add more mirin but avoid more vinegar. This sauce is supposed to be on the sweeter side.
Gochujang chili sauce
Step 30
Whisk all ingredients together. If you need to thin it further, and/or are having trouble getting everything to mix evenly, microwave it for 30 seconds and stir in just a touch of water.
View on PKU for Life
↑Support creators by visiting their site 😊
Notes
0 liked
0 disliked
There are no notes yet. Be the first to share your experience!
