By Kyle McBride
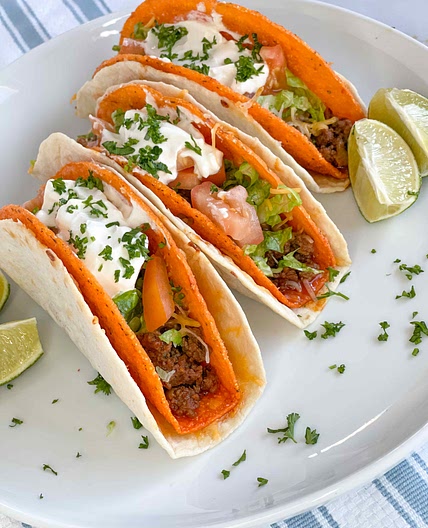
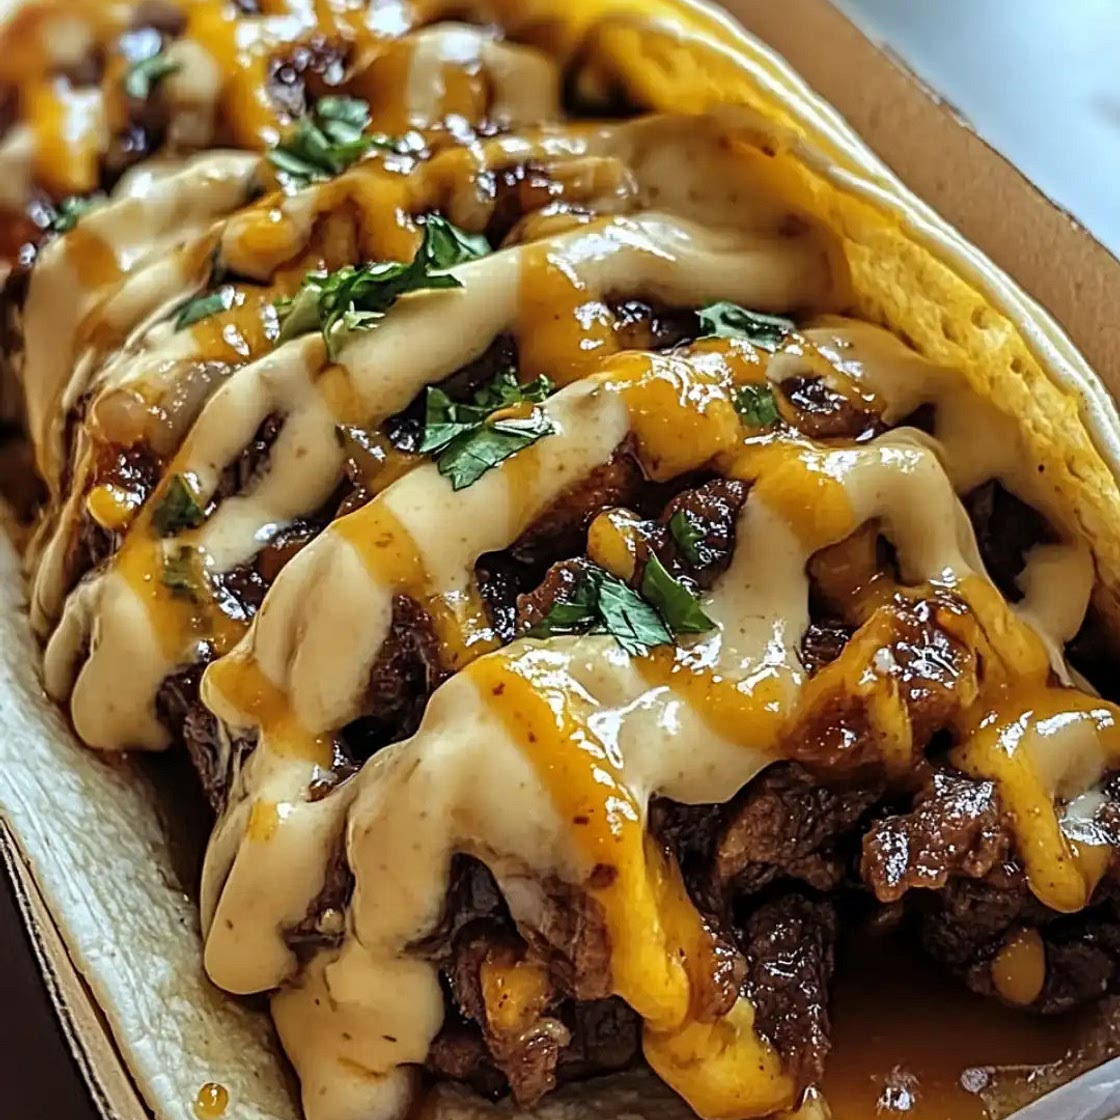
Garlic Butter Honey BBQ Beef Tacos
79 steps
Prep:15minCook:15min
Tacos are more than just a meal; they are a celebration of flavor, texture, and culinary creativity. Among the endless varieties of tacos, one recipe stands out for its mouthwatering balance of savory, sweet, and smoky: Garlic Butter Honey BBQ Beef Tacos. These tacos feature tender, juicy beef cooked to perfection with rich garlic butter and a tantalizing honey BBQ glaze. Whether you’re hosting a weekend get-together, treating your family to something special, or simply craving bold flavors, this dish delivers a fusion of irresistible tastes.
Updated at: Mon, 06 Jan 2025 21:17:26 GMT
Nutrition balance score
Unbalanced
Glycemic Index
45
Low
Glycemic Load
15
Moderate
Nutrition per serving
Calories326.8 kcal (16%)
Total Fat15.5 g (22%)
Carbs34.3 g (13%)
Sugars16 g (18%)
Protein13.9 g (28%)
Sodium714.7 mg (36%)
Fiber2.5 g (9%)
% Daily Values based on a 2,000 calorie diet
Ingredients
10 servings
For the Beef:
1.5 lbsbeef steak
skirt steak, flank steak, or ribeye works well
2 tablespoonsunsalted butter
4garlic cloves
minced
2 tablespoonsolive oil
1 teaspoonsalt
½ teaspoonblack pepper
1 teaspoonsmoked paprika
½ teaspoonground cumin
Honey BBQ Sauce Ingredients:
⅓ cuphoney
½ cupBBQ sauce
choose your favorite brand or homemade
1 tablespoonworcestershire sauce
1 teaspoonapple cider vinegar
1 tablespoonunsalted butter
For the Tacos:
Instructions
Prepare the Beef
Step 1
Season the beef: Place the beef steak on a clean surface. Drizzle with olive oil and sprinkle evenly with salt, black pepper, smoked paprika, and cumin. Rub the spices into the meat for maximum flavor. Allow the beef to rest for 10-15 minutes at room temperature. This ensures the seasoning penetrates and the meat cooks evenly.
Step 2
Cook the beef: Heat a large skillet or grill pan over medium-high heat. Add 1 tablespoon of butter and let it melt. Place the seasoned beef into the skillet and sear for about 3-4 minutes per side for medium-rare doneness. Adjust the cooking time based on your preferred doneness.
Step 3
Add garlic butter: In the last minute of cooking, add the minced garlic and remaining butter to the skillet. Baste the beef by spooning the melted garlic butter over the meat. Once cooked, transfer the beef to a plate, tent with foil, and allow it to rest for 5-10 minutes.
Step 4
Slice the beef: After resting, slice the beef thinly against the grain. This ensures tenderness in every bite.
Make the Honey BBQ Sauce
Step 5
In a small saucepan over medium heat, combine honey, BBQ sauce, Worcestershire sauce, apple cider vinegar, and 1 tablespoon of butter.
Step 6
Stir continuously until the mixture begins to simmer. Allow it to cook for 2-3 minutes, until it thickens slightly and develops a glossy texture.
Step 7
Remove from heat and set aside.
Assemble the Tacos
Step 8
Warm the tortillas: Heat your tortillas on a skillet or directly over a flame for about 20-30 seconds per side. This gives them a warm, slightly charred flavor.
Step 9
Layer the ingredients: Begin by placing a few slices of the cooked beef in each tortilla. Drizzle the honey BBQ sauce generously over the beef. Add shredded lettuce, diced red onions, and sliced avocado.
Step 10
Add cheese and garnish: Sprinkle shredded cheddar cheese over the top and finish with fresh cilantro leaves.
Step 11
Serve with lime wedges: A squeeze of lime juice adds a refreshing acidity that balances the richness of the beef and sauce.
Helpful Tips for Making Garlic Butter Honey BBQ Beef Tacos
Step 12
Choose the Right Cut of Beef • Opt for cuts like skirt steak, flank steak, or ribeye. These cuts cook quickly, remain juicy, and slice well for tacos.
Step 13
Season Generously • Season the beef liberally with salt, pepper, smoked paprika, and cumin to ensure bold flavors. Allow the meat to rest for 10-15 minutes before cooking to let the seasoning absorb.
Step 14
Cook the Beef Properly • Sear the beef over medium-high heat to develop a nice crust while keeping the inside tender. For the best results, cook the beef to medium-rare and avoid overcooking.
Step 15
Slice Against the Grain • After resting the beef for 5-10 minutes, slice it thinly against the grain. This helps keep the meat tender and easy to chew.
Step 16
Perfect the Honey BBQ Sauce • Taste the sauce as you go! Adjust the honey for extra sweetness or add a splash of apple cider vinegar for tang. If you prefer a spicier sauce, mix in chili powder or hot sauce.
Step 17
Warm the Tortillas • Heat the tortillas on a dry skillet or directly over a flame for 20-30 seconds per side. This softens them, enhances their flavor, and makes them more pliable.
Step 18
Balance the Toppings • Avoid overloading the tacos with toppings. Keep it balanced with a mix of textures—fresh avocado, crisp lettuce, and tangy onions work well.
Step 19
Rest the Beef • Always let the beef rest after cooking. This allows the juices to redistribute, keeping the meat tender and juicy.
Step 20
Serve Fresh • Assemble the tacos just before serving to maintain the perfect texture of the beef, sauce, and toppings.
Step 21
Make It Your Own • Don’t be afraid to experiment! Customize the dish with your favorite cheeses, toppings, or spice levels to suit your taste.
Variations for Garlic Butter Honey BBQ Beef Tacos - Protein Alternatives
Step 22
Grilled Chicken: Substitute beef with boneless chicken thighs or breasts. Season and cook the chicken similarly, then shred or slice before tossing it with honey BBQ sauce.
Step 23
Shrimp: Replace beef with shrimp for a lighter, seafood version. Cook shrimp in garlic butter, add a pinch of paprika, and toss in the honey BBQ glaze.
Vegetarian Option:
Step 24
Use grilled portobello mushrooms or jackfruit as a plant-based alternative. Both absorb the garlic butter and BBQ sauce flavors beautifully.
Step 25
Toss roasted cauliflower or chickpeas with honey BBQ sauce for a hearty vegetarian filling.
Spice It Up
Step 26
Stir chili powder, cayenne pepper, or a splash of hot sauce into the honey BBQ sauce.
Step 27
Top the tacos with sliced jalapeños or pickled serrano peppers for an extra kick.
Step 28
Drizzle the finished tacos with spicy chipotle mayo for creamy heat.
Cheese Varieties
Step 29
Cotija Cheese: A salty, crumbly Mexican cheese that adds authenticity.
Step 30
Pepper Jack: For a spicy, creamy alternative.
Step 31
Queso Fresco: A mild, crumbly cheese that pairs perfectly with bold flavors.
Step 32
Smoked Gouda: Adds a rich, smoky note that complements the BBQ sauce.
Low-Carb and Gluten-Free Options
Step 33
Replace tortillas with lettuce wraps for a refreshing, low-carb option.
Step 34
Use gluten-free tortillas made from corn, almond flour, or cassava flour.
Step 35
Serve the beef and toppings over a bowl of cauliflower rice or a salad for a taco bowl twist.
Hard Shell Tacos
Step 36
For added texture and crunch, swap soft tortillas for crispy hard taco shells. Toast them lightly in the oven before filling them for the best flavor.
Fusion Flavors
Step 37
Korean BBQ Tacos: Replace the honey BBQ sauce with Korean-style bulgogi marinade and top with kimchi and sesame seeds.
Step 38
Tex-Mex Style: Add refried beans, salsa, and guacamole as additional fillings.
Step 39
Caribbean-Inspired: Add a touch of pineapple juice to the honey BBQ sauce and top the tacos with grilled pineapple chunks.
Creative Toppings
Step 40
Fresh Mango Salsa: Adds a sweet, tangy element that pairs beautifully with the beef.
Step 41
Pickled Red Onions: Provide a bright, acidic contrast to the rich flavors of the taco.
Step 42
Coleslaw: A creamy or vinegar-based slaw adds crunch and freshness.
Step 43
Avocado Crema: Blend avocado, lime juice, and sour cream for a smooth, tangy drizzle.
Vegan Version
Step 44
Use mushrooms, jackfruit, or tofu for the protein. Cook them in vegan butter with garlic and toss in a vegan BBQ sauce.
Step 45
Replace butter with plant-based butter.
Step 46
Use vegan cheese or omit the cheese entirely.
Step 47
Opt for corn tortillas or gluten-free wraps for the base.
Conservation and Storage - Storing the Beef
Step 48
Allow the cooked beef to cool completely before storing.
Step 49
Place the beef slices in an airtight container or resealable plastic bag.
Step 50
Refrigerate for up to 3 days for optimal freshness.
Step 51
For longer storage, freeze the beef in a freezer-safe container or bag for up to 2 months. Be sure to remove excess air to prevent freezer burn.
Reheating the Beef
Step 52
To reheat, warm the beef gently in a skillet over low heat with a splash of water or a small amount of butter. This method helps restore moisture and prevents the meat from drying out.
Step 53
Avoid using the microwave for reheating as it can make the beef chewy.
Storing the Honey BBQ Sauce
Step 54
Transfer any leftover honey BBQ sauce to a sealed jar or airtight container.
Step 55
Refrigerate the sauce for up to 1 week.
Step 56
To reuse, reheat the sauce over low heat on the stove while stirring occasionally.
Step 57
Transfer any leftover honey BBQ sauce to a sealed jar or airtight container.
Step 58
Refrigerate the sauce for up to 1 week.
Step 59
To reuse, reheat the sauce over low heat on the stove while stirring occasionally.
Storing Tortillas
Step 60
Wrap any leftover tortillas tightly in foil or plastic wrap to prevent them from drying out.
Step 61
Store them at room temperature for up to 2 days, or refrigerate them for up to 5 days.
Step 62
For longer storage, tortillas can be frozen. Stack them with parchment paper in between to prevent sticking, then store in a freezer-safe bag for up to 2 months.
Step 63
Wrap any leftover tortillas tightly in foil or plastic wrap to prevent them from drying out.
Step 64
Store them at room temperature for up to 2 days, or refrigerate them for up to 5 days.
Step 65
For longer storage, tortillas can be frozen. Stack them with parchment paper in between to prevent sticking, then store in a freezer-safe bag for up to 2 months.
-Reheating Tortillas
Step 66
Warm refrigerated or frozen tortillas in a dry skillet over medium heat for about 20-30 seconds per side. Alternatively, wrap them in foil and reheat in the oven at 350°F (175°C) for about 5 minutes.
Step 67
Warm refrigerated or frozen tortillas in a dry skillet over medium heat for about 20-30 seconds per side. Alternatively, wrap them in foil and reheat in the oven at 350°F (175°C) for about 5 minutes.
Assembled Tacos
Step 68
Assembled tacos are best enjoyed fresh. If you need to store leftovers, keep the components (beef, sauce, tortillas, and toppings) separate. This prevents the tacos from becoming soggy.
Step 69
If you must store fully assembled tacos, wrap them tightly in foil and refrigerate for up to 1 day. Reheat in the oven at 350°F (175°C) until warm.
Step 70
Assembled tacos are best enjoyed fresh. If you need to store leftovers, keep the components (beef, sauce, tortillas, and toppings) separate. This prevents the tacos from becoming soggy.
Step 71
If you must store fully assembled tacos, wrap them tightly in foil and refrigerate for up to 1 day. Reheat in the oven at 350°F (175°C) until warm.
-Serving Suggestions - Sides
Step 72
Mexican Rice: A classic side with bold flavors that complements the tacos perfectly.
Step 73
Street Corn (Elote): Grilled corn topped with mayonnaise, cheese, and chili powder adds a creamy, tangy touch.
Step 74
Black Bean Salad: A fresh, vibrant salad with beans, tomatoes, onions, and avocado.
Frequently Asked Questions (FAQs)
Step 75
Can I make these tacos ahead of time? Yes! You can prepare the beef and sauce ahead of time. Store them separately and reheat when ready to assemble the tacos.
Step 76
What’s the best cut of beef for these tacos? Skirt steak, flank steak, or ribeye are ideal. They cook quickly and remain tender when sliced properly.
Step 77
Can I use store-bought BBQ sauce? Absolutely! Use your favorite store-bought BBQ sauce to save time, or make a homemade version if you prefer.
Step 78
How can I make the dish spicier? Add chili powder or cayenne pepper to the BBQ sauce, or top the tacos with sliced jalapeños or hot sauce.
Step 79
What toppings go best with these tacos? Avocado, shredded lettuce, red onions, cheese, and fresh cilantro work perfectly. A squeeze of lime adds a refreshing touch.
View on Cooking Taste
↑Support creators by visiting their site 😊
Notes
0 liked
0 disliked
There are no notes yet. Be the first to share your experience!