By Jillian Adamson
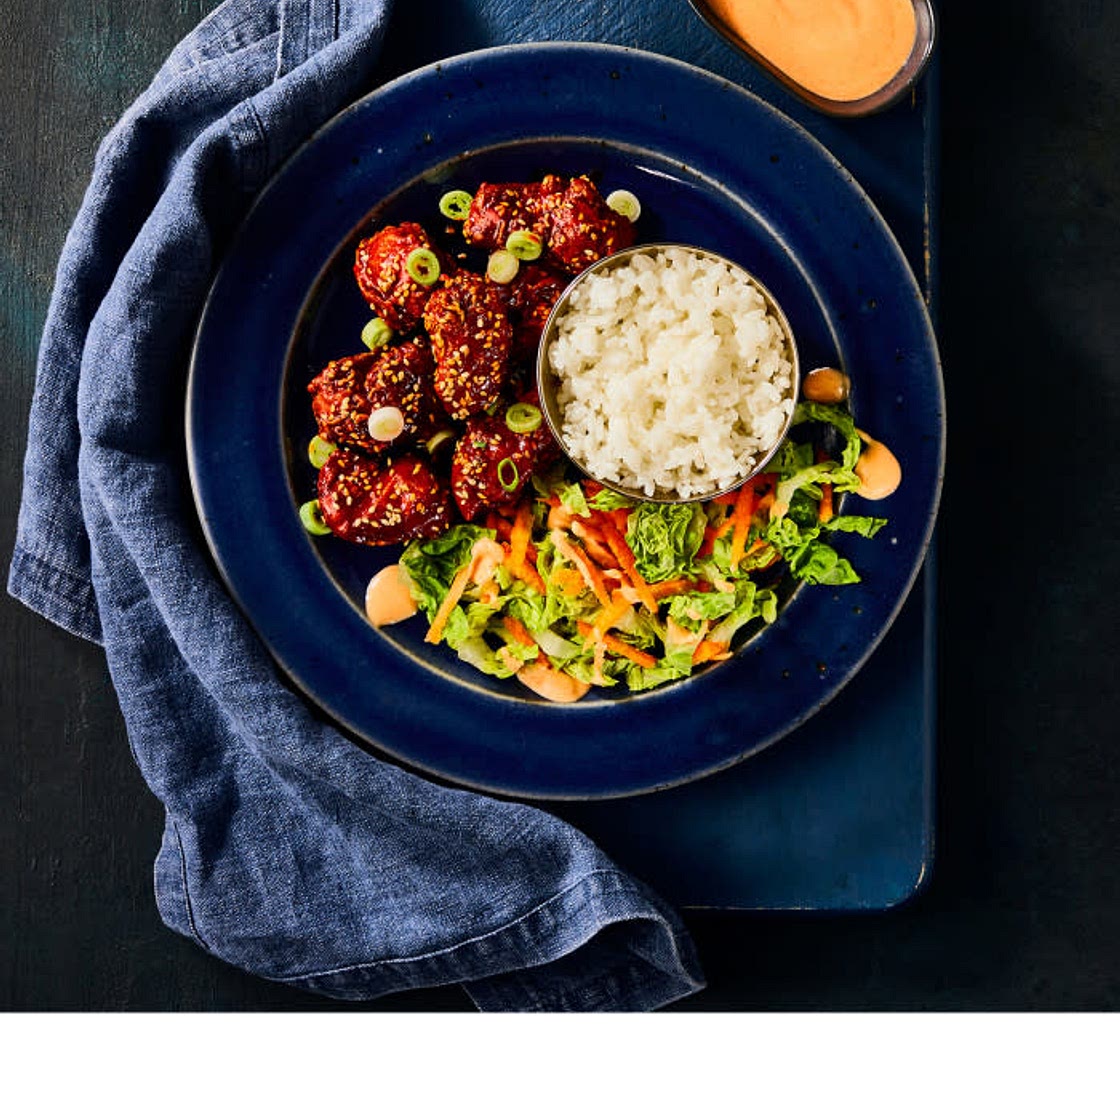
G - Korean Fried Chicken With Yang-Nyum Sauce
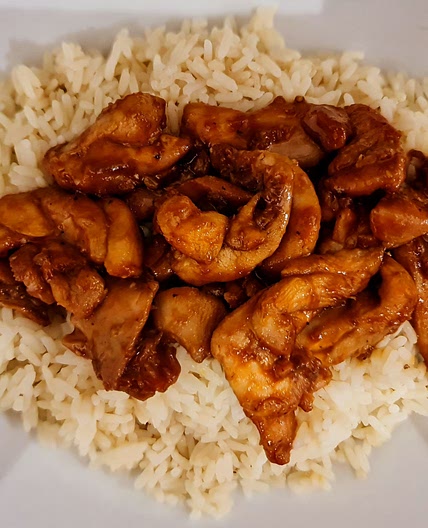
If you like sticky, spicy fried chicken pumped up with extra garlic, you're going to love this. Serve with a refreshing slaw and rice to the side.
Updated at: Thu, 17 Aug 2023 10:04:02 GMT
Nutrition balance score
Unbalanced
Glycemic Index
74
High
Glycemic Load
86
High
Nutrition per serving
Calories949.1 kcal (47%)
Total Fat41.8 g (60%)
Carbs116.4 g (45%)
Sugars18.4 g (20%)
Protein24.7 g (49%)
Sodium1193.3 mg (60%)
Fiber5.2 g (19%)
% Daily Values based on a 2,000 calorie diet
Ingredients
2 servings
Instructions
Step 1
https://www.gousto.co.uk/cookbook/recipes/korean-fried-chicken-with-yang-nyum-sauce
Step 2
Rinse the sushi rice in a sieve under cold running water for 30 secs (use your hands to really wash the grains!), then set aside to drain fully
Step 3
Add the drained rice with 200ml cold water and a pinch of salt to a pot with a lid and bring to the boil over a high heat (or just use a rice maker) - Tip: Don't let the water fully boil as this will make the rice stick to the pot!
Step 4
Once boiling, reduce the heat to low until very gently bubbling and cook, covered, for 15 min
Step 5
After 15 min, remove the pot from the heat and keep covered for a further 10 min before serving
Step 6
Tip: Don't peek! Keep the lid on the whole time to get fluffy and sticky rice!
Step 7
While the rice is cooking, combine the gochujang paste (or sriracha), rice vinegar, ketchup, honey and 1 tbsp cold water in a bowl and give everything a good mix up – this is your yang-nyum sauce
Step 8
Peel and grate the carrot[s]
Step 9
Wash, then shred the little gem lettuce
Step 10
Peel and finely chop (or grate) the garlic
Step 11
Trim, then slice the spring onion
Step 12
Combine 1 tsp yang-nyum sauce (you'll use the rest later!) with the mayo and 1 tsp cold water in a separate bowl – this is your creamy Korean dressing
Step 13
Cut the chicken thighs into large, bite-sized pieces and add them to a bowl with 1 tbsp flour and soy sauce
Step 14
Give everything a good mix up so the chicken is fully coated
Step 15
Add the cornflour to a separate bowl
Step 16
Add the chopped chicken thighs to the bowl with the cornflour and give it a good mix up until all the chicken is coated
Step 17
Heat a large, wide-based pan (preferably non-stick) with a very generous drizzle of vegetable oil (enough to cover the whole base of the pan) over a medium-high heat
Step 18
Once the pan is very hot, add the coated chicken and cook for 5-6 min on each side until golden and crispy and the chicken is cooked through (no pink meat!) – this is your crispy chicken
Step 19
Once crispy, transfer to kitchen paper and reserve the pan
Step 20
Once the chicken is done, carefully pour away the oil
Step 21
Return the pan to a medium heat and add the chopped garlic and remaining yang-nyum sauce and cook for 1-2 min or until thickened
Step 22
Once thickened, add the crispy chicken with the toasted sesame seeds and give everything a good mix up – this is your Korean yang-nyum fried chicken
Step 23
Combine the grated carrot and shredded lettuce – this is your salad
Step 24
Serve the Korean yang-nyum fried chicken with the sticky rice and salad to the side
Step 25
Garnish the chicken with the sliced spring onion and drizzle the creamy Korean dressing over the salad
Step 26
Enjoy
Notes
0 liked
0 disliked
There are no notes yet. Be the first to share your experience!
