By Parrott Street Catering
The Only Breakfast Burrito Recipe You Need (Freezer friendly!)
32 steps
Prep:30minCook:40min
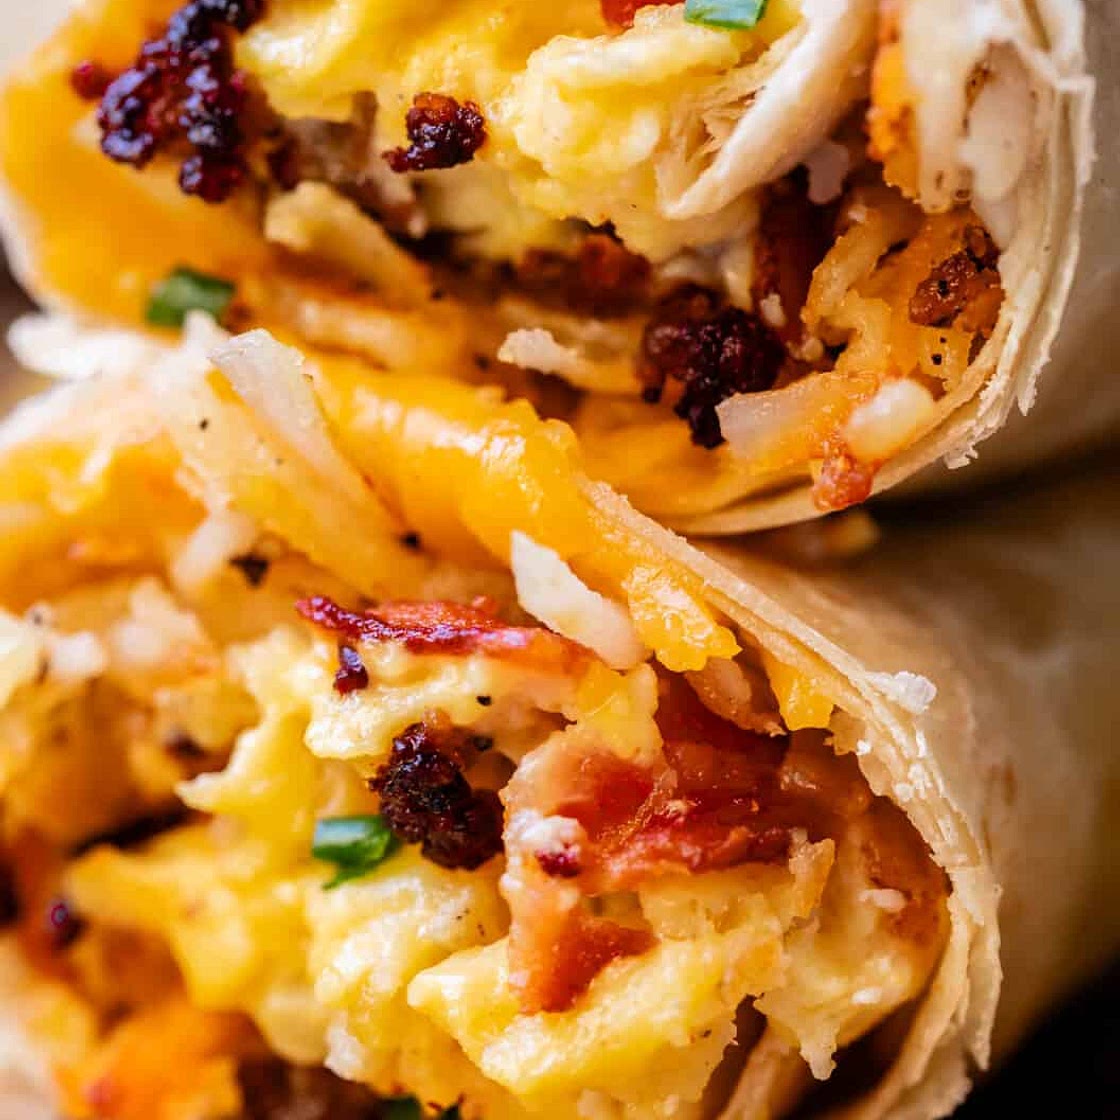
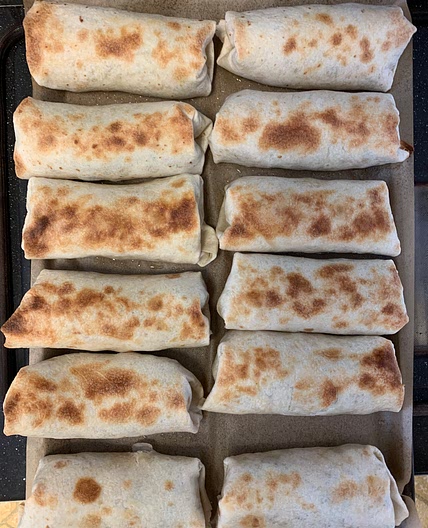
Welcome to the only Breakfast Burrito recipe you will ever need! Once you know the basics of this amazing make ahead meal, you are going to be unstoppable. The possibilities are endless! I will show you all my tips and tricks for how to customize, how to store in the freezer, how to defrost and reheat, and most especially, how to garnish when you are ready to serve, because even the best breakfast burritos are nothing without proper toppings. Nothing, I say! Calories: 713kcal
Updated at: Mon, 19 Aug 2024 07:27:17 GMT
Nutrition balance score
Uh-oh! We're unable to calculate nutrition for this recipe because some ingredients aren't recognized.
Ingredients
15 servings
1.5 poundsbacon
thin slice
1 poundbulk breakfast sausage
1.25 poundscheddar cheese
shredded at home, if you have time
30 ouncesfrozen shredded hash browns
⅓ cupbacon grease
from the bacon you just cooked, maybe more
½ cupbutter
or more, for the hash browns
kosher salt
generous, for the hash browns
black pepper
for the hash browns
½ cupgreen onions
chopped
4 ouncescream cheese
chopped into chunks
15eggs
large
1 ¼ teaspoonsseasoning salt
or kosher salt
1 teaspoonblack pepper
1 teaspoononion powder
¼ cupbutter
for the eggs
15flour tortillas
10-inch, warmed, burrito size
1 batchChipotle Mayo
click for recipe
avocado
sliced
salsa
Restaurant style, homemade or store-bought
cilantro
optional
Instructions
Step 1
Bake your bacon in the oven, it's so much easier. Click for all the details in the post, but the basic idea is to line up 1 and 1/2 pounds bacon in a single layer on a couple baking sheets and bake at 400 degrees F for about 10-18 minutes. It's so much easier than using a pan on the stove, and you can cook a lot more at once.
Step 2
Cook the bacon until it is quite crisp; burritos are a rather soggy environment and we want to maintain that crunch. When the bacon is done, remove the slices to a paper-towel lined plate and let cool. Once cool, chop into bite size pieces.
Step 3
SAVE your bacon grease! You can either leave it on the pan (and tilt your pan into the skillet later, for the hash browns) or funnel all the grease into a bowl or jar for easier access. It will harden as it cools.
Step 4
Meanwhile, brown the sausage. In a large skillet, add 1 pound breakfast sausage and cook over medium high heat for about 5-8 minutes, breaking it up with a wooden spoon.
Step 5
Optional: If you want those little crispy browned parts, (my one true love) here's how to do it. Once all the sausage is cooked and no longer raw, pile up most of the sausage on the edge of the pan, and spread out a thin layer of sausage bits over the center of the pan, so each piece is separate. Let them cook undisturbed for a minute or two, until crispy and starting to blacken. Scrape them off to the side and replace with a new "batch" from the pile, and repeat until all your sausage is browned and crispy.
Step 6
Shred the cheese. You can do this by hand, but a food processor is much faster. Of course you can also buy pre-shredded cheese, but it does not melt as well, meaning you will have burrito insides that don't melt into each other quite as well. Think of your cheese like burrito glue. (Don't go too far down this train of thought. All you need to remember is that shredding your own cheese makes a better burrito.)
Step 7
Cook the hash browns. Heat another large 12-inch skillet over medium high heat (or use the same skillet from browning the sausage, but make sure you clean off any browned bits first). Add 2 tablespoons bacon grease and 2 tablespoon butter to the pan, and swirl to coat.
Step 8
Do not thaw the shredded hash browns. Add about 2 cups frozen hash browns to the hot pan. Spread them out and then (this is important!) pack them down tightly into a patty. I used the back of a measuring cup to pack them together. Sprinkle the hash browns generously with kosher salt and black pepper.
Step 9
Let cook undisturbed until the edges are starting to brown. If you notice that some parts of the potatoes are starting to look dry and not bubbly on the edges, add a little pat of butter right on top of the potatoes; it will melt down to the bottom.
Step 10
Flip your potatoes. We are not stirring, we are not tossing. We are flipping these potatoes like a pancake. Use a spatula to cut your pack of potatoes into smaller (pancake-size) pieces if necessary. Get your spatula under there and flip. Add more butter (or bacon grease) if it's looking dry. Continue cooking, undisturbed, for another 3-4 minutes, still on medium high heat (though turn it down to medium if it starts to smoke.)
Step 11
When both sides of your potato-pancake are crispy and browned, remove to a plate. Repeat this process in 3-4 batches until you have cooked all 30 ounces of hash browns. I used two large skillets to make it go faster. (This is better than adding more potatoes at one time to the pan – they won't get crisp.) Let the hash browns cool.
Step 12
Make the eggs. Chop 1/2 cup green onions and set aside. Chop up 4 ounces (that's half a pack) of cream cheese into chunks.
Step 13
Crack 15 eggs into a large bowl. Add 1 and 1/4 teaspoon seasoning salt (or kosher salt is fine), 1 teaspoon black pepper, and 1 teaspoon onion powder. Whisk vigorously for a little longer than you think you need to. Don't wimp out on me here. You want these eggs to be frothy and bubbly. Break up all those proteins. Use the whisk attachment on your stand mixer if that's easy for you. You could also use a hand mixer. (A whisk really is fine though, just do a good job.)
Step 14
Use the same 12-inch skillet that you cooked the potatoes in (make sure to wipe out any absolutely blackened bits; clean it completely if it is NOT a non-stick pan. You need a smooth surface for your eggs.) Heat the pan over medium high heat and let it preheat until very hot, about 2 minutes. Add 1/4 cup (half stick) butter to the pan and let it melt but don't let it brown.
Step 15
Add the eggs to the pan all at once. Turn the heat down right away to low. Use a silicone spatula to scrape the edges of the pan. Don't walk away, and keep scraping the bottom and sides of the pan for the next 5 minutes or so. You want these eggs to cook SLOOOWWWW. Eventually you can turn the heat up to medium-low if it is taking forever. But slow cooked eggs is how we keep them soft and tender for our burritos that need to be reheated. (You have reheated scrambled eggs before right? It doesn't always go well? Slow cooking them now helps combat rubbery eggs later.)
Step 16
When the eggs have some parts that are getting set, but still some major liquid parts, add the cream cheese chunks. Continue cooking, letting the cream cheese melt (although if it doesn't melt completely, I don't know a soul who would say no to cream cheese chunks in their burritos.)
Step 17
I cannot stress this enough: remove your pan of eggs from the heat when they are BARELY SET. These eggs are going to look soft and wet, but should have no sloshy liquid parts. See photo to get an idea. These eggs are barely to the point that you would stick your fork in them to nab a bite. They will continue to cook even off heat, and will set up a little more. But the idea for breakfast burritos is to have very very wet eggs, so that when they are reheated, they don't become rubbery. Even if you plan to eat these right away, cook your eggs less than you would if eating the eggs solo. They will help your burrito parts melt into each other (see above about cheese glue 😂). Nobody wants a dry breakfast burrito, and overcooked eggs are almost always the culprit.
Step 18
Add the chopped green onions to the eggs and stir. Top with a sprinkle of cheese if you are obsessed with cheese.
Step 19
Heat the tortillas on a plate covered with a damp paper towel. (Warm tortillas don't break when folding.) OR follow instructions for melting cheese below.
Step 20
Make the burritos: create an assembly line of your ingredients: tortillas, cheese, hash browns, eggs, bacon, sausage. The closer to room temperature your ingredients are, the better (not the tortillas).
Step 21
f you want extra insurance against a soggy burrito, sprinkle about 3-4 tablespoons cheese all over one tortilla (not in a line down the middle.) Microwave the tortilla on a plate for about 20-30 seconds until it's almost melted (but not so much that you dry out your tortilla). This creates an extra barrier in between the wet eggs and the tortilla. (I also tried cheese first without melting, and that is okay too. Melting keeps the cheese more in place.) Wipe the condensation off the plate before adding the next tortilla.
Step 22
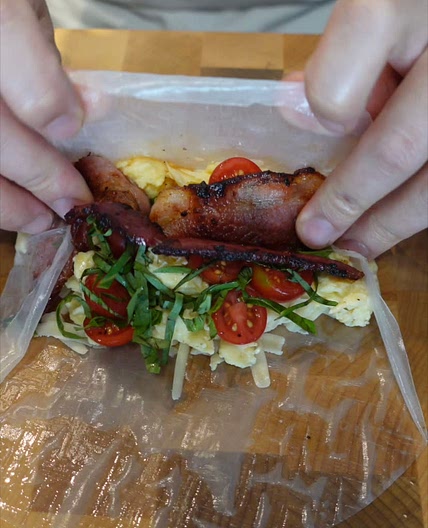
Add fillings: After you add cheese (melted or not), add a layer of hash browns in a line down the center. Then add a layer of eggs, directly on top of the hash browns. Add a layer of bacon and a layer of sausage.(If you are eating these right away, add a layer of sliced avocado, a sprinkle of cilantro, and a heavy dollop of Chipotle Mayo and or salsa; spread it out.)
Step 23
Fold your burrito: Fold the edges of the tortilla up over the top of the ends of the line of filling. See photos. Fold the other edge all the way over the filling using your thumbs. Make one more fold with each end piece so it looks tapered, kind of like the top triangle of an envelope before you close it (but not so pointy). Then finish rolling the burrito until it's closed. It's really helpful to look at the photos if you've never done this.
Step 24
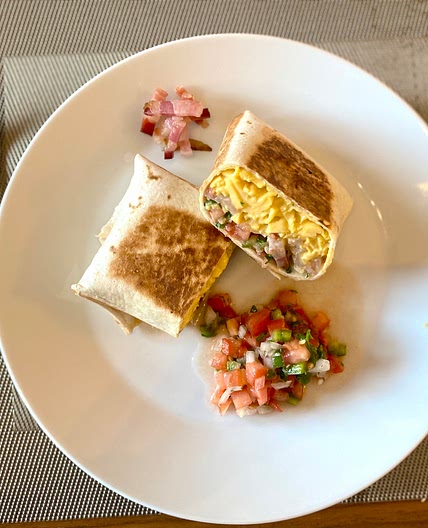
Garnish your burritos: I'm just going to say this, it is an absolute CRIME to eat these burritos without proper garnishes. Chipotle Mayo is my favorite, in addition to a healthy serving of Restaurant Style Salsa. Sliced avocado and/or guacamole is also a great choice.
Step 25
Garlic Aioli would also be good, although I would add in some chili powder, or some chopped jalapenos for good measure. Pico de Gallo with sour cream is another great fresh option.
Step 26
Wrap your burritos: If you are not serving these right away, wrap your burritos in foil. Get a 12 inch square of aluminum foil. Place your tightly wrapped burrito baby near the bottom, parallel with the edge. Fold the edges of the foil up over the ends of the burrito, all the way to the top. Mold it to the burrito so the ends are covered, then roll up the burrito until it's sealed. See photos. Label with a sharpie if you have burritos with different fillings.
Step 27
Refrigerate your burritos: If you plan to eat these within 12 hours, wrap them individually and store in the fridge in ziplocks. Reheat in the microwave for 1-2 minutes on high (no foil!), or in the oven at 350 degrees F for about 8-10 minutes.
Step 28
Freeze your burritos: If you don't plan to eat these within 12 hours, freeze your burritos. Place the foil-wrapped burritos in a gallon ziplock. Seal and freeze for up to 3 months.
Step 29
Reheating from frozen:
Step 30
Microwave: Unwrap the frozen burrito and remove all traces of foil. Wrap in a paper towel and put it on a plate. Defrost the burrito in the microwave for 3-5 minutes. If you don't have a defrost button, cook it on power level 5 for about 3-5 minutes. About halfway through, you might want to slice it in half and wrap each half in a paper towel, and keep microwaving, so that the heat can penetrate to the center.
Step 31
Stick around and keep checking it every minute or so, every microwave is different and you won't want to overcook it or the tortilla will get all hard and cardboardy.
Step 32
Oven: Preheat the oven to 350 degrees F. Place the foiled wrapped (completely frozen) burritos on a baking sheet. Bake at 350 for about 45-55 minutes, until warmed throughout. This is a great option when you want to serve several people all at once.
Notes
1 liked
0 disliked
There are no notes yet. Be the first to share your experience!
